Monday, 3 September 2018

Get Started With Image Recognition Using TensorFlow and Raspberry Pi
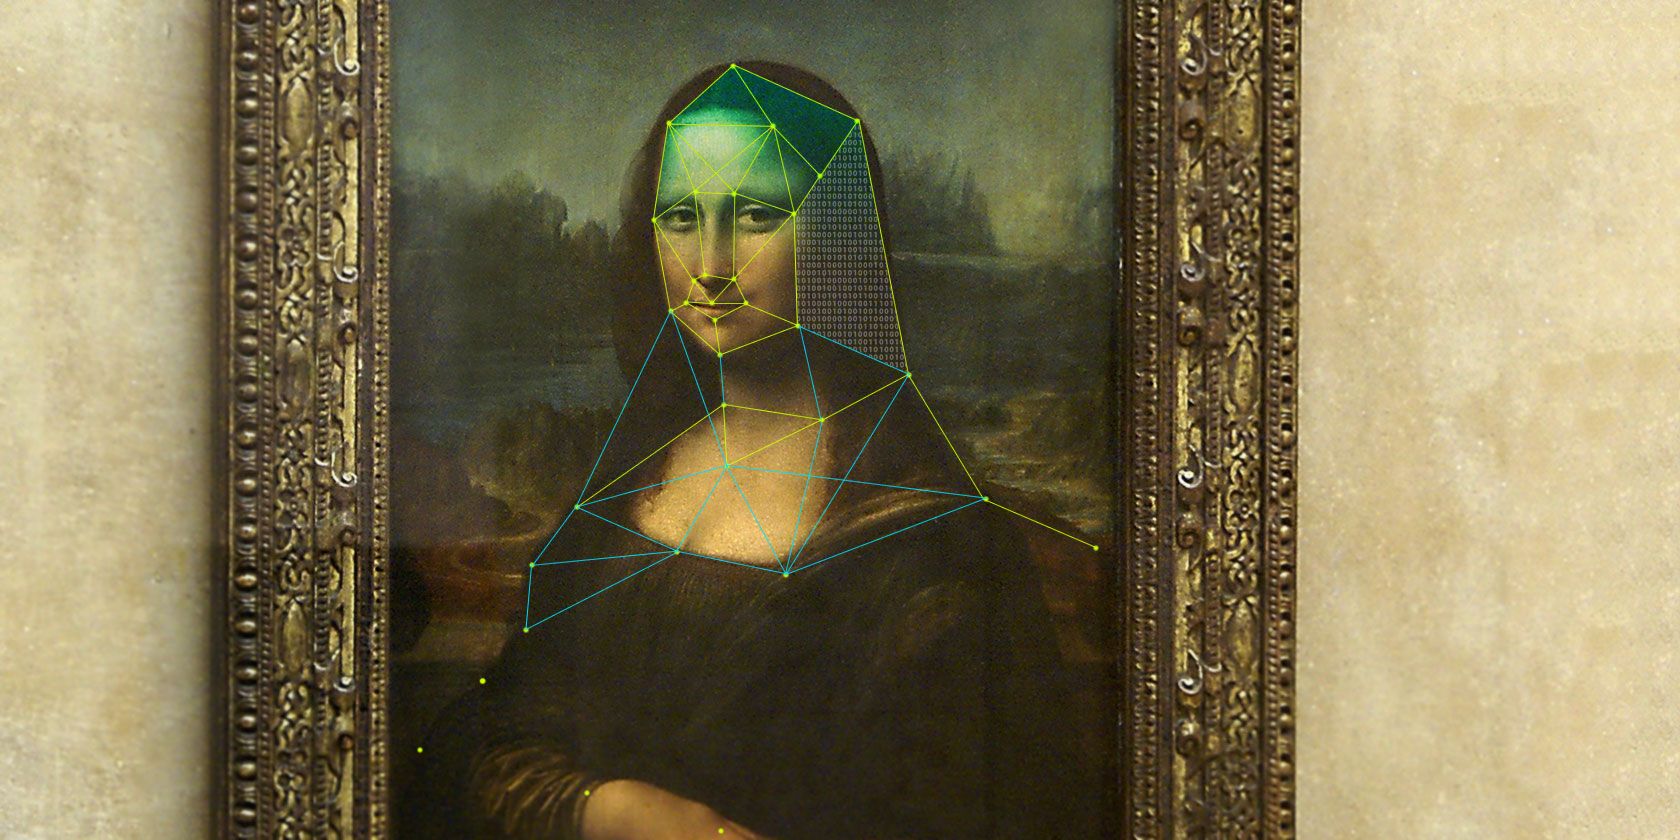
TensorFlow is Google’s Neural Network library. Given that machine learning is the hottest thing around currently, it is no surprise that Google are among the leaders in this new technology.
In this article, you will learn how to install TensorFlow on the Raspberry Pi, and run simple image classification on a pre-trained neural network.
Getting Started
To get started with image recognition, you will need a Raspberry Pi (any model will work) and an SD card with the Raspbian Stretch (9.0+) operating system (if you’re new to the Raspberry Pi, use our installation guide). Boot up the Pi and open a terminal window. Make sure your Pi is up to date, and check your Python version.
sudo apt-get update
python --version
python3 --version
You can use both Python 2.7 or Python 3.4+ for this tutorial. This example is for Python 3. For Python 2.7, replace Python3 with Python, and pip3 with pip throughout this tutorial.
Pip is a package manager for Python, usually installed as standard on Linux distributions. If you find you don’t have it, follow the install for Linux instructions in this article to install it.
Installing TensorFlow
Installing TensorFlow used to be quite a frustrating process, but a recent update makes it incredibly simple. While you can follow this tutorial without any prior knowledge, it might be worth understanding the basics of machine learning before trying it out.
Before installing TensorFlow, install the Atlas library.
sudo apt install libatlas-base-dev
Once that is finished install TensorFlow via pip3
pip3 install --user tensorflow
This will install TensorFlow for the logged in user. If you prefer to use a virtual environment, modify your code here to reflect this.
Testing TensorFlow
Once it has installed, you can test whether it is working with the TensorFlow equivalent of a Hello, world!
From the command line create a new Python script using nano or vim (If you aren’t sure which one to use, they both have advantages) and name it something easy to remember.
sudo nano tftest.py
Enter this code, provided by Google for testing TensorFlow:
import tensorflow as tf
hello = tf.constant('Hello, TensorFlow!')
sess = tf.Session()
print(sess.run(hello))
If you are using nano, exit by pressing Ctrl + X and save your file by typing Y when prompted.
Run the code from the terminal:
python3 tftest.py
You should see “Hello, TensorFlow” printed. If you are running Python 3.5, you will get several runtime warnings. The official TensorFlow tutorials acknowledge that this happens, and to ignore it.
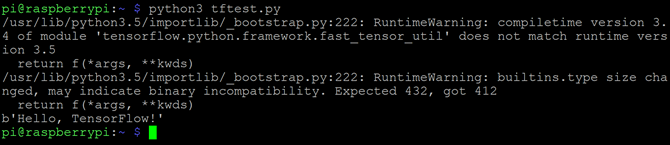
It works! Now to do something interesting with TensorFlow.
Installing the Image Classifier
In the terminal, create a directory for the project in your home directory and navigate into it.
mkdir tf1
cd tf1
TensorFlow has a git repository with example models to try out. Clone the repository into the new directory:
git clone https://github.com/tensorflow/models.git
You want to use the image classification example, which can be found at models/tutorials/image/imagenet. Navigate to that folder now:
cd models/tutorials/image/imagenet
The standard image classifying script runs with a provided image of a panda:

To run the standard image classifier with the panda image provided enter:
python3 classify_image.py
This feeds an image of a panda to the neural network, which returns guesses as to what the image is with a value for its level of certainty.

As the output image shows, the neural net guessed correctly, with an almost 90 percent certainty. It also thought the image might contain an custard apple, but it was not very confident with that answer.
Using a Custom Image
The panda image proves that TensorFlow works, but that is perhaps unsurprising given it is the example the project provides. For a better test, you can give your own image to the neural net for classification. In this instance, you’ll be seeing if the TensorFlow neural net can identify George.

Meet George. George is a dinosaur. To feed this image (available in cropped form here) into the neural net, add arguments when running the script.

python3 classify_image.py --image_file=/home/pi/george.jpg
The image_file= following the script name allows the addition of any image by path. Lets see how this neural net did.

Not bad! While George is not a triceratops, the neural net classified the image as a dinosaur with a high degree of certainty when compared to the other options.
TensorFlow and Raspberry Pi, Ready to Go
This basic implementation of TensorFlow already has potential. This object recognition is happening on the Pi, and needs no internet connection to function. This means that with the addition of a Raspberry Pi camera module and a Raspberry Pi-suitable battery unit, the whole project could go portable.
Most tutorials only scratch the surface of a subject, but it has never been truer than in this case. Machine learning is an incredibly dense subject. One way to take your knowledge further would be by taking a dedicated course. In the meantime, get hands on with machine learning and the Raspberry Pi with these TensorFlow projects you can try yourself.
Read the full article: Get Started With Image Recognition Using TensorFlow and Raspberry Pi
from MakeUseOf https://ift.tt/2NJ9MnW
via IFTTT
Network Drives at IFA 2018: What’s New and What’s Hot?
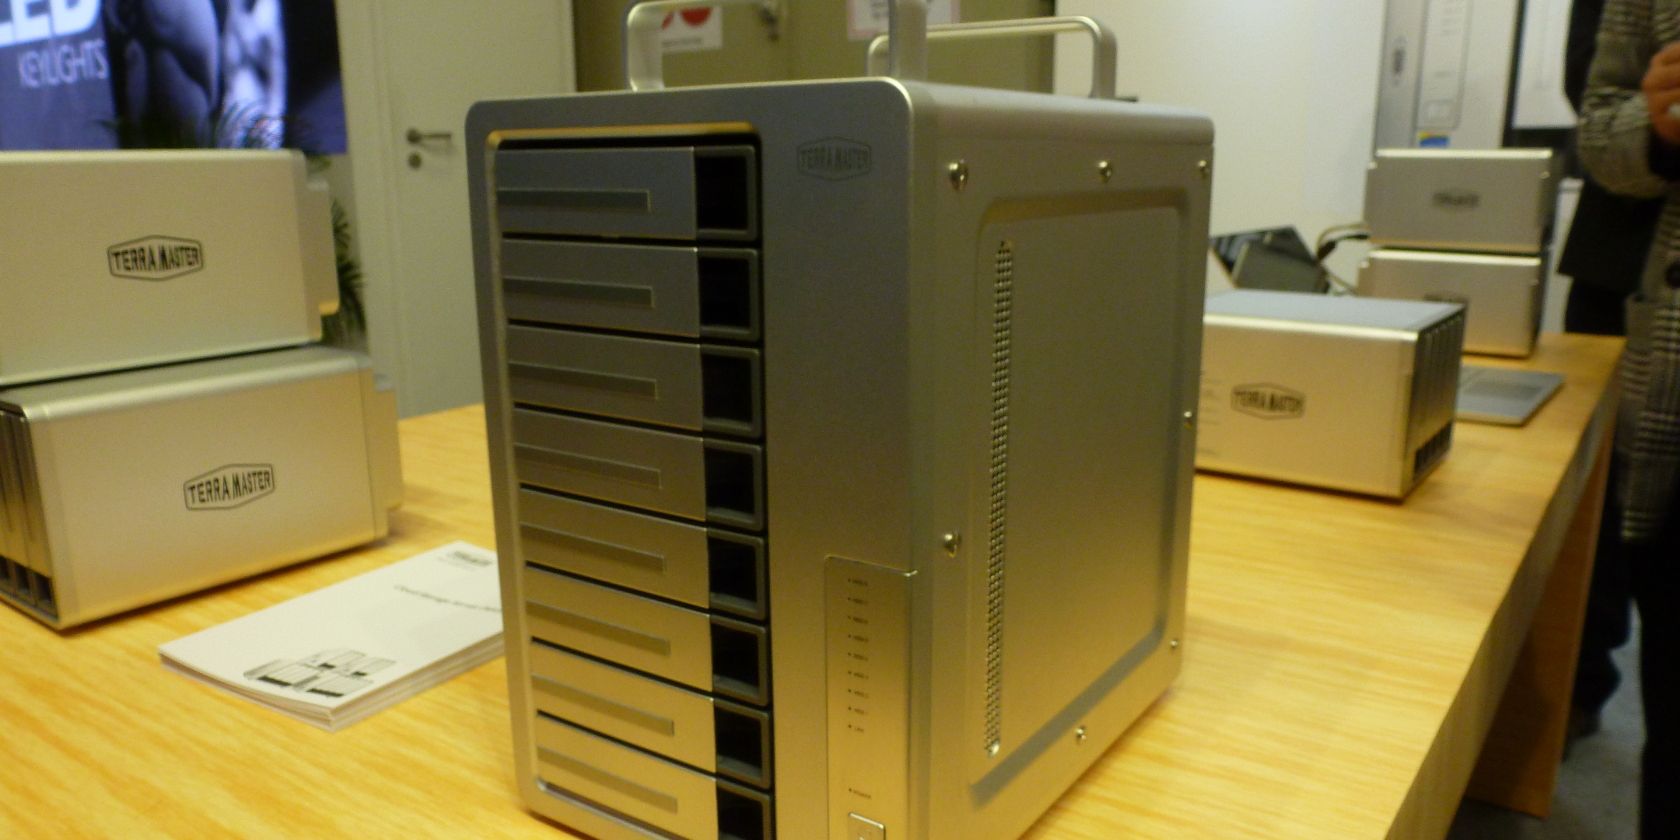
The were several new NAS systems on show at IFA 2018, along with updated versions of previous systems. Here is a rundown of what we saw.
Note: This article may be updated at a later date.
QNAP
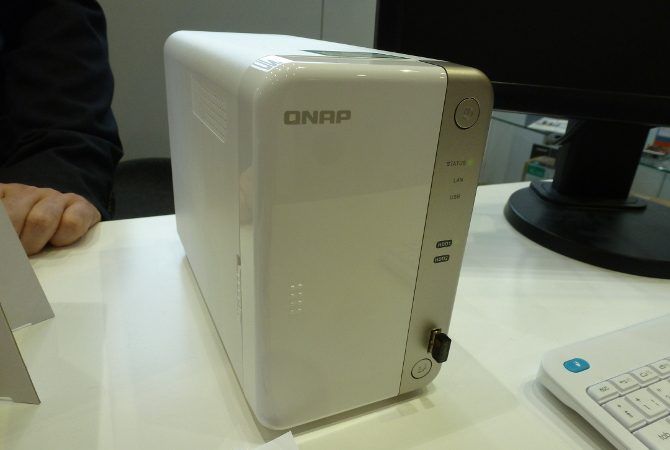
TS-251B NAS
Price: Around $350
QNAP showcased it’s 2018 version of the TS-251B NAS system. Aimed at the home/home office market, the small NAS box has a few interesting features. Equipped with an Intel Celeron J3335 dual-core 2.0 GHz processor and a choice of 2GB or 4GB of RAM, its PCIe expansion slot adds a variety of extra functions.
Onboard LAN is 1 Gigabit with dual RJ34 ports, but this can extend to 10 Gigabits via the QM2 PCIe expansion card. This card serves a dual purpose, as it can also house extra storage. Alongside the two drive bays, further storage is available through an M.2 SSD PCIe expansion card. Some flexibility is available here as the card can contain up to 4 M.2 SSDs, or 2 SSDs with a 10 Gigabit LAN port. A Wi-Fi card is also available, though M.2 SSDs cannot be fitted in conjunction with it.
The modular feature set and small form factor of this NAS make it a good contender for a home NAS unit. It comes with an HDMI port, and while transcoding is not possible, it would make an excellent media center alongside all of the features expected of home and small office NAS systems.
Terra Master
F8-421
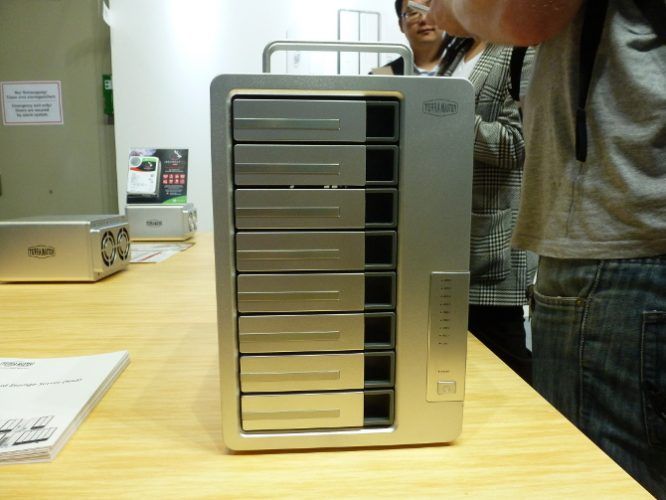
Price: Not Given
Terra Master showcased an eight-bay NAS system aimed at home and professional users alike. Featuring a Quad Core 1.5 GHz processor and 8GB of DDR4 RAM, it is capable of sustaining up to 96TB of storage (8 x 12 TB).
Alongside upgrading the number of drive bays, a software update was promised this month adding further functionality to the NAS with Docker along with other updates. Due to a new collaboration with Seagate, expect to see the Ironwolf drives sold in conjunction with Terra Master NAS systems in the future.
WD
My Passport Wireless SSD
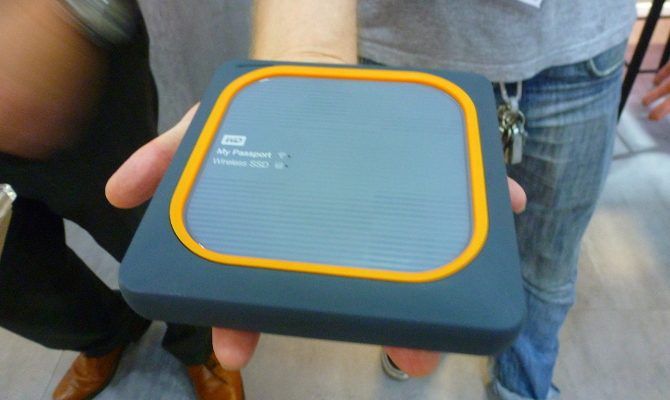
Price: 250GB ($191.99), 500GB ($289.99), 1TB ($499.99), 2TB ($774.99)
WD’s new Passport Wireless SSD (available on Amazon) came about through collaboration with professional photographers. As a standalone portable NAS, the previous version had a standard HDD and was prone to failure in harsh environments. The SSD version is less susceptible to this problem, and a silicon protective casing is designed to protect the unit in the event of it being dropped.
Available in various disk sizes, it is a fully functional Linux-based NAS system with a 6400 mAh battery. Devices connect to the box wirelessly, with up to 8 simultaneous connections possible. A connection is also available via SD card slot (configurable for automatic transfer) and USB 3.0 slot.
The My Passport app also can integrate with the Adobe Cloud allowing for the direct transfer of media into a working environment quickly. Plex and Twonky can be used with it, though the small form factor and battery requirements mean no transcoding. A use case presented to us by a WD representative was for car journeys with children—setting it up as a portable streaming hotspot for cartoons. While possible, this device seems to shine for media use, with up to 10 hours of battery life claimed when used in conjunction with one device.
Designed as the child unit to WD’s larger home NAS solutions, it works intuitively with them, though it should work perfectly as a standalone mobile storage solution with 250GB/500GB, and 1/2TB versions available.
NAS at IFA 2018
While there was little wholly new or groundbreaking in NAS at IFA 2018, some great systems were on show for users ranging from home and small office systems, to large-scale business uses.
Read the full article: Network Drives at IFA 2018: What’s New and What’s Hot?
from MakeUseOf https://ift.tt/2oyD51v
via IFTTT
Cameras at IFA 2018: What’s New and What’s Hot?
If you’re not into Instant Cameras, the big announcement at IFA may be a series of rumored full-frame mirrorless cameras from Canon and Panasonic. For those interested in actual announcements, the bombshell revelation was the Mint line of instant camera products.
Polaroid
Mint 2-in-1 Instant Camera
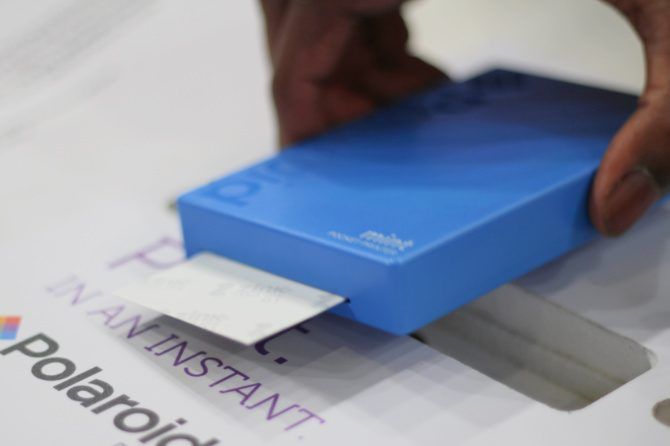
The new Polaroid Mint 2-in-1 Photo Printer takes Instant Camera portability to the next level. More so than other Instant Cameras, the Mint focuses on lighter weight, longer battery life, increased expandable storage size, and more. In fact, it can shoot 5o to 60 photos on a single battery charge and sport up to 256GB of expandable storage.
The biggest advantage, though, that the Mint 2-in-1 has over its competitors is its best-in-class portability. Not only is the Mint 2-in-1 sleek, it can also comfortably fit inside of a coat or pants pocket.
So how did Polaroid improve over last year’s products? The Polaroid Mint 2-in-1 combines wireless Bluetooth smartphone pairing, so if you want to print photos direct from an infinitely superior smartphone camera, you can.
However, the demonstration model did not, in any sense of the word, print instantly. Printing over Bluetooth causes a small amount of input lag, delaying photos by around 20 or 30 seconds. Not bad by any means, but perhaps not as instant as the product’s name would suggest.
The Mint 2-in-1 should cost $129 making it one of the most expensive Instant Cameras on today’s market.
Mint Printer
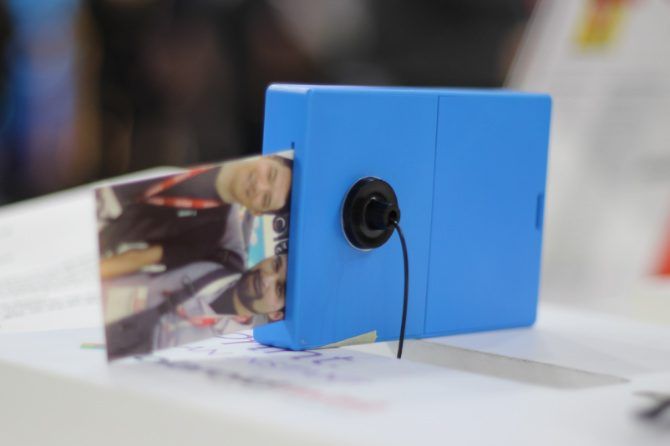
While the Mint 2-in-1 can shoot images and spit out physical photographs, the Polaroid Mint Printer more or less turns your infinitely better smartphone into an Instant Camera.
A point of confusion that readers might have is that the two devices (printer and 2-in-1) look almost identical, except that one includes a camera lens and costs more—$129 for the 2-in-1 and $99 for the photo printer.
Of the two devices, I’d say that the printer offers more value. Why would anyone want to take photos with a weaker quality camera sensor than what’s in their smartphone?
Panasonic
LX100 II
Panasonic may have officially announced the LX100 II at IFA, but there’s a rumor of another upcoming model scheduled for debut on September 25.
The LX100 II is more or less an incremental update on the fairly successful LX100. Like the LX100, it uses the Lumix’s Micro Four-Thirds sensor, which is—as the name suggests—a 4:3 aspect ratio sensor which is almost full-frame (but not). It improves on the previous camera sensor in terms of megapixels, going from 13MP to 17MP. A minor upgrade at best.
The real news will most likely come on September 25, just a few weeks after Canon’s highly anticipated full-frame mirrorless DSLR announcement. If true, Panasonic may attempt to counter Canon’s announcement with its own full-frame mirrorless Lumix model. However, keep in mind that these are all show-floor rumors and may be the product of overly vivid imaginations.
Kodak
PrintoMatic Instant Camera
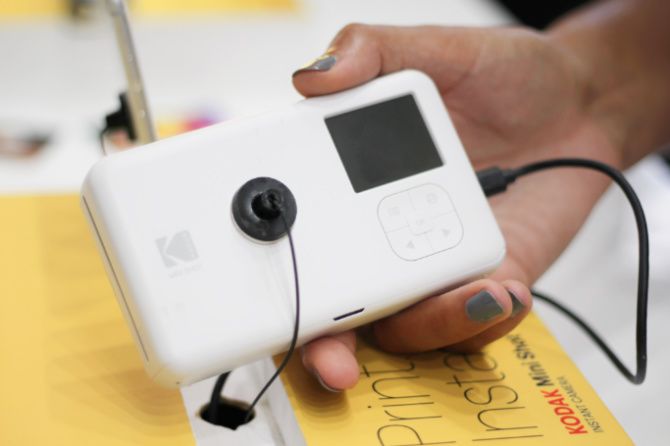
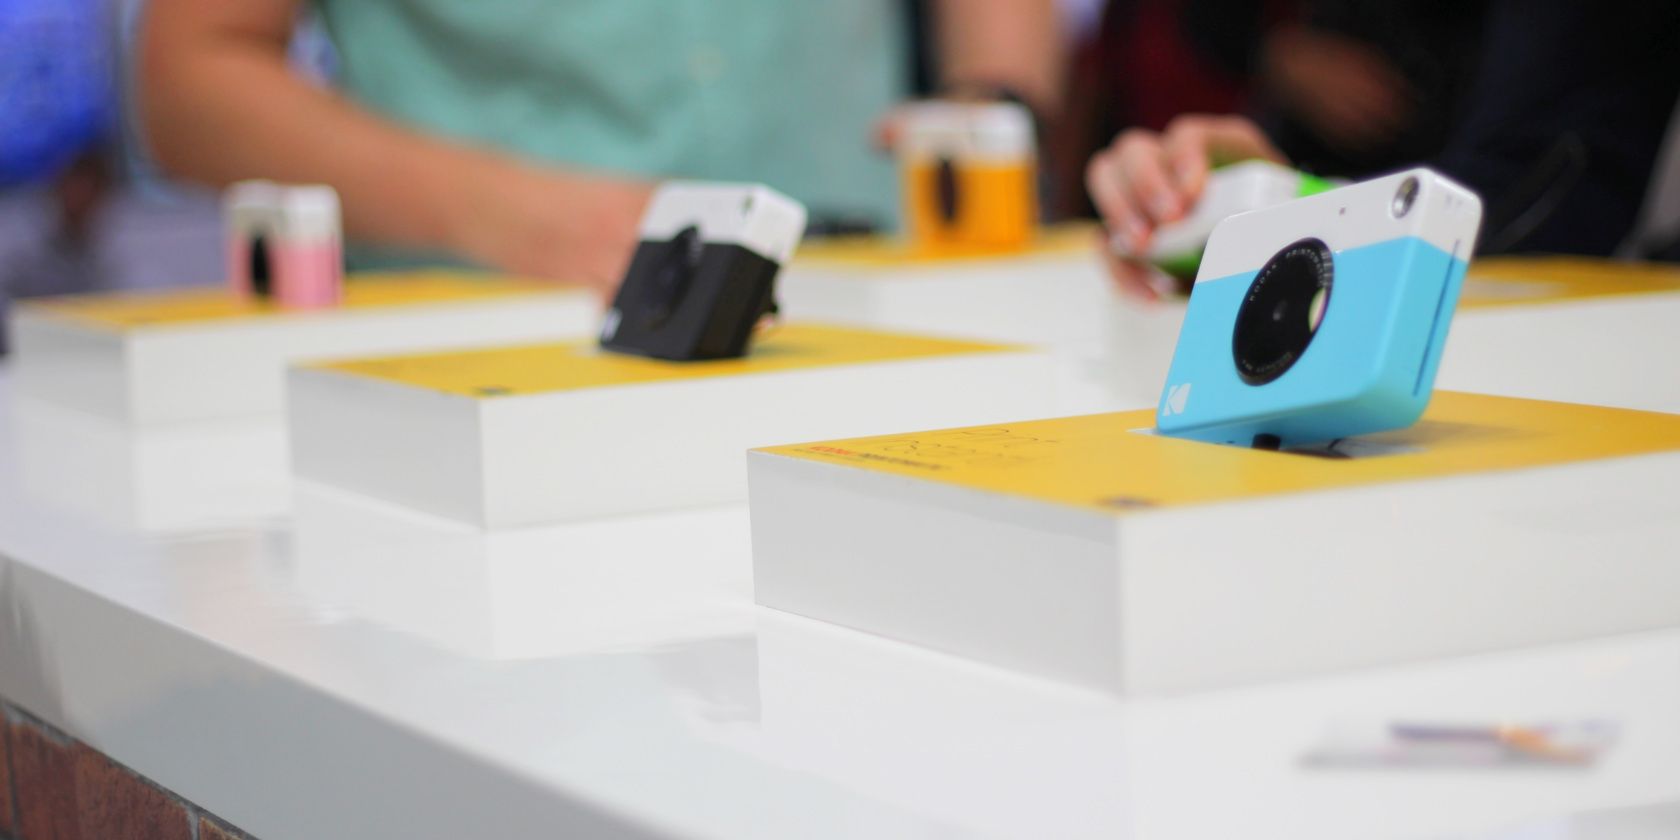
The newest model of PrintoMatic camera doesn’t add much in terms of features, but it managed to stand out with its lower cost and good print quality. At its listed price of $69.99, the PrintoMatic offers similar features as the more expensive Polaroid Mint.
2018’s PrintoMatic adds a simple but appealing feature: a wider array of color options. Among these are the colors:
- Millennial Pink
- White
- Yellow
- Black
- Blue
I don’t know why Kodak rebadged pink as “Millennial Pink” while leaving their other colors with names as unoriginal as “Yellow” and “Blue,” but if you are a fan of the original PrintoMatic, the different colored models may impress you.
Insta360
Pro 2 360 Camera
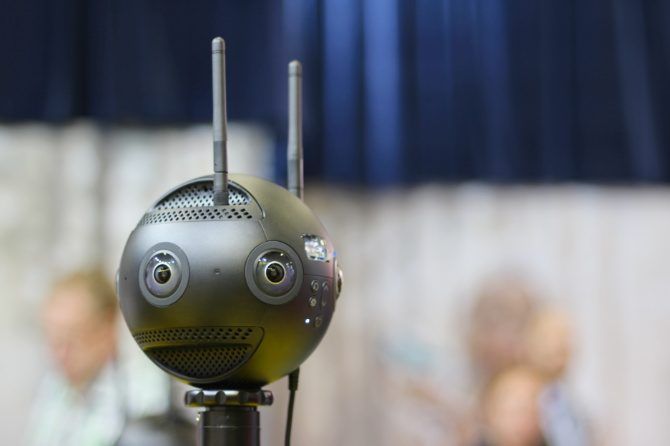
The Insta360 360 camera is a professional-grade 360-degree camera capable of shooting 3D video in a complete circle.
A big issue with 360-degree 3D cameras is that they oftentimes unintentionally include the cameraman in the shot (because it shoots everything). The Insta360 is capable of removing the cameraman at up to 300-meters distance.
That’s extremely useful to professional filmmakers who don’t want to pay for digital cameraman removal in post-production.
What’s the Best Camera Announced at IFA 2018?
It’s a tossup between the PrintoMatic’s Millennial Pink color scheme or the Polaroid Mint Printer. If you forced me to choose between the two, I’ll come clean: the new camera revelations were overshadowed by the rumored announcement of full-frame mirrorless cameras from Canon and Panasonic. Look forward to them at Photokina 2018.
Read the full article: Cameras at IFA 2018: What’s New and What’s Hot?
from MakeUseOf https://ift.tt/2Pxiar6
via IFTTT