Friday 31 August 2018

3 Free VPNs for Kodi (But the Best VPN for Kodi Is Paid)

kodi-tv-vpn

If you’re using Kodi, you’ve probably decided that a VPN is a wise idea, especially if you’re going to use some sketchy add-ons. But you aren’t ready to spend money on a proper VPN, what are your options?

Well, you can start off with this list of free VPNs that you can use with your Kodi box.

Do You Need a VPN for Kodi?

Using a VPN (see our guide to VPN terminology) for Kodi is about more than avoiding detection when using illegal add-ons.

Kodi is remotely hackable, and add-ons can be riddled with security flaws. Whether you’re accessing illegal content, adding legal streams, or simply using the approved add-ons, you might be making your Kodi less secure and more susceptible to man-in-the-middle and keylogger attacks.

Even rogue subtitle files can hack your device!

Kodi isn’t anonymous, which means that anyone observing your activity online (whether a hacker or a government agency) can see exactly what you’re streaming. Using a VPN with Kodi, you can anonymize your online activity, encrypting all data leaving Kodi.

It doesn’t matter if you’re using a PC, smartphone, or Raspberry Pi; a VPN can be installed. A VPN will also protect other hardware on your network in the event of a Kodi add-on attempting malicious activity. Our list of reasons for using a VPN with Kodi expands on this topic.

The Best Free VPNs for Kodi

Various free VPNs are available, but which ones are suitable for use with Kodi?

Before we proceed, it’s worth highlighting here that free VPNs typically offer a restricted experience. Bandwidth is often limited, meaning that your activity via the VPN is capped. Paid VPNs don’t have such a limit.

As such, the list of options for free VPNs that you might use with Kodi is limited.

  1. ProtonVPN: A good option, but P2P (peer-to-peer) is not supported. So while streams from YouTube and other direct streaming services will work, add-ons relying on P2P data will not work.
  2. TunnelBear: Sadly, this has a 500MB daily cap for free use, making it pointless for video streaming. However, if you’re streaming audio or downloading podcasts with Kodi, this could be an option.
  3. VPNBook: No registration, and therefore the most private VPN out there. VPNBook doesn’t offer an app. As such, you will need to install an OpenVPN client on your Kodi device and manually configure the settings. This may not be suitable for many users.

Ultimately, you’re not going to get an enjoyable experience using a free VPN with Kodi. If you choose to use a free VPN, you will see more ads; any personal data you submit will be sold, too. See our list of the best unlimited free VPNs for more.

However, there is a better option.

If you aren’t able to pay for a VPN but want limitless VPN access, why not consider a trial subscription? As long as you cancel the subscription before the billing cycle begins, you should be able to use your chosen VPN for free. Many services offer a free trial (ranging from three to 30 days), so this option is worthy of consideration.

What Is the Best Paid VPN for Kodi?

Express VPN desktop client

Put off by the idea of using a free VPN with your Kodi box? It’s understandable; the best answer is to find an affordable, fast, and competent VPN solution that can handle gigabytes of streaming media.

While we’ve put many VPNs to the test over the years, the one that offers best reliability for Kodi is ExpressVPN (save up to 49% off using this link).

With desktop clients for Windows and macOS, OpenVPN support for Linux, and apps for Android, iOS, Apple TV, and Amazon Fire (tablet and TV), Xbox, PlayStation, and the Chrome, Mozilla, and Safari browsers, ExpressVPN is available everywhere. You can choose from over 2,000 VPN servers in 94 countries, and it’s easy to set up and use.

ExpressVPN is based in the British Virgin Islands, with no data retention laws, with no restrictions on what you can stream, and no one forcing them to store your activity. You can be confident of a secure, private Kodi streaming experience.

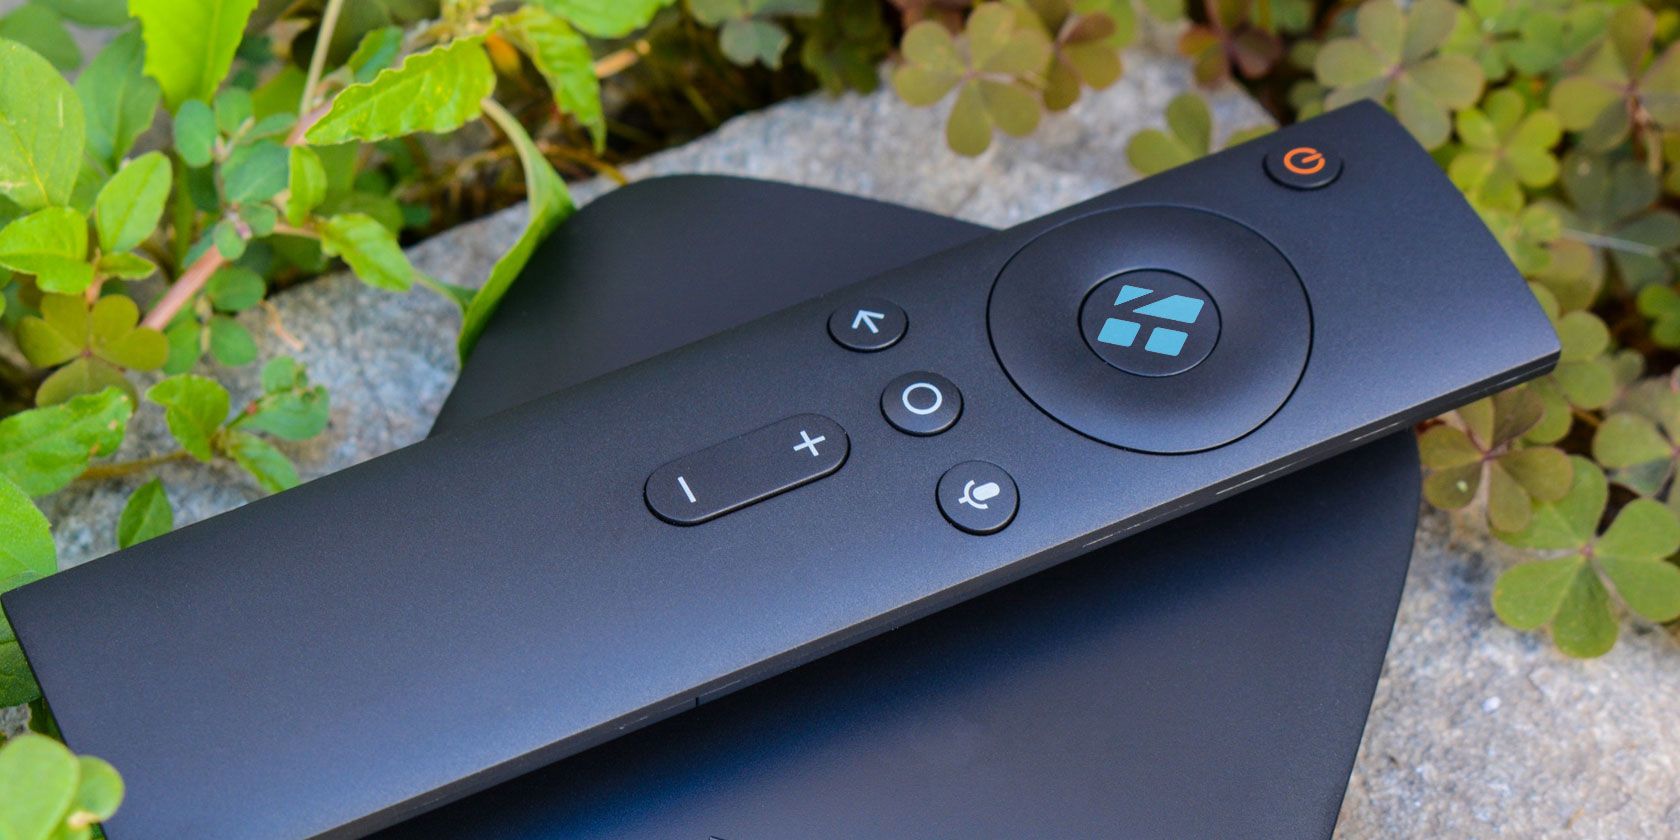
Which VPN Should You Use With a Kodi Fire Stick?

Have you installed Kodi on your Amazon Fire Stick? If so, you’ll probably want to install a VPN there too.

Thanks to the Amazon Fire Stick’s Fire OS being based on Android, this is relatively straightforward. All you should need to do is install your VPN app from the Amazon App Store.

IPVanish offers an app for Amazon Fire Stick

But which one is best?

ExpressVPN, PureVPN, NordVPN and many other recognizable names are available. If you’re looking for the best option for this device, however, we suggest you take a look at IPVanish.

Note that if you’re using a VPN on your Amazon Fire Stick or TV box, you’ll need to ensure that it is running before you open Kodi. While it is possible to access the Android apps from within Kodi, this can cause a lag and cause the VPN (or Kodi) to crash.

How to Install a VPN on Kodi

Installing a VPN on Kodi differs from machine to machine. Perhaps your Kodi system is running on Windows; perhaps Linux. Alternatively, you could be using an Android TV, a games console, or a Raspberry Pi.

Each of these has a slightly different requirement for running a VPN with Kodi.

For example, Linux computers will benefit from OpenVPN, which is supported by many VPN providers. A PC or Android device, meanwhile, should be able to run a dedicated mobile app from the VPN provider.

Because the requirements are different depending on the hardware, it is a good idea to check if your device is supported by the VPN provider before proceeding. You should also consult our guide to setting up a VPN on Kodi. Not all Kodi devices work well with a VPN. If you find that things aren’t working well, try a VPN router instead.

Read the full article: 3 Free VPNs for Kodi (But the Best VPN for Kodi Is Paid)


from MakeUseOf https://ift.tt/2C5eefj
via IFTTT

The Best WordPress Hosting Providers

wordpress-hosting

WordPress is the world’s most popular web-based content management system (CMS). It powers more than 30 percent of the internet’s top 10 million sites.

The WordPress software (which you shouldn’t confuse with WordPress.com hosting) is open source, incredibly easy to set up, and entirely free to use. All you need is a domain name and a web hosting plan.

Here are seven of the best WordPress hosting providers.

1. Bluehost

bluehost monthly costs

Bluehost is arguably the most recognizable name in the world of WordPress web hosting; the company has been around since 1996. Indeed, WordPress actively recommends Bluehost on its site and has done since 2005.

If you’re creating a website for the first time, you probably won’t have much traffic to start with. In that case, the company’s shared hosting plan will suffice. It offers 50GB of space, unmetered bandwidth, and five email accounts. Bluehost has an average uptime of >99.99 percent and average load times of 419ms.

The plan costs $7.99 per month. However, significant discounts are available for new customers, making it one of the cheapest WordPress hosting plans. (Get up to 63% off using this link!)

If you need something with a bit more power, check out the VPS (virtual private server) plans. For $19.99 per month, you get 2GB of RAM, 30GB of SSD storage, two cores, and free SSL.

2. InMotion Hosting

inmotion monthly costs

Unusually, InMotion Hosting offers six dedicated WordPress hosting plans. Most companies only offer a couple.

The cheapest plan is WP-1000S. It will set you back $8.99 per month and is suitable for up to 20,000 monthly visitors. It includes unlimited bandwidth, unlimited email accounts, and 40GB of SSD storage space.

At the other end of the scale is the WP-6000S plan. It costs $119.99 per month and is suitable for up to 1.2 million monthly page views.

The three most expensive plans all include a dedicated IP address and a free subscription to Jetpack Professional. (Get up to 50% off using this link!)

Regardless of which plan you choose, WordPress comes preinstalled; you won’t need to fiddle with third-party installers. You can also decide whether you want to optimize your site for traffic from either the eastern or western hemisphere.

InMotion’s uptime runs at 99.97 percent. Its average load time is 752ms.

3. WordPlus

wordplus homepage

None of the big companies offer free WordPress hosting, but that doesn’t mean there aren’t free web hosting services out there.

Of course, you could just head to WordPress.com. Its servers are powerful enough to handle any traffic you throw at it. But there are some trade-offs—for example, you can only install your own plugins and run Jetpack if you pay a monthly fee. The free version is limited to 3GB of space, and you cannot display your own ads.

Instead, check out WordPlus. The free flavor gives you 128MB of SSD space, unlimited bandwidth, free SSL, free CDN, and access to cPanel. You can also use all WordPress’ best plugins.

If that doesn’t cover your needs, other popular free WordPress hosting providers include 000webhost, HostAwesome, and Byet. The four providers all have very different features and capabilities, so make sure you do your research before choosing.

4. SiteGround

siteground monthly costs

In addition to the entry-level shared web hosting plans, lots of companies also offer managed WordPress hosting.

Typically, managed WordPress hosting is more expensive than its shared hosting counterpart, even though the list of features is often very similar.

The difference comes in the level of support you receive. If you’re not technically inclined and would rather focus on producing content rather than managing the backend of a website, a managed WordPress hosting plan could be for you.

The hosting provider will manage all the behind-the-scenes stuff, including security, speed optimization, updates, and backups. The security support is perhaps the most important, it’s easy to overlook when you start a new website.

On the downside, you can only run WordPress. If you decide to convert to a different CMS in the future, you’ll need to migrate your entire site to a new plan. You might also find that your host will block some plugins that reduce performance.

If you’d like a managed WordPress hosting plan, check out SiteGround. With 99.98 percent uptime and a load time of 722ms, it’s one of the best performing hosts on this list.

It’s cheapest managed hosting plan—called StartUp—costs $11.95 per month. It’s suitable for 10,000 monthly visits and offers 10GB of space.

5. A2 Hosting

a2 hosting monthly costs

A2 Hosting is a company I can personally vouch for. I use it to host four websites and have never had any issues.

When I first migrated to A2 Hosting from my previous provider, the company was quick to resolve technical issues that arose from the transfer, even though it later transpired that the problems were caused by the old host and were not of A2’s making.

Since then, every time I have opened a support ticket, A2 has responded quickly and accurately. I’ve lost track of the number of times the reps on the company’s 24/7 live chat have solved my issues in the middle of the night.

Regarding plans, A2 offers shared hosting, VPS hosting, and dedicated hosting. The entry-level shared hosting plan includes 25 email addresses, a 2.1 GHz core, five databases, and a server with a guaranteed 64GB of RAM. Regardless of which plan you pick, you can easily install WordPress using Softaculous.

Interestingly, A2 Hosting has compiled two of its own WordPress plugins that are worth using. A2 Fixed W3 Total Cache is a tweaked version of the popular W3 Total Cache plugin, while A2 Optimized WP offers performance improvements such as minifying files and pages, GZIP compression, image compression, and security improvements.

Finally, with an uptime of 99.90 percent and an average load time of 413ms, A2 Hosting is unquestionably one of the best WordPress hosting providers out there.

6. GoDaddy

godaddy monthly costs

Another managed WordPress hosting provider worth considering is GoDaddy.

The company is more commonly associated with domain names rather than hosting plans, but its managed plan can comfortably compete with other companies’ offerings on both price and features.

The cheapest GoDaddy WordPress hosting plan costs $8.99 per month. It is suitable for up to 25,000 visitors per month. It offers 10GB of storage and 99.99 percent uptime.

Because the plan is managed, you can expect nightly backups, automatic malware scanning and removal, a staging environment to test changes, and automatic DDoS protection.

7. HostGator

hostgator monthly costs

Our final recommendation is HostGator. Like Bluehost, it’s a well-established name in the industry and supports more than 10 million sites.

The entry-level cloud plan $9.95 per month. You will get two CPU cores, 2GB of RAM, free SSL, and unlimited bandwidth and storage. It can handle 100,000 visits per month.

If you need more power, check out the Business plan instead. For $22.95 per month, you will get 6GB of RAM, six CPU cores, and a dedicated IP address. You can also have an unlimited number of parked domains. It’s suitable for 500,000 visits per month.

Lastly, HostGator has some of the most impressive performance stats in this list. It boasts an uptime of 99.96 percent and a load time of 462ms.

Making the Right WordPress Hosting Choice

The world of WordPress hosting is a competitive place. There is not a great deal of difference between any of the mainstream providers; they all offer similar features for a similar price.

The biggest decision you need to make is whether to buy managed WordPress hosting or regular hosting. Your level of technical expertise and willingness to learn should guide your thought process.

For more information about web hosting, check out our articles on the best web hosting services and the reasons free web hosting is bad for your first website.

Read the full article: The Best WordPress Hosting Providers


from MakeUseOf https://ift.tt/2PokjVR
via IFTTT

Home Computing at IFA 2018: What’s New and What’s Hot?

One of the biggest announcements at IFA this year, Europe’s consumer electronics show currently taking place in Berlin, Germany until September 5, is Intel’s launch of their refreshed 8th generation processor series. Simultaneously, laptop manufacturers like Asus, Acer, Dell, and Lenovo are releasing new hardware equipped with the new processors.

Intel

8th Generation U-series and Y-series Processors

Intel released two new laptop CPUs, both of which are based on the previous generation Kaby Lake processors.

The Intel U-series “Whiskey Lake” runs at an ultra-low power 15 Watt. Meanwhile, the Y-series “Amber Lake” gets by with an extremely low power 5 Watt, which should significantly increase the battery life of devices equipped with this processor.  In contrast to their predecessor, they come with overhauled chipsets, that natively support USB 3.1, among other features mainly relevant to hardware manufacturers.

Moreover, both processors contain firmware- and OS-based updates that mitigate the Spectre and Meltdown vulnerabilities. Unfortunately, hardware-based fixes are not yet available.

So let’s have a look at the new laptops equipped with these processors.

ASUS

ZenBook Flip 13 and 15

The hallmark of this series is its 360° ErgoLift hinge. Not only can smoothly fold the display all the way to its back, but when folded back more than 135°, it also slightly props up the keyword to create a more comfortable angle for typing. In addition, this series has the frameless NanoEdge design, characterized by a 90% screen-to-body ratio. Both models offer smart control with face login and active stylus support.

The ZenBook Flip 13 is available with the 8th generation Intel Core i7 or i5 U-series (Whiskey Lake) processor. This model features an integrated Intel UHD graphics chip and the 13.3″ screen offers a 16:9 Full HD (1920 x 1080 pixels) touchscreen. It supports up to 16GB RAM and up to 512GB SSD storage. At 16.9mm thick, it clocks in at a weight of 1.3kg.

In addition to its 3D infrared front-facing camera, you can get an optional full HD world-facing camera, placed at the top left corner of the keyboard base. While operating the laptop in tent mode, this camera lets you capture the world from your perspective and tune into 3D virtual objects using mixed-reality applications. You can opt out of this camera in favor of better connectivity, specifically a USB 2.0 port.

The unique feature of the ZenBook Flip 13 is the number pad integrated into the touchpad. It turns on or off via the button in the top right of the touchpad.

The ZenBook Flip 15 offers enough keyboard real estate to feature a standard number pad section.

In terms of specs, this model sets itself apart from the ZenBook Flip 13 with improved graphics. It integrates an NVIDIA GeForce GTX graphics card with 2GB dedicated memory. In line with the improved graphics, you can also get it with a 4K Ultra HD (3840 x 2160 pixels) touchscreen, though you can also opt for a Full HD touchscreen.

The Flip 15 weighs 1.9kg, which is fairly light, considering its 15.6″ form factor.

ZenBook 13, 14, and 15

This series features many of the same characteristics as the Flip series, including a frameless NanoEdge display with an up to 95% screen-to-body ratio, a NumberPad in the 13″ and 14″ models, as well as Intel’s new 8th generation U-series (Whiskey Lake) i7 or i5 processor and up to 16GB memory.

The tight designs of the ZenBook 13 and 14, which ASUS praises as the smallest ever, contributes to the low weight of 1.09kg, for both models. The ZenBook 15 weighs only 1.59kg.

ZenBook Pro 15

The ZenBook Pro 15‘s unique feature is its ScreenPad, an interactive high-resolution LCD touchscreen that replaces the traditional touchpad. Using the ScreenPad, you can move the cursor, launch applications, and create a miniature dual monitor setup by pulling a window from your desktop to the ScreenPad.

Pair that with an 8th generation Intel Core i9 processor, an NVIDIA GeForce GTX graphics card with 4GB dedicated memory, an Ultra HD 15.6″ touchscreen, up to 16GB RAM, and up to 1TB SSD, all at 1.88kg, and you have a true power user machine. Though you can, of course, get less heavy specs.

Stay tuned for more laptops featuring Intel’s new 8th generation processors and other cool features as we continue to explore the exhibition.

Read the full article: Home Computing at IFA 2018: What’s New and What’s Hot?


from MakeUseOf https://ift.tt/2wxZO25
via IFTTT

Smartphones at IFA 2018: What’s New and What’s Hot?

Smartphones-Feature-IFA2018

The 2018 edition of the IFA consumer electronics trade show has a few new smartphone launches that you need to know about. LG has a cool new phone based on Android One, called the LG G7 One, and BlackBerry is finally deeming its gadgets worthy of mass consumption by releasing a phone that won’t make you break the piggy bank open.

BlackBerry Key 2 LE

Blackberry-KEY2LE-002-IFA2018

Oh BlackBerry. Yes, it’s still around. The once-dominant business phone’s new owner, TCL, is as obstinate as the shopkeeper in the Monty Python sketch. TCL believes BlackBerry isn’t dead, and so must we.

At IFA, BlackBerry debuted the new Key 2 LE. It seems like LE stands for Light Edition because it’s essentially the Key 2 with inferior hardware. The phone has a Snapdragon 636 processor, 4GB of RAM, and a 3,000 mAh battery, all of which are a step down from the Key 2. The dual camera is a combination of a 13-megapixel shooter and a 5-megapixel shooter, instead of the Key 2’s dual 12-megapixel shooters.

On the bright side, the price comes down as well to a much more affordable $399 for 32GB, or $449 for 64GB. That’s not cheap, but if you want a phone with a physical keyboard, then the BlackBerry Key 2 LE is the only real mid-range phone you should consider.

The rest of the things are what you know and love about BlackBerry. It’s the same keyboard as the Key 2, with its angled keys and the custom one-command shortcut key. You also get the famed BlackBerry security. Basically, if you’re a BlackBerry fan, you won’t miss any software.

LG G7 One

LG-G7-001-IFA2018

The LG G7 One is the latest in Google’s Android One program. What started as a simple initiative to give a stock version of Android on low-cost phones has now expanded to bring other features, notably augmented reality, to even mid-range and high-end phones. The G7 One is probably going to be mid-range, although LG hasn’t released the price details yet.

The lack of bloatware is welcome since LG has a habit of adding a ton of customizations that makes Android unrecognizable. It also inserts you deep into its ecosystem of products, so unless you’re buying every product from LG, these extra apps are bloatware.

In contrast, the G7 One feels slim and sleek both in software and in hardware. That said, the phone does make some compromises, especially in the camera department. In an age of dual cameras, it packs only a single 16-megapixel shooter. Still, the rest of the hardware is all right, with a quality Qualcomm Snapdragon 835 processor, a 6.1 inch screen (3120×1440 pixels), and a 3000 mAh battery.

But the point of the G7 One really is all about the software. This phone is a good example of how Google Lens works, where you can take a photo of anything you see to see an explanation. For instance, let’s say you’re walking down the road and see someone wearing a bag you really like. Double-tap the dedicated Google Lens button on the phone to fire up the app, and point it at the bag. In a few seconds, Google Lens will tell you everything you want to know about the bag, and give you options to buy it online. It works really well, and it’s almost magical to see it live.

LG did not give any details about the price of the device or its availability. If you want to venture a guess, know that it is slightly stripped down version of the LG G7 Thinq, and the Thinq costs $750.

Huawei Kirin 980 and Honor Play

Huawei-Kirin980-IFA2018

Huawei didn’t launch a new flagship phone at IFA. Instead, it launched a missile at mobile processor manufacturer Qualcomm, by unveiling the new HiSilicon Kirin 980 processor. This is the world’s first processor based on a 7nm chip. By comparison, the Qualcomm Snapdragon 845 is based on a 10nm chip.

The quad-core processor includes four Cortex A76 cores for high-performance tasks, and four Cortex A55 cores for low-power tasks. Graphics are handled by a Mali G76 GPU, which should let you play any game out there. The Kirin 980 is also optimized for the new trend of dual rear cameras, and claims to understand and assimilate data from two cameras up to 46% faster than its predecessors.

Huawei concluded its keynote address by adding that they will launch the Huawei Mate 20, the first phone based on the Kirin 980, in October.

Meanwhile, it announced a new phone called the Honor Play, a smartphone aimed at gamers. What makes it a “phone for gamers”, you ask? Honor Play has a “Turbo Mode” that overclocks the GPU by 60%, without consuming that much extra battery. It’s a bit gimmicky, honestly, and not something to get overly excited about. What is worth noting is the price, as Huawei says the Honor Play will cost 329 euros. That’s an impressive phone for the price.

More At IFA

IFA 2018 will go on till September 5, and MakeUseOf will be at the trade show to cover it. There are more keynote addresses and press conferences scheduled, as well as exhibitors from all around the world showing off their wares. Keep watching this space for updates from IFA 2018.

Read the full article: Smartphones at IFA 2018: What’s New and What’s Hot?


from MakeUseOf https://ift.tt/2PnWLAG
via IFTTT

How to Fix the Windows Stop Code Memory Management BSOD

fix-stop-code-memory-bsod

Windows 10 throws up a dazzling array of error messages and stop codes when things go wrong. When a blue screen of death (BSOD) error hits, you can use the Windows stop code to pinpoint and fix the issue.

At times, stop codes issue for very specific errors. At other times, you might have to work through a range of Windows 10 fixes. The Windows 10 “Memory Management” stop code involves the latter.

In this article, we help you resolve your memory management BSODs, one fix at a time.

What Is Windows Memory Management?

Memory management is vital to keep your operating system ticking over nicely. Memory management is the function that manages your system memory. (I hear you say, “Duh, Gavin, it’s in the title!”) Properly working memory management, however, is vital to your system health.

When memory management goes wrong, your system will start showing BSODs at regular intervals. Here’s why:

Memory management essentially tracks every memory location on your system, regardless of status. It manages the transition of memory and processes between your RAM and physical memory during execution, deciding how much memory to allocate (and how much is available for allocation). When you close a program, it reallocates that memory to other processes or marks it available for use.

Unfortunately, memory management isn’t absolved of system errors, just like the rest of your system. And when it does crash, it takes your system with it.

The Memory Management Blue Screen Error

Simply put, a memory management BSOD means there’s been a critical memory management error. There are several well-known causes for memory management errors:

  • Faulty RAM
  • Issues with new hardware, such as a graphics card
  • Faulty drivers
  • Software issues, including corrupt system and operating system files
  • Disk errors

At times, your system might recover after a simple reset. If you encounter a Memory Management BSOD, restart your system and see if the error returns. If not, there is a chance it was a one-off.

So how do you fix it? Here are a few things you can try.

1. Update Windows 10

The first thing to do is check that Windows 10 is completely up to date. Outdated system files can cause unexpected errors. Checking for a pending update is a quick and easy way to figure out if that is what is causing your issue.

Hit Windows key + I to open the Settings panel. Now, head to Update & Security, then check under Windows Update for any pending updates. If there is an update, save any important files, then press Restart now. Your system will reboot during the process.

2. Run Windows 10 Memory Diagnostic Tool

You can use the integrated Windows Memory Diagnostic utility to check if your system RAM is working correctly. The Memory Diagnostic tool runs after a system reboot. It checks your system memory for errors and logs the scan to a text file for analysis.

Type Windows Memory Diagnostic into your Start menu search bar and select the best match. You have two options: reboot immediately and run the utility, or set the utility to run after your next reboot. As you are trying to fix your memory management BSODs, save any important documents and reboot your system immediately. The Windows Memory Diagnostic runs immediately after reboot.

The log file, however, isn’t apparent after you boot back into Windows 10. Press Windows key + X and select Event Viewer from the power menu. In the Event Viewer, select Event Viewer (Local) > Windows Logs > System. Then, in the right-hand column select Find and type MemoryDiagnostic into the box. Hit Find Next. Your diagnostic results will display in the bottom of the window.

From there, you need to investigate any specific errors the Windows Memory Diagnostic throws up.

3. Run MemTest86

Windows Memory Diagnostic doesn’t show any errors. But you’re sure the issue relates to your system RAM. If that’s the case, you can use MemTest86 to perform an in-depth memory test.

MemTest86 is a free, standalone memory testing tool for x86 machines. You boot MemTest86 from a USB flash drive (or bootable disc) and leave it to check your system RAM. Now, a MemTest86 RAM check takes a long time to complete; a single pass takes hours depending on the amount of RAM you have installed.

Want to give it a try? Check out “Step 7: Check Your RAM Using MemTest86” in our guide to fixing the WHEA Uncorrectable Error. It has all the instructions you need!

4. Update Your Drivers

Another quick and handy potential fix is to update your system drivers. New software or hardware may come with new drivers, and your system might not have got the message. Driver faults are less common than in the days of computing yore, especially as Windows 10 now handles driver updates, by and large. But that’s not to say they don’t happen.

Press Windows Key + I to open the Settings panel, then select Update & Security > View update history. You can find any driver updates here. Now, type device manager in the Start menu search bar and select the best match. Head down the list and check for an error symbol. If there is nothing, your driver status is likely not the source of the issue.

That said, you can use a third-party tool to update all of your system drivers simultaneously. Check out this list of free tools you can use to fix the majority of Windows problems. The first two options—IOBit’s Driver Booster and Snappy Driver Installer—do exactly this.

GPU Drivers

A common theme throughout Memory Management BSOD threads and forum posts is that, at times, outdated or brand-new GPU drivers can cause the BSOD. Give some attention to your GPU drivers and double-check your last update.

5. Run CHKDSK

CHKDSK is a Windows system tool that verifies the file system and with certain settings, fixes issues as it runs. You run CHKDSK from the Command Prompt, and it has a bunch of nifty features.

Type command prompt in your Start menu search bar, then right-click the best match and select Run as administrator. (Alternatively, press Windows key + X, then select Command Prompt (Admin) from the menu.)

Next, type chkdsk /r and press Enter. The command will scan your system for errors and fix any issues along the way.

6. Run SFC

sfc scannow command prompt

Memory management still occurring? System File Check is another Windows system tool that checks for missing and corrupt Windows system files. Sounds like CHKDSK, right? Well, SFC checks for Windows system files specifically, while CHKDSK scans your entire drive for errors.

But before running the SFC command, it is best to double-check that it is completely functional.

DISM stands for Deployment Image Servicing and Management. DISM is an integrated Windows utility with a vast range of functions. In this case, the DISM Restorehealth command ensures that our next fix will work properly. Work through the following steps.

  1. Type Command Prompt (Admin)in the Start menu search bar, then right-click and select Run as administrator to open an elevated Command Prompt.
  2. Type the following command and press Enter: DISM /online /cleanup-image /restorehealth
  3. Wait for the command to complete. The process can take up to 20 minutes depending on your system health. The process seems stuck at certain times, but wait for it to complete.
  4. When the process completes, type sfc /scannowand press Enter.

7. Check Physical Hardware

Last but not least, physically check your system hardware. Did you move your system recently? There’s a small chance your hardware unseated during the process. Only a small chance, but something worth checking!

8. Reset Windows 10 (Last Resort)

windows reset

Okay, still tearing your hair out? Sometimes nothing other than a Windows 10 Reset will completely fix your problem. Windows 10 Reset replaces your system files with a completely fresh set of files and theoretically clears lingering issues relating to the Memory Management error while keeping the majority of your important files intact.

Head to Settings > Update and Security > Recovery, then under Reset this PC select Get started. Your system restarts as soon as you hit the button, so make sure you to backup any important files beforehand. Your system will restart, then you may select Keep my files or Remove everything.

The Memory Management Stop Code Error Fixed

Memory Management BSODs are difficult to take care of. Many variables can lead to a Memory Management BSOD, and that’s exactly why diagnosing a direct issue is sometimes problematic. However, one of the above fixes will bring your system back from the brink so you can continue your work free of any BSOD for now.

Still struggling with the Memory Management BSOD? You can use BlueScreenView for a slightly more user-friendly method for BSOD dump file analysis. Give it a try!

Read the full article: How to Fix the Windows Stop Code Memory Management BSOD


from MakeUseOf https://ift.tt/2LHHLLC
via IFTTT

YouTube Launches Fundraising Tools for Charity

YouTube has launched YouTube Giving, a suite of tools designed to help YouTubers and viewers raise money for charity. All but one of the YouTube Giving tools are being launched in beta, so these features are likely to evolve over time based on results.

Plenty of YouTubers already align themselves to charities, normally for causes close to their hearts. They’re then able to leverage their audiences to raise money for those charities. YouTube Giving is YouTube giving YouTubers support to accomplish that.

The Four Elements of YouTube Giving

As explained on the YouTube Creator Blog, there are four elements to YouTube Giving:

Fundraisers are exactly what you’d expect. They allow YouTubers and U.S.-registered nonprofits to create fundraising campaigns alongside their videos. Viewers can donate via a “Donate” button, with YouTube managing the logistics and payment processing.

Community Fundraisers are the same thing, expect multiple YouTubers can host the same fundraiser. This basically pools YouTubers’ resources, allowing them to team up to collectively raise funds for good causes. Again, YouTube manages the back-end stuff.

Campaign Matching is tied to Fundraisers and Community Fundraisers. As the name suggests, it allows the creators of those to receive matching pledges. These will be displayed within the fundraiser in order to inspire others to donate money.

Super Chat for Good is the same Super Chat you may already be familiar with, but with money made from purchases going directly to a nonprofit of the YouTuber’s choosing. As with normal Super Chats, these will be available on live streams and Premiere videos.

YouTube Giving Is a Work in Progress

YouTube Giving is currently a work in progress, and therefore only available to a small percentage of YouTubers. However, YouTube states it will “listen to your feedback on these beta features and continue to expand access to more creators.”

YouTube isn’t the only way to give money or resources to charity. You can use these apps and websites to give money to charity, and there are some amazing Christmas charities to donate to. You can even mine cryptocurrency for charity these days!

Image Credit: Tom Small/Flickr

Read the full article: YouTube Launches Fundraising Tools for Charity


from MakeUseOf https://ift.tt/2oqAPJz
via IFTTT

10 Handy Ways to Use Your Mac and iPhone Together

ios-macos-together

MacOS and iOS work well together. If your desktop and phone both come from Apple, you have many useful functions at your fingertips.

Let’s explore the best ways you can use both devices side-by-side.

1. Copy and Paste Content

copy-paste-from-mac

It’s easy to move between your Apple devices seamlessly, thanks to a special set of features called Continuity. The Universal Clipboard feature is part of this set and it allows you to share clipboard content between your Mac and iPhone.

To copy-paste text and graphics between the two devices, you’ll need to ensure that on both of them:

  • You’re signed in with the same iCloud account.
  • Bluetooth is turned on.
  • You have enabled the Handoff setting. On macOS, it’s called Allow Handoff between this Mac and your iCloud devices and lives under System Preferences > General. On iOS, you’ll find it listed as Handoff under Settings > General.

After that, you can copy content on your Mac and paste it in anywhere on your iPhone, and vice-versa.

2. Resume Tasks

resume-task-on-mac

As long as you have the settings outlined in the above section in place, you can also stop tasks on one device and resume them on another.

For example, you can start typing a note in Notes on your iPhone and finish it within Notes on your Mac. The Notes app active on your phone gets a special icon in your Mac’s Dock at the far left. (Look for the Notes icon with a tiny phone attached to it.) Click on that Dock icon to resume typing the note.

If you’re resuming a note from Mac on your iPhone, you’ll have to tap on the Notes banner that appears at the bottom of the app switcher screen. To reveal this screen, double-press the Home button on your phone.

This Apple feature, Handoff, works with various apps including Mail, Safari, Reminders, and Pages.

3. Drop Files, Webpages, and More

airdrop-mac

To share files between your Mac and iPhone, you can use AirDrop, Apple’s in-built file transfer utility for desktop and mobile devices.

After you enable Wi-Fi and Bluetooth on both devices and ensure that they’re discoverable, sharing is simple. (The devices don’t need to be on the same network for AirDrop to work between them.)

To begin sharing, select the Share > AirDrop option from the context menu of the file or folder you want to send from your Mac to your iPhone. Then select the destination device when it shows up in the Share dialog.

If you’re transferring files in the other direction, first select the ones you want to send. Then tap on the Share button to reveal the AirDrop option in the Share menu.

airdop-iphone

You can transfer not only files and folders with AirDrop, but other types of data as well. This includes webpages, notes, contacts, and photos.

Keep in mind that AirDrop can be temperamental at times. If you have trouble using it, we have a few tips to troubleshoot your file transfer woes.

4. Play Music, Movies, and TV Shows

play-audio-from-iphone

You can play audio from your iPhone on your Mac with a Lightning USB cable. But if you want to stream (or mirror) content wirelessly from your Mac and iPhone, you can use Apple’s AirPlay feature. The catch is that neither device can act as an AirPlay receiver. But an Apple TV can. Its price starts at $149.

If you don’t want to spend that much money, you can get a piece of software like Reflector ($15) instead. It simulates an AirPlay receiver and lets you stream content from your iPhone to Mac. To stream content from your Mac to your iPhone, you can use StreamtoMe.

Our beginner’s guide to AirPlay will tell you everything you need to know about streaming and mirroring on your Mac and iPhone.

5. Share an Internet Connection

personal-hotspot-on-mac

You need a simple tweak to turn your Mac’s internet connection into a Wi-Fi hotspot. First, head to System Preferences > Sharing and enable the checkbox for Internet Sharing. Then click on the Start button at the confirmation prompt.

To use your iPhone’s internet connection on your Mac (known as tethering), you’ll need to enable the Personal Hotspot option under Settings on your iPhone. Your mobile device will then show up in the list of networks on your Mac, and you can connect to it.

Instead of Wi-Fi, you can also use Bluetooth or a USB cable for tethering. Our iPhone hotspot guide can help you understand the ins and outs of the hotspot feature. Your experience of this feature might vary depending on your carrier. If you face any issues, go through our troubleshooting tips for iPhone tethering.

6. Close Safari Tabs

icloud-tabs-on-iphone

If you enable iCloud sync for Safari on your Mac and iPhone, you can close tabs open on one device from the other. To set up syncing:

  • On macOS: Visit System Preferences > iCloud and enable the checkbox for Safari.
  • On iOS: Go to Settings > Apple ID > iCloud and flick the toggle switch for Safari to the right.

After you make these changes, the Safari tabs from your iPhone show up in the Safari tab switcher on your Mac. You might need to scroll down to see them.

(To reveal the tab switcher, hit Shift + Cmd + Backslash (\) or click on View > Show Tab Overview).

To close one of the iCloud tabs, click on the Close button that appears when you hover over it. If you want quick access to iCloud tabs, keep the Show iCloud Tabs toolbar button handy.

Now, on your iPhone, you’ll find your Mac’s Safari tabs listed below your active tabs in the tab switcher. To reveal the tab switcher, tap on the Tabs toolbar button at the bottom-right. Slide the tab name to the left to reveal its Close button.

7. Unlock Your Mac Using Your iPhone

tether-mac

You’ll need a third-party app for the convenience of using your iPhone’s passcode or Touch ID fingerprint to unlock your Mac. You can try Tether (Free) or FingerKey ($3). Unlox ($4), formerly known as MacID, is another great option.

If you have an Apple Watch, you can use that to unlock your Mac simply by sitting in front of it. That’s the Auto Unlock feature in action. Speaking of which, you might be missing out on more Apple Watch features like this one.

8. Type on Your iPhone Using Your Mac’s Keyboard

typeeto-mac

If an iPhone app you’re typing into has a Mac version and supports iCloud sync, anything you type into the app on your desktop shows up in the mobile version soon and vice-versa.

Even if that’s not an option, a Mac app that simulates a proper Bluetooth keyboard can work. We recommend Typeeto ($20), which comes with a free trial. Our guide to typing on your iPhone with your Mac’s keyboard will show you how such software works.

9. Make and Receive Calls From Your Mac

call-from-mac

You can receive and make both cellular and FaceTime calls on your iPhone from your Mac. To make this work, your Mac and iPhone must be connected to the same network and signed in with the same iCloud and FaceTime account. You also have to enable these settings:

  • On macOS: Facetime > Preferences > Settings > Calls from iPhone
  • On iOS: Settings > Phone > Calls on Other Devices > Allow Calls on Other Devices (From the same section, enable the the toggle switch for the Mac in question.)

Now when you receive a call on your phone, you’ll see a notification for it on your Mac. You can accept or decline the call from the notification itself.

receive-iphone-call-on-mac

To make a call from your Mac, first right-click on a phone number or its link from any app. Next, click on the Call [Number] using iPhone option in the context menu and then the Call option in the alert that appears.

10. Send and Receive SMS From Your Mac

You can use your Mac to send text messages using your iPhone if you enable Text Message Forwarding from Settings > Messages on your iPhone.

You also have to ensure that you’re reachable at your phone number and email address on iMessage. To do this, put a check mark next to the relevant contact details in the Messages app settings:

  • On macOS: From Messages > Preferences > Accounts
  • On iOS: From Settings > Messages > Send & Receive

Now you’re all set to send SMS from your Mac. Start an iMessage conversation as you normally do, but this time see if you can select a phone number to send the message to. With text forwarding in place, you should be able to do so.

Mac Plus iPhone Equals Harmony

As a Mac user, you don’t always have to buy an iPhone (and vice versa), but if you do so, it can prove quite convenient. You can use a mix of native features and third-party apps to move effortlessly from your Mac to your iPhone and back.

Speaking of seamless transitions, you must take a look at these iOS apps that can power up your Mac experience.

Read the full article: 10 Handy Ways to Use Your Mac and iPhone Together


from MakeUseOf https://ift.tt/2wwsicv
via IFTTT

The 7 Hottest Snapchat Streak Tips for Beginners

Virtual and Augmented Reality at IFA 2018 Was Largely Missing In Action

Smart Home Automation at IFA 2018: What’s New and What’s Hot?

It’s been years since smart technology ushered in a new age of home comfort, but the best home automation offerings at IFA 2018 are pushing things to the next level.

From thermostats to security cameras and beyond, we went to Berlin to see it all first hand. In this article, we’ll keep you on top of the hottest and most interesting smart home products and announcements that we come across.

Netatmo

Smart Outdoor Camera

The Netatmo Smart Outdoor Camera (available on Amazon) distinguishes itself from other smart security cameras in its advanced object recognition. Rather than recording all the time, or sporadically recording any time a leaf blows by, it only triggers recording when it sees people, animals, and cars.

As for the recording itself, the Netatmo Smart Outdoor Camera can record locally to microSD (8GB card included) or remotely to Dropbox or even your own FTP server. Disconnected from Wi-Fi? Not a problem. Just unload the local recordings—you won’t miss a beat.

The 4MP camera records a field of view of 100 degrees in 1080p resolution, and can detect motion up to 50 feet away at night. It also comes with a built-in LED floodlight, and you can tap into the camera’s live feed whenever you want using the Netatmo mobile app.

Smart Indoor Camera

Immediately, the Netatmo Smart Indoor Camera (available on Amazon) stands out because it doesn’t look like a traditional security camera, but rather a sleek and stylish cylinder. Unless an intruder knows what to look for, they won’t realize it for what it is.

You can set up particular people as “known faces,” and the camera will keep a log of every time it sees a face. When triggered, the camera makes a short recording of the event—or not, if you prefer to preserve a person’s privacy. If the camera detects a stranger’s face, you’ll get a mobile alert

The 4MP camera captures in 1080p resolution and records locally to microSD (8GB card included) or remotely to Dropbox or your own FTP server. You can tap into the camera’s live feed whenever you want using the Netatmo mobile app.

Ring

Stick Up Camera

The Ring Stick Up Camera stood out most to us, a wireless and weather-resistant camera that can be used both indoor and outdoor. It mounts using a single screw, meaning you can take it down and hook it up anywhere else at a moment’s notice.

Once mounted, you can use the Stick Up Camera’s neck to fold out, swivel around, turn, and tilt to make the camera face any direction you want. Admittedly, the camera body is bulky and conspicuous so you know you’re looking at a security camera.

With a Ring Protect Plan, the Stick Up Camera can record when triggered and store each recording for up to 60 days. Without a Protect Plan, you can still tap into its live IP feed and view in real-time. Other notable features include 720p HD video quality, night vision, two-way talk, mobile alerts, and remote-activated siren.

We don’t know when the Ring Stick Up Camera will be released, but we’re hopeful for later this year.

Tado

V3+ Smart Thermostat

The Tado V3+ Smart Thermostat is a neat solution that can replace most central heating setups. If you have radiator heating instead, opt for the Tado V3+ Smart Radiator Thermostat, which replaces the radiator’s control knob. Both starter kits include a bridge, which plugs straight into your wireless router.

The device itself is a touchscreen that allows minute control over the temperature and settings. Or you can control the thermostat through the newly revamped Tado app, both on demand or by setting up Smart Schedules that automatically adhere to preset temperature patterns. You can also set “Away” temperatures so you aren’t unnecessarily wasting energy.

The Air Comfort feature claims to improve sleep quality by offering advice on what you could improve, such as when to open or close windows. It incorporates indoor data (e.g. room temperature and humidity) and outdoor data  (e.g. weather forecasts, pollen).

The Tado V3+ is compatible with IFTTT, Google Assistant, Amazon Alexa, and Apple HomeKit. Other notable features include geofencing (automatically turns on and off when you leave home radius) and the ability to request boiler repair or maintenance from one of Tado’s partnered services (currently only in select European countries).

We’ll be updating this post with more products as we encounter them.

Read the full article: Smart Home Automation at IFA 2018: What’s New and What’s Hot?


from MakeUseOf https://ift.tt/2N1seet
via IFTTT

Twitter Tests Telling People Who to Unfollow

Twitter is only as good as the people you follow. Which is why so many people struggle to get the most out of Twitter, as they join the site, follow a handful of people, and then get bored. On the other hand, it’s possible to follow too many people.

Following too many people means a timeline filled with uninteresting nonsense. And the need to scroll through tweets you have no interest in to get to the good stuff. Which is why Twitter recently started recommending who you should stop following.

Who to Unfollow on Twitter

This was spotted by several Twitter users, some of whom took screenshots of the recommendations. Twitter has long recommended “Who to Follow” based on who you’re already following, so this would seem to be the natural balancing force.

Matt Navarra was invited to “improve your timeline by reviewing some accounts you may not need to follow”. Clicking “Take a look” then opened up a list of accounts Twitter thought he could live without. Probably due to a lack of engagement.

The wording was different for different people. Tim Fernholz’s was much more to the point, saying, “You don’t need to follow everyone to know what’s happening. Make sure you’re only following the people that make Twitter great for you.”

Twitter issued a statement to Slate saying:

“We know that people want a relevant Twitter timeline. One way to do this is by unfollowing people they don’t engage with regularly. We ran an incredibly limited test to surface accounts that people were not engaging with to check if they’d like to unfollow them.”

So, it was a test, and one limited to a small percentage of Twitter users. Still, Twitter hasn’t yet indicated whether it deemed the test to be a success and whether it’s likely to be rolled out to more users in the future. So this could be the last we see of it.

Twitter Knows Your Tastes

Suggesting people you should unfollow makes a lot of sense. After all, Twitter knows which tweets you’ve read, which links you’ve clicked on, and which profiles you’ve explored. So why not let them help you decide who is surplus to requirement?

Whether you’re new to the site or have been tweeting for years you should probably read our guide to using Twitter. And then take the opportunity to go through the list of people you follow and cull any you no longer have any interest in engaging with.

Image Credit: Bram Koster/Flickr

Read the full article: Twitter Tests Telling People Who to Unfollow


from MakeUseOf https://ift.tt/2BXQx8J
via IFTTT

Tumblr Finally Cracks Down on Hate Speech

tumblr-followers

Tumblr is updating its community guidelines to tackle certain behaviors. The changes mean Tumblr is cracking down on hate speech, violent threats, and non-consensual sexual content. The new guidelines are set to come into effect on September 10.

While many other social networks have been cracking down on hate speech (with the exception of Twitter), Tumblr has remained silent. However, the staff has clearly decided that now is the right time to change its community guidelines to protect its users.

Tumblr Changes its Community Guidelines

In a blog post, Tumblr states it’s changing its community guidelines in order to “keep Tumblr the constructive, empowering place it should be”. Tumblr loves its “diverse, kinetic, passionate communities” but they’re not always easy to police.

Tumblr is acting now as it believe its community guidelines need to “reflect the reality of the internet and social media today and acknowledge that the things people post and share online influence the way others think and behave.”

The Kind of Content Tumblr Is Targeting

First, Tumblr is cracking down on hate speech. This is to ensure against the internet “being exploited by hate groups to organize, recruit, and radicalize with horrifying efficiency.” Specifically, Tumblr is asking users to report hate speech whenever they encounter it.

Next on the agenda is an attempt to ban “the glorification of violence and its perpetrators”. While violent threats against individuals and groups have always been against the rules, Tumblr has added the ban on posts glorifying acts of violence.

Finally, Tumblr is expanding its ban on sexual imagery and sexual harassment. This is specifically targeting deepfakes and creepshots, which Tumblr describes as “new technologies that can be used to humiliate and threaten other people”.

The Hate Speech Versus Free Speech Debate

Tumblr’s new community guidelines will go into effect on September 10, 2018. After which any post breaking the rules will be taken down. Not that we should expect things to be that simple, as there is an ongoing debate about hate speech versus free speech.

Read the full article: Tumblr Finally Cracks Down on Hate Speech


from MakeUseOf https://ift.tt/2om16J0
via IFTTT

What to Watch on Amazon Prime Video in September 2018

prime-video-feb

Every month, Amazon makes a bunch of new TV shows and movies available on its Prime Video subscription streaming service. Join us as we look ahead to some of the best new video content to watch in September 2018.

Note: Prime Video is only one of the many awesome benefits of an Amazon Prime membership!

1. Ghostbusters I and II

It might be a little early for Halloween, but it’s never a bad time to reminisce about 1980s movies.

The 1984 original won more plaudits than the 1989 sequel, but both Ghostbusters films are staple viewing for any cinema fan.

2. Jerry Maguire

Jerry Maguire manages to please both sports fans and romcom lovers with the tale of an NFL agent who has an epiphany about his journey in life.

Tom Cruise plays the lead role.

3. King Lear

King Lear is a 2018 co-production between Amazon and the BBC. It is a modern adaptation of the famous Shakespeare play.

The story takes place in 21st century London and tells the story of the king’s descent into madness.

4. Sleepless in Seattle

Sleepless in Seattle, a romcom which was released in 1993, sees Tom Hanks and Meg Ryan play the lead roles.

The movie was nominated for two Oscars and two BAFTAs.

5. Forever

The latest Amazon Original series is Forever. It joins a long list of highly watchable Amazon Original content.

The series follows the lives of Oscar and June. They lead a typical married life until an innocent ski trip develops into an unexpected situation.

Forever goes live on September 14.

6. There Will Be Blood

2007 drama movie There Will Be Blood won two Oscars—Best Actor and Best Picture—and was nominated for a further six.

Daniel Day-Lewis plays the role of Daniel Plainview, an oilman who is ruthlessly trying to exploit the California oil boom around the turn of the last century.

7. Wishenpoof Season 2

Wishenpoof is an Amazon Original kids’ show about Bianca, a young girl who can make wishes come true.

The first season was a critical success; the much-awaited second season goes live on September 7.

More Movies and TV Shows on Amazon Prime Video

These seven new shows and films are the ones that caught our eye, but there are more than 50 new releases scheduled to become available. The highlights include The Usual Suspects, Darkest Hour, and Watchmen.

And don’t forget all the great content that’s already on the service, including the best movies on Amazon Prime and the best TV shows on Amazon Prime Video.

Read the full article: What to Watch on Amazon Prime Video in September 2018


from MakeUseOf https://ift.tt/2LQBmi6
via IFTTT

What Is the Best Smart TV Operating System?

best-smart-tv-os

There are lots of things you need to know before buying a smart TV. What size do you want? How many HDMI ports do you need? Any extra features that are important to you?

But there’s one question that people often overlook: which operating system should you buy? This article will help you answer that question.

Picking the Right Operating System Is Important

It isn’t 2016 anymore. Back then, we were telling readers why you should avoid buying a smart TV. But in the intervening years, a lot has changed.

It’s now almost impossible to find a new TV that isn’t “smart.” Take a trip to your local electronics store, and you’ll be overwhelmed with promises of streaming, casting, sharing, and all the smart TV buzzwords.

But, not all smart TVs are created equal. Much like the world of desktop operating systems, the various smart TV operating systems have their own strengths and weaknesses. Some have a more extensive choice of apps, some have a better user interface, some are more compatible with third-party devices, and so on.

So, which is the best? In this article we pit Roku TV, Android TV, Fire TV, WebOS, and TizenOS against each other to see which smart TV operating system is best.

1. Roku TV

In 2017, Roku launched a lot of new hardware, but the Roku TV operating system survived the cull.

The OS includes the best parts of the Roku set-top boxes but also throws in some extra features that are unique to the platform.

For example, unlike the other products in the Roku range, you can connect an HDTV antenna to a Roku TV and enjoy a full electronic program guide (EPG) from within the Roku ecosystem.

Roku TV has also benefited from staying well clear of the seemingly never-ending bickering between Amazon, Google, and Apple. As such, you’ll find all the most popular apps from all the providers (unlike Amazon Fire TV, which does not have a YouTube app).

Other features include a universal search function, a customized feed of upcoming shows you’ll be interested in, and a private listening mode.

Many manufacturers offer Roku TV televisions, including TCL, Element, Insignia, Philips, Sharp, RCA, Hitachi, and Hisense.

Of course, like all Roku products, you can also install private channels. They provide access to TV content which isn’t available in the main store. We’ve previously looked at the best private Roku TV channels if you would like to learn more.

2. WebOS

webos screenshot

WebOS is LG’s smart TV operating system. After a curious history, the OS finally emerged as the leading smart TV operating system in 2014 thanks to its slick and easy-to-use interface.

Since 2014, LG has been steadily refining the OS, and it’s now found in everything from fridges to projectors.

The operating system revolves around the launch bar at the bottom of the screen. On the bar, you will find all your apps and settings. You can customize the order of the bar so the apps you use most frequently show up first.

WebOS is Bluetooth compatible, meaning it’s easy to hook up keyboards, mice, and other useful peripherals. It is also Miracast compatible. (Miracast is a cordless version of HDMI!)

Other noteworthy features include live apps (so you can pause content in one app, start using another app, then return to the first app and pick up where you left off later in the day), 360-degree video playback, and an OLED image gallery.

If you’re looking for crisp and clean, WebOS is the clear winner.

3. Android TV

android tv screenshot

Android TV is probably the most common smart TV operating system. And, if you’ve ever used an Nvidia Shield (one of the best devices for cord cutters), you’ll know that the stock version of Android TV takes some beating in terms of the feature list.

However, with Android being Android, you will not get a consistent user experience across different TV manufacturers. They all feel the need to put their own “twist” on it, usually for the worse. Error messages saying that a part of the OS system has stopped working are not uncommon on non-stock implementations.

On a more positive note, any television running Android TV will also have Chromecast built in. It makes streaming or casting content from your Android phone or tablet a breeze.

You can also cast directly to your TV from your computer as long as you have Chrome installed. Just go to Menu > Cast to begin.

You also be able to use Google Assistant. That means you can use your voice—via your TV—to control all your smart home devices such as lights, speakers, thermostats, electrical sockets, and more.

4. Tizen OS

tizen screenshot

TizenOS is a Linux-based operating system that has been developed by The Linux Foundation.

You will only find TizenOS on Samsung devices. It’s in all of the company’s products, including TVs, cameras, ovens, and air conditioning units.

Of course, TizenOS has a bad reputation following the Samsung TV “spy-gate” in 2015. To be fair, those issues are long in the past. Samsung TVs don’t spy on your any more (at least to our knowledge). However, Tizen still leaves a lot to be desired as a smart TV OS.

Visually, the operating system is fine. It’s clearly taken a lot of design cues from WebOS; there’s a horizontal bar at the bottom of the screen with all your apps and content.

Criticism comes in two forms. Firstly, it’s not as intelligent as some of the other operating systems on this list. For example, while Roku learns what you like and suggests new content from all the apps you have installed on the OS, TizenOS merely suggests apps that you haven’t opened for a while. It’s not inspiring.

Secondly, it faces accusations of being too simplified. Whereas WebOS strikes a perfect balance, tech-savvy users will find the fun settings hidden being endless buttons and submenus.

U.K. users will also bemoan the lack of Freeview Play. It’s a repo of programs from all of Britain’s major OTA TV networks and is available on most of Samsung’s competitors’ TV sets.

5. Fire TV Edition

Fire TV Edition is the new kid on the block. As the name suggests, it’s the smart TV operating system version of the popular Amazon Fire TV devices. At the time of writing, you will only find Fire TV Edition on Toshiba and Element televisions.

Fire TV Edition also gives you access to Amazon Alexa. Like Google Assistant, it can control your smart home, update you on the news and weather, and engage with other apps that form part of your daily workflow.

Content-wise, you’re limited to apps that are available in the Amazon Appstore. Even though Fire TV is based on Android, you cannot access the Google Play Store. Nonetheless, most mainstream apps are available, with the notable exception of YouTube.

However, you can sideload apps onto Fire TV devices, and Fire TV Edition is no different. You just need to get your hands on the APK file for the app you want.

Check out our article looking at the different versions of Fire TV if you’re not sure whether Fire TV Edition is right for you. And if you’ve already bought a new Fire TV Edition, make sure you check out our list of essential Fire TV apps.

And the Winner Is…

We’re going to call it a three-way tie between Android TV, WebOS, and Roku. In truth, each of the smart TV operating systems excels in a different area, but Amazon Fire falls flat due to the lack of YouTube and the Google Play Store, while TizenOS is by far the weakest of the bunch.

If you want slick and minimal, go for WebOS. If you want the largest selection of apps, choose Roku. And if you want smart assistant capabilities, pick Android TV.

If you’d like to learn more about smart televisions, check out our list of smart TV lies you have probably fallen for.

Read the full article: What Is the Best Smart TV Operating System?


from MakeUseOf https://ift.tt/2Ce3awH
via IFTTT