Tuesday 30 June 2020

Debian vs. Ubuntu vs. Linux Mint: Which Distribution Should You Use?

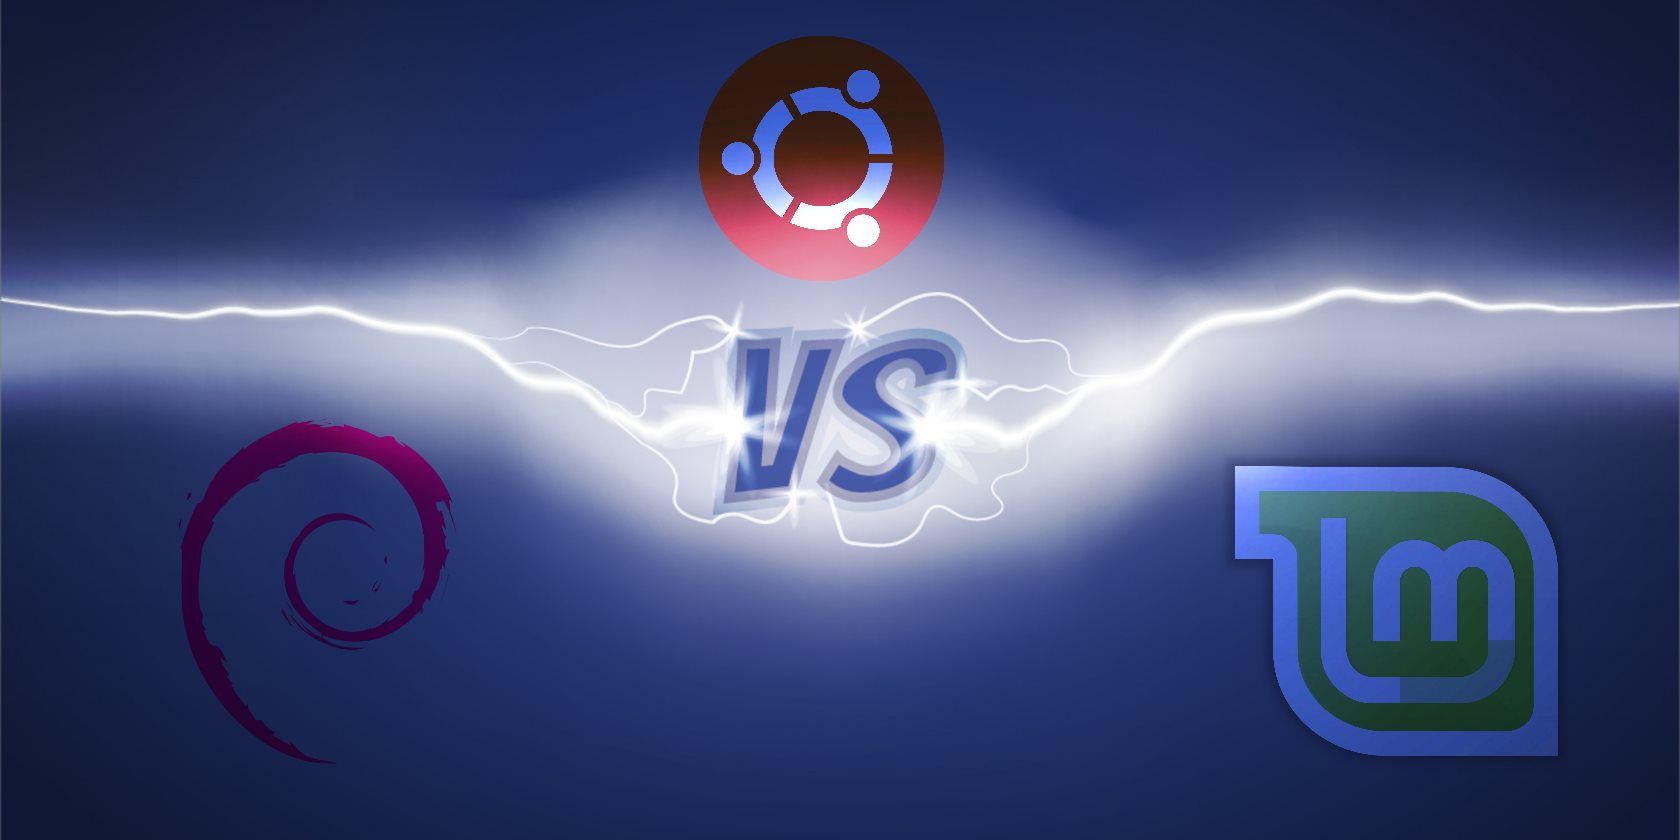
If you’ve heard of Ubuntu, the most popular version of Linux for desktop PCs, there’s a good chance you’ve also heard of Debian and Linux Mint.

With so many Linux distributions to choose from, a newcomer can understandably have a hard time telling them all apart. In this case, these three options have a great deal in common, but there remains a lot that sets them apart.

Debian-Based Linux Distributions

In the Linux world, there are hundreds of Linux-based operating systems (commonly known as “distributions” or “distros”) to pick from. Most of them expand from an already existing distro and implement various changes. There are only a handful that aren’t based on something else.

Debian is one of them, a parent that a majority of other versions of Linux have spawned from. Ubuntu is the most prominent descendant.

Yet while Ubuntu may be based on Debian, it has gone on to become a parent to many other distros as well. Linux Mint, for example, is based on Ubuntu.

If you’re connecting the dots, that means that Linux Mint is ultimately based on Debian.

But Linux Mint is not Ubuntu, and Ubuntu is not Debian. While they may largely share the same technical underpinning, chances are you won’t have that impression when you boot them up for the first time.

Debian

Debian running the GNOME desktop

Software engineer Ian Murdock released the first version of Debian in 1993, in the process establishing a community of developers who would work together to provide a stable way to use the best software the free software world had to offer. The name came from the combination of his name and the name of his then-girlfriend, Debra.

While you can install Debian on your laptop and replace Windows, Debian is more than a desktop operating system. It’s a massive collection of software that you can configure in different ways to create the kind of experience you want. This is why so many projects use Debian as a foundation.

But yes, you can install Debian as a desktop operating system. Technically there is a default desktop experience available, but the installer enables you to pick and choose which desktop interface you prefer. You can even choose not to have a graphical interface at all, which is ideal for servers.

This freedom means the Debian teams leave the bulk of design and usability decisions to the various free software projects themselves. How Debian looks and feels has more to do with what the GNOME or KDE teams decide than the opinions of Debian developers.

You won’t find the custom themes and personal style that Ubuntu and Linux Mint both offer in spades, though this isn’t necessarily a bad thing.

The GNOME desktop interface, for example, doesn’t support custom themes and many app developers actively request that distros stop theming their apps.

Debian’s Package Management

Yet there is a major part of the experience that is specific to Debian. That’s package management. Debian uses the DEB format and the APT package manager. I won’t go into details about them here, though, because as Debian-based distros, Ubuntu and Linux Mint inherent these same tools.

This isn’t to suggest that there’s nothing special about Debian. The reasons to use Debian are many, but only a few are likely to matter all that much to people first discovering free software.

If you’re coming to Debian from a different version of Linux, you may notice that much of the software is older than what you get elsewhere. New versions of Debian only come around once every two to three years, and app updates are frozen in time alongside the rest of the system, aside from security patches and similar maintenance. If you want to use newer software on Debian, you can, but doing so comes with more bugs and instability.

In short, Debian isn’t hard to use, but it is geared more toward technical users than Ubuntu or Linux Mint. Debian is great for people who care more about the values of free software, want more control over how their PC works, are creating a server, or value long-term stability.

Ubuntu

Ubuntu Linux distribution

Unlike Debian, Ubuntu is the product of a private company. Canonical launched Ubuntu in 2004. The goal was to create a version of Linux geared toward non-technical users. The slogan was “Linux for Human Beings.”

So, what set Ubuntu apart from Debian? For starters, there was a clear product: the Ubuntu desktop. Canonical employed developers to make the chosen default experience as pleasant as possible for users.

Today, Canonical provides a simpler installer, a restyle of the GNOME desktop, and newer software.

(Ubuntu packages technically come from the unstable branch of Debian. That means experienced users can get this software on Debian too, but at the risk of a less stable desktop).

The Snap Store

Canonical has created the snap package format, courting commercial software developers to release their apps into the Snap Store.

The Snap Store, alongside Ubuntu’s position as the most widely used version of Linux, makes Ubuntu the Linux distro with the greatest degree of software support from non-Linux developers. This is relevant for apps like Skype and Steam, plus large swathes of PC games.

Canonical’s snap format is a universal format that works regardless of which Linux distro you choose. As such, you no longer have to use Ubuntu to enjoy many of these benefits.

Ubuntu has a predictable release schedule, with new long-term support releases launching every two years. Interim releases come out every six months. This makes it suitable for people who like regular updates and those who simply want a reliable computer.

Various flavors of Ubuntu are available beyond the mainstream version. Kubuntu uses the KDE desktop environment, while Lubuntu uses LXQt. Xubuntu employs the Xfce desktop, and Ubuntu MATE ships with (surprise!) the MATE desktop. If you don’t like the default interface, one of the many Ubuntu flavors may be the right fit.

Linux Mint

Linux Mint with the Cinnamon desktop environment

Clément Lefèbvre started Linux Mint in 2006, only a few years after Ubuntu. There was considerable experimentation in the early days, as the Mint developers decided how to structure the technical aspects of the desktop. They eventually landed on making Linux Mint fully compatible with the Ubuntu desktop.

Both distros use mostly the same repositories and can install the same software. DEB packages meant for Ubuntu will also work in Linux Mint. The Linux Mint team doesn’t care much for snaps, but it’s still possible for you to install them.

The primary difference between Mint and Ubuntu comes down to the initial desktop experience. The Linux Mint team created the Cinnamon desktop environment, which by default resembles Microsoft Windows. You have an app launcher in the bottom left, a task bar along the bottom, and system icons in the bottom right.

Mint comes with a selection of tools that simplify the process of installing apps and changing desktop themes. Mint also has the option to pre-install multimedia codecs that, on Debian and Ubuntu, you have to install after installation.

These changes have encouraged people to choose Linux Mint as an easier or more comfortable desktop to learn and use on a daily basis.

If you don’t love the Cinnamon desktop, there are MATE and Xfce editions of Linux Mint available as well. Both come with the same theme and general layout but may run smoother on older machines.

Debian vs. Ubuntu vs. Linux Mint: Which Is It?

Personally, I would use Debian. But then I’m a long-time free software user who has come to prefer distros that try not to make changes to “upstream” code. But I wouldn’t necessarily give Debian to a first time Linux user. Anyone familiar with computing could figure it out, but Ubuntu and Linux Mint offer an easier experience and look better.

The same could be said of elementary OS and Pop!_OS, which are both also based on Ubuntu. And if you’re inclined to like Debian, you might find much to like in Fedora, another upstream-focused project that isn’t based on another distro.

If you aren’t already paralyzed by choice, there are so many more great Linux distros to consider.

Read the full article: Debian vs. Ubuntu vs. Linux Mint: Which Distribution Should You Use?


from MakeUseOf https://ift.tt/2Ai2LTD
via IFTTT

What Is a Linux Display Manager? How to Choose and Set One

linux-display-manager

You’re probably happy with your Linux operating system, but from time to time its good to refresh things. One way to do this is to replace some of the default applications and components. Think the default file manager, the text editor, or even the desktop environment or kernel.

One switchable component that is often overlooked is the display manager. But what is this component? How do you switch to a new display manager in Linux? Let’s find out.

What Is a Display Manager?

Also known as a “login manager”, a display manager is responsible for starting the display server and loading the desktop. This happens right after your correctly enter your username and password

Change the Linux display manager for a swish new login box

Simply put, it controls user sessions and manages user authentication. Most of the display manager’s magic occurs “under the hood.” The only visible element is the login window, sometimes referred to as the “greeter”.

What a Display Manager Is Not

You probably already know your Linux computer has a window manager and a display server.

The display manager is a distinct piece of software. While all three interact, they have different functionality, and perform different jobs.

Examples of a window manager include:

  • KWin
  • Openbox
  • Dwm

Some well-known display servers for Linux are:

  • Wayland
  • Mir
  • Org

(Many Linux distributions feature Wayland as the default display server and a few others are also moving in that direction, so it’s a good idea to know more about using Linux with Wayland.)

Linux display manager configuration

Some display managers, meanwhile, are:

  • GDM (Gnome Display Manager)
  • LightDM
  • LXDM

We’ll look at some more display managers below.

Why Replace a Display Manager?

Why would anyone want to replace a display manager, you ask? Well, here are a few probable scenarios:

  • You’re trying to revive an old PC and you need a lightweight display manager.
  • Your current display manager breaks after an update, and it’s much faster to just install a different one than migrate to another distro.
  • You want to apply gorgeous themes to your login window, but your distro’s default display manager is limited in this respect.

There are several popular display managers for Linux. You’ll notice they’re quite similar in appearance; the main differences are size, complexity, and how they manage users and sessions.

Six Linux Display Managers You Can Switch To

With a new display manager installed, you can have some fun with themes. MDM is the best choice if customization is your priority, since it supports both old GDM and new HTML themes. DeviantART features many collection of themes for various display managers, for example. If you’re using SDDM, you can find theme packages for it in the repositories.

But first, which display manager are you going to switch to?

1. KDM

The display manager for KDE up to KDE Plasma 5, KDM features plenty of customization options. You can easily configure it via the control module in System Settings. There you can choose which KDM theme to use, or switch to the simple greeter that lets you customize the background, welcome message, and font.

Other features include:

  • Fast user switching
  • Display user list
  • Enable root shutdown
  • Allow passwordless login
  • Autologin
  • Fingerprint scanning

KDM supports X and Wayland and can also detect installed desktop environments and window managers. They are then offered in list form for you to choose which one to start when you enter your credentials.

While some features might overwhelm a beginner, KDM is easy to set up thanks to the straightforward graphical dialog.

2. GDM (GNOME Display Manager)

What KDM is to KDE, GDM3 is to GNOME—the default display manager of a popular Linux desktop environment. Like KDM, it supports X and Wayland and offers:

  • Automatic login
  • Hiding the user list
  • Passwordless login
  • Custom sessions
  • Built-in themes
  • Multiple user login
  • Fast session switching
  • Fingerprint scanning
  • Smart card authentication

Configuring GDM3 can be done either via the dedicated dialog in System Settings or by editing configuration files.

Note that GDM3 is distinct from the legacy GDM. While they may appear similar, GDM3 is not backward compatible with legacy GDM themes, with options hidden in configuration files.

3. SDDM (Simple Desktop Display Manager)

SDDM is a comparatively new display manager scene. Initially released in 2013, it has survived while older rivals such as SLiM and Mint Display Manager have folded.

With support for X and Wayland, SDDM relies on QML theming, and replaced KDM as the default display manager in KDE Plasma 5.

SDDM features:

  • Automatic login
  • Num Lock on
  • Modify greeter users
  • Support for themes

As with other no-frills display managers, you can configure SDDM by editing a config file (sddm.conf). If you’re using SDDM on KDE, it has a configuration module in System Settings. Alternatively, use the handy sddm-config-editor utility.

4. LXDM

LXDM is part of the LXDE environment but runs comfortably on other desktop environments since it doesn’t have many dependencies. You can set it up through its own configuration utility, or edit configuration files in /etc/lxdm (or if you’re on Lubuntu, /etc/xdg/lubuntu/lxdm).

Using LXDM you can expect:

  • Configurable user list
  • Autologin
  • Icons for each user
  • User switching
  • Timed autologin
  • Custom background images

Both the official documentation and unofficial witness accounts on various forums note that LXDM doesn’t terminate user processes on logout. To ensure this happens, modify the /etc/lxdm/PostLogout file.

LXDM might be quirky, but it’s fast, so if that’s an acceptable trade-off for you, try it out.

5. LightDM

Perhaps the most popular and certainly the most versatile display manager is LightDM. Having supplanted older display managers in popular distros, it is customizable and feature-packed. LightDM is also lightweight, and supports X.Org and Mir.

With LightDM you can expect:

  • Greeters for GTK, Qt/KDE, Unity and others
  • Login screen themes
  • User list
  • Custom background image
  • Adjustable window position

Configuration files should be edited to make these tweaks—the easiest way is the LightDM GTK Greeter Settings tool.

6. XDM

This is the default display manager for the X Window System and was first released in 1988. It is a minimalist display manager suitable for low spec systems or those with modest requirements.

Despite this, XDM still offers some features:

  • Themes
  • Set background wallpaper
  • Tweak fonts
  • Adjust login box position
  • Handles multiple X sessions
  • Passwordless login

Most tweaks are applied by editing etc/X11/xdm/Xresources.

How to Replace a Display Manager on Linux?

Seen something you like? Perhaps you want to switch Ubuntu’s display manager to LightDM.

Whatever your preference and distro there are just two steps to replacing your current display manager on Linux:

  1. Install a new display manager
  2. Set it up as the default

The first part of the process is easy, as you only have to find the appropriate package for your distribution and install it. You can remove the old display manager if you want to, but in most cases it won’t be necessary.

Setting up the new display manager as the default is different for each distribution. It boils down to editing a few configuration files or running a simple one-line command in the terminal.

Use this short guide to set up your chosen display manager, which you should have already installed.

Debian, Ubuntu, Linux Mint, and Most Ubuntu Derivatives

Installing a new display manager should prompt the dpkg-reconfigure tool to launch. If not, run it manually:

  • Run sudo dpkg-reconfigure gdm3
  • Select the default display manager in the dialog that pops up

Switch your Linux display manager

You can replace “gdm3” with any of the display managers that are currently installed on your system. If this fails, edit the /etc/X11/default-display/manager file with root privileges.

For Arch Linux and Manjaro

Enable the systemd service for your new display manager:

systemctl enable displaymanager.service -f

If this doesn’t work, Manjaro users can try disabling the previous display manager first:

sudo systemctl stop gdm
sudo systemctl disable gdm
sudo systemctl enable lightdm.service
sudo systemctl start lightdm

while on Arch Linux you might have to remove the /etc/systemd/system/default.target file, and create a display-manager.service file in the /etc/systemd/system directory. This new file should be a symlink to your new display manager’s service file in /usr/lib/systemd/system/.

Change the Display Manager on Fedora

Start by disabling the old display manager, enable the newly installed replacement, then reboot:

  • Run systemctl disable [old display manager]
  • Follow this with systemctl enable [new display manager]
  • Then reboot

When Fedora reboots it will be with a fresh display manager.

For PCLinuxOS

You should be able to select your new display manager from the desktop.

  • Open Control Center > Boot
  • Find Set up display manager
  • Select the display manager you installed earlier

If the system doesn’t acknowledge the changes, edit /etc/sysconfig/desktop and set the new display manager.

For openSUSE

To change the display manager in openSUSE, first download your replacement and confirm the installation location.

Next enter

sudo update-alternatives --set default-displaymanager \ [FILEPATH]

Prefer changing the display manager with a desktop tool?

  • Install yast2-alternatives
  • Open the Control Center
  • Browse to Display Manager
  • Set the new display manager

Your new display manager should activate on next reboot.

Change Your Linux Display Manager Today

As you’ve seen, replacing a display manager is not as hard as it sounds. Once you start reading more about their features, you might be tempted to test a few different display managers in search of the best one – and I encourage you to do so.

You don’t have to wait for software to “break” to try something new or to experiment with a new Linux desktop environment.

Read the full article: What Is a Linux Display Manager? How to Choose and Set One


from MakeUseOf https://ift.tt/2VyfxdX
via IFTTT

How to Use WhatsApp Web on PC: The Ultimate Guide

whatsapp-web-everything

WhatsApp Web offers a quick and easy way to read and reply to WhatsApp messages on your computer. It lets you use WhatsApp online from your browser. And in this guide we show you how to use WhatsApp Web on your PC.

What You Will Need to Run WhatsApp Web

Largely speaking, it’s a simple process and you’ll have the necessary items at hand. But for the sake of thoroughness, here’s the list.

  1. An Android phone or an iPhone with a working rear camera.
  2. A laptop or desktop computer with any modern web browser, like Google Chrome.
  3. An active internet connection for both your phone and your PC.
  4. The latest version of WhatsApp.

Download: WhatsApp for Android | iOS (Free)

How WhatsApp Web Works

How to Install and Use WhatsApp Web on any computer

WhatsApp Web does not have all the features of the mobile app. In fact, it can’t work without the mobile app. You will need your phone to connect to and use WhatsApp Web.

This is, in essence, a clone or a mirror of what’s happening on your phone. If a message comes to your phone, you’ll see it in WhatsApp Web. If your phone doesn’t get a message because it doesn’t have an active internet connection or it’s switched off, then you won’t see it in WhatsApp Web either.

This makes WhatsApp Web inferior to other chat apps, but in some ways, it also makes WhatsApp Web more secure.

How to Set Up WhatsApp Web

Once you have these elements ready, setting up WhatsApp Web is simple:

  1. Open the browser on your PC and go to web.whatsapp.com.
  2. You will see a QR code that you need to scan to connect to WhatsApp Web.
  3. On your WhatsApp mobile app, tap Menu > WhatsApp Web to start the QR code reader.
  4. Point your phone’s rear camera to the QR code on your PC screen.

As soon as WhatsApp Web scans the QR code, it will connect your phone to your PC. In a jiffy, WhatsApp Web and WhatsApp mobile will be synced. You are now ready to use WhatsApp online through the computer.

What You Can Do With WhatsApp Web

  • Use your keyboard to type.
  • Access media (photos, videos, audio) in-line. You can also download any media directly to your PC. However, you cannot bulk download all media files; you have to manually click each.
  • View videos from Facebook, Instagram, and YouTube without leaving the chat window, through Picture-in-Picture mode.
  • Start a new conversation with any contact, or search for existing conversations.
  • View contact information.
  • Start a new group chat, talk in group chats, and view group information.
  • Connect multiple computers to your phone and save them for future. You can also remotely disconnect any browser from your phone.
  • Get or mute desktop alerts and sounds.
  • Share photos and videos, documents, and contacts.
  • Send emojis, GIFs, and stickers, as well as voice notes.
  • View WhatsApp Status updates from any contact.
  • Select multiple messages, and clear messages.
  • Reply, forward, star, or delete messages.
  • Edit your profile.

What You Can’t Do With WhatsApp Web

  • You can’t send a WhatsApp Broadcast.
  • You can’t make or receive WhatsApp Voice calls or WhatsApp Video calls.
  • You can’t post new WhatsApp Status updates.
  • You can’t share maps or your current location.
  • You can’t change media download settings, so all photos and videos sent to you are downloaded automatically.
  • You can’t use two browsers at the same time. While you can add multiple browsers/PCs to your phone, you can only use one at a time.
  • Settings are limited to notifications through WhatsApp Web and chat wallpapers.

Using Multiple WhatsApp Accounts

You can use multiple accounts with WhatsApp Web on one computer

Some folks have two numbers associated with two different WhatsApp accounts. You can still control WhatsApp online for both on a single PC.

To do that, you will need to open WhatsApp Web in two different browsers, such as Chrome and Opera. Alternately, you can open WhatsApp Web in an incognito window, but that automatically logs you out after an hour.

What Makes WhatsApp Web Special

WhatsApp Web is special because of the keyboard, you can finally type fast

So why should you use WhatsApp Web when it’s more limited than the phone? Because of the keyboard, of course.

If you want to engage in long conversations with someone, it’s easier to type using a keyboard. In fact, WhatsApp Web also works with WhatsApp Business, and you’ll be glad that you can take care of multiple customers through it.

You can use keyboard shortcuts too. The most useful two to remember are Ctrl + Shift + [ to go to the previous chat, and Ctrl + Shift + ] to go to the next chat.

How Safe Is WhatsApp Web?

While it initially got some flak for its lack of security, WhatsApp now boasts end-to-end encryption for all of its messages. This extends to WhatsApp Web as well.

Still, it’s a good idea to employ the best security practices for WhatsApp and understand how safe your photos are in WhatsApp, whether you’re using it your phone or using WhatsApp Web. For example, if you have to use WhatsApp Web on a different computer, always open it through an incognito window.

How to Log Out of WhatsApp Web

How to log out of all devices connected to whatsapp web

If you are using WhatsApp Web on your own computer, you can stay logged in even when you are done. It’s convenient.

If you are using it on someone else’s computer, then remember to log out after you are done using WhatsApp online. It’s best to do this on both the computer and the mobile app.

  1. To log out of WhatsApp Web through your computer, go to Menu > Log out.
  2. To log out of WhatsApp Web through your phone, go to Menu > WhatsApp Web > Log out from all devices. As the name indicates, this will close WhatsApp Web on any computer you are logged in.

Once you log out, you will need to run the WhatsApp Web QR Code scan again to reconnect to the device.

WhatsApp Web Tips and Tricks

The more you know about WhatsApp Web, the more astounded you will be by what you can achieve with it. In fact, we prefer it to the official desktop apps for WhatsApp since WhatsApp Web is more feature-filled, and even offers extensions.

There’s also a clever hack that makes WhatsApp Web worth using. Through WhatsApp Web, you can actually read your WhatsApp messages without marking them with blue ticks. It’s a sneaky one, but if you want to learn how to do that and more, check out our list of WhatsApp Web tips and tricks everyone should know.

Read the full article: How to Use WhatsApp Web on PC: The Ultimate Guide


from MakeUseOf https://ift.tt/2nODOOQ
via IFTTT

The Best Cheap Webcam Alternatives Until Prices Drop

webcam-alternatives

The COVID-19 pandemic sent the prices of certain bits of PC hardware spiraling. Webcams were one of the first items to begin selling out. People working from and those wishing to stay in video contact with family quickly cleared webcam stocks at the most popular online retailers.

The result is a webcam market filled with questionable brands, high prices for webcams, and a lack of stock at regular stores.

However, you don’t need a dedicated webcam. You probably have a webcam alternative in your home, waiting for use. So, here are the best webcam alternatives until the prices return to normal!

How to Use a Smartphone or a Tablet as a Webcam

UBeesize Adjustable Camera Stand Holder UBeesize Adjustable Camera Stand Holder Buy Now On Amazon $19.98

Let’s start with the easiest option—using your iPhone or Android device as a webcam. There are numerous apps available to both platforms that convert your smartphone camera into a handy webcam.

As many smartphones now come equipped with powerful cameras, you’ll get a clear image for your video calls. Check out how to use your iPhone as a webcam or how to use your Android device as a webcam for detailed instructions.

One thing that will make using your smartphone as a webcam easier is a tripod or mount. The UBeeszie Adjustable Camera Stand Holder is a basic smartphone and camera mount. It won’t change your life, but it will keep your smartphone stable on your desk during a meeting or family voice call, which is perfect.

How to Use a DSLR as a Webcam

Using a DSLR as a webcam requires a little bit more work than the smartphone option. The plus side is that you’ll have one of the best webcam streams around, unrivaled in quality amongst your co-workers and family.

There are two options for using a DSLR as a webcam. One uses software and is relatively plug and play. The other uses an external capture card to convert the HDMI output of the DSLR into a streamable USB signal output.

1. Using a Nikon or Canon DSLR as a Webcam with SparkoCam

SparkoCam features list

If you own a Nikon or Canon DSLR, you can use SparkoCam, a webcam and video effects tool for Windows. SparkoCam is freeware, although the free version will add a large SparkoCam logo to your video output.

There are various SparkoCam licenses, which you should check out before committing. For example, you can purchase a Standard License for both camera types for $69.95, which includes one year of upgrades. There are also licenses available for just Canon or Nikon cameras.

On to the software itself. SparkoCam offers support for a range of Nikon and Canon DSLR models (full list). If your camera model is not on the list, it is highly likely it will not work with the software. This is due to limitations with some older DSLR models.

SparkoCam is easy to use. You connect your DSLR to your computer via a USB cable, then select the corresponding model in the software. Once SparkoCam recognizes your camera, you can adjust the resolution and other features.

Now, there is one important thing to note before purchasing SparkoCam. The output frames per second appear to fluctuate, with some users noting that they could not create video at more than 30 frames per second.

However, this is more likely an issue with USB 2.0 devices, rather than the software. And for the most part, 30FPS is absolutely fine for a family video chat or meeting with colleagues.

The other thing to consider is that SparkoCam does not use the microphone on your DSLR. You will need to use a separate microphone. SparkoCam is available to Windows only. Furthermore, at the price point, it is most of the more expensive solutions. However, it is an option, nonetheless.

2. Using a Canon DSLR as a Webcam with EOS Webcam Utility Beta

Canon DSLR users can opt for the EOS Webcam Utility Beta, which turns your compatible Canon camera into a high-quality webcam.

The software is in beta, so there are potential bugs and other glitches that could affect performance. Furthermore, we haven’t tested the software with a Canon DSLR. Still, the software looks decent enough, and Canon is specifically marketing this new software in response to the COVID-19 pandemic to help make communication easier.

Check out the above video for a tutorial on setting up EOS Webcam Utility Beta. Like SparkoCam, the EOS Webcam Utility Beta is available to Windows only.

3. Using a DSLR as a Webcam on Linux

The previous two options were all about Windows. But what if you use Linux and you want to use your DSLR as a webcam? Well, the libgphoto2 project takes care of that. The video above is a detailed tutorial on how to use your DSLR as a webcam on Linux with libgphoto2.

Using a DSLR as a Webcam with a Capture Card/Device

If none of the software options work with your DSLR, you’ll need an external capture card. An external capture card is a special video device that turns your HDMI input into a streamable output, usually via a USB cable.

There are several excellent capture cards on the market. Most are extremely easy to use, too. However, one thing to note is that the capture card market is also experiencing fluctuations due to COVID-19.

1. AVerMedia Live Gamer Mini

AVerMedia Live Gamer Mini AVerMedia Live Gamer Mini Buy Now On Amazon $87.35

The AVerMedia Live Gamer Mini offers plug and play connectivity if you want to use your DSLR as a webcam. Furthermore, there is Full HD recording, hardware encoding, and zero-latency passthrough up to 1080p at 60FPS (1080p60).

You also have the option of using AVerMedia’s RECentral streaming software, which adds additional streaming and overlay options.

2. AVerMedia AVerCapture LGP Lite

AVerMedia AVerCapture LGP Lite AVerMedia AVerCapture LGP Lite Buy Now On Amazon $74.25

The slightly smaller cousin to the Live Gamer Mini, the AVerMedia AVerCapture LGP Lite is a handy plug and play capture card that lets you use your DSLR as a webcam.

Like the Live Gamer Mini, the LGP Lite allows Full HD recording and 1080p60 video passthrough. There’s also the handy capture card button you can use for one-click recording.

3. MiraBox Capture Card

MiraBox Capture Card MiraBox Capture Card Buy Now On Amazon $125.99

The MiraBox Capture Card is a USB 3.0 capture card that works well with DSLRs. It offers Full HD playback with 1080p60 video passthrough, and is compatible with Windows, macOS, and Linux. It is completely plug and play and will work with your Xbox One, PS4, and Nintendo Switch, too.

4. BlueAVS Capture Card

BlueAVS Capture Card BlueAVS Capture Card Buy Now On Amazon $39.99

The BlueAVS Capture Card is a basic but effective capture card option. You can connect a wide range of media options to the BlueAVS Capture Card and stream directly to your computer.

You should note that this is a USB 2.0 capture card, rather than USB 3.0. This means that you will not stream video from your DSLR at more than 30FPS. Again, that isn’t much of an issue for video calls with your friends and family, but something you should consider if you want a higher fidelity video stream.

5. Elgato Cam Link 4K

Elgato Cam Link 4K Elgato Cam Link 4K Buy Now On Amazon $126.43

The Elgato Cam Link 4K is one of the easiest ways to use a capture card with your DSLR as a webcam. You connect your DSLR to the Elgato Cam Link 4K with an HDMI cable and insert the capture card into a USB port on your computer. You can then select your DSLR for video calls, as well as other video recording tools.

Unfortunately, the Elgato Cam Link is sold out at many retailers, while the price on some sites is clearly double the usual retail price. So, while the Elgato Cam Link 4K is an excellent option, you could save money by waiting until the price returns to normal.

Are These the Best Webcam Alternatives?

For the time being, while the webcam market is unsettled and prices fluctuate, using a webcam alternative is a great option. You can use your smartphone or tablet as a webcam for a quick and easy alternative. Or, if you want greater video quality, you can use a DSLR camera as a webcam alternative.

Webcams won’t remain sold out forever. The demand for new webcams will stabilize, especially as the COVID-19 pandemic begins to ease around the world. Until then, try one of the webcam alternatives.

Oh, and if you have more than one webcam or additional camera, why not try using multiple webcams for your video calls?

Read the full article: The Best Cheap Webcam Alternatives Until Prices Drop


from MakeUseOf https://ift.tt/2ZqlVVF
via IFTTT

How to Find Your Router’s IP Address?

router-ip-address

While your router’s IP address isn’t need-to-know information on most days, there will be times you need to have it on hand.

For example, you may need it for changing settings on the device via its web-based control panel. And while it’s simple enough to get this information, many people aren’t sure exactly where to start—especially when it comes to different operating systems.

Whether you’re on your PC or a mobile device, here’s how to find your router IP address on different platforms…

What Is My Router IP Address For?

While some routers use text-based URLs, many use an IP address that you can use in your browser to access the device’s admin panel. In this panel, you can change settings, install firmware updates, troubleshoot issues, and configure your preferences.

You can find out more information on how to access your router in our guide on the topic.

Many routers in a private network use the default IP address 168.192.168.0.1 or 192.168.1.1. If your router doesn’t use these specific default addresses, it will still most likely use one starting with 192.168.x.x.

However, the only way to know your router’s IP address for sure is to directly check it through a connected device like your computer. Otherwise, you’ll be stuck typing in all the variations of common router IP addresses until you get it right.

That might take a while.

Finding out what your router’s IP address is is pretty simple, but steps differ depending on the OS of your PC or mobile device. See our short tutorials below on how to find this IP address on various platforms…

How To Find Your Router IP Address on Windows

There are two main ways to find your router IP address on Windows—using Windows PowerShell or by visiting the Network and Sharing Center in your Control Panel.

Windows PowerShell

router ip address windows powershell

The simplest way to find your router IP address on Windows is by using Windows PowerShell.

Right click Start to find Windows PowerShell and type in ipconfig. Press Enter and various IP addresses will appear.

You will find your router’s IP address next to Default Gateway.

Control Panel

windows control panel

Another way to find your router’s IP address on Windows is to use the Control Panel.

Open your Control Panel and go to Network and Internet > View network status and devices.

This takes you to the Network and Sharing Center, which shows you the network you are connected to.

Next to Connections, you will see blue text that describes your network connection type—such as Wi-Fi or Ethernet. Click on this text.

network and sharing center windows

This opens a small status window with information about your connection. Next, select the Details button.

connection status windows

An additional popup will appear with more details about your connection. Next to IPv4 Default Gateway, you will see your router’s IP address.

network connection details router ip address windows

How to Find Your Router IP Address on macOS

To find your router IP address on macOS, head to your System Preferences and select Network.

system preferences macos

This opens a window with your available network connections. Select your internet connection and then the Advanced button near the bottom right corner of the window.

macos network window

In this window, select the TCP/IP tab. Here you will find your router’s IP address next to Router, under Subnet Mask.

router ip address macos

How to Find Your Router IP Address on Android

While there are Android apps that can identify your router’s IP address, it’s easier and safer to just check it yourself in your network settings.

The exact wording of menu options may differ depending on your brand of Android smartphone, but the basic process is the same.

To find your router IP address on Android, go to Settings and select the wireless/connections/network menu.

Then, select the network you are currently connected to and access additional or advanced settings. You can do this by holding down on the network name (Huawei P40 Lite) or selecting the cog icon (Samsung Galaxy S20 Ultra).

wi-fi settings samsung android

In these advanced settings, switch the IP settings from DHCP or dynamic to Static. Your router IP address will then show up under Gateway.

router ip address on samsung android

You don’t have to save this new setting since you now have the information you need. Switch back to a dynamic IP address or exit without saving to avoid the disadvantages of static IP addresses.

Find Your Router IP Address on iOS

Finding your router’s IP address on iOS couldn’t be simpler. Go to Settings > Wi-Fi and select your current network.

This shows you more details and settings about your Wi-Fi connection. Check the section detailing your IPv4 address and you’ll find your router’s IP address next to Router.

find router ip address ios

How to Find Your Router IP Address on Linux

The user interfaces of different flavors of Linux can vary, but it’s relatively easy to check your router’s IP address on the OS.

Just click on your network icon and select Connection Information or Network Settings in the dropdown menu. This will open up a window with details about your current network. In some desktop environments, you can simply hover the mouse over the network icon.

(please add screenshot here Christian)

You’ll find your router’s IP address next to Default Route or Default Gateway.

Check your router's IP address in Linux

There are ways to find your router IP address in Linux with terminal commands, but the exact commands differ depending on your chosen distro.

Learn More About Your Router

Now you know how to find your router IP address on a variety of platforms. But there’s a lot more you can learn about your router.

Why not read about ways to improve your router speed? From reboot schedules to setting tweaks, there are a variety of simple ways you can make your router’s connection faster without replacing the entire device.

Read the full article: How to Find Your Router’s IP Address?


from MakeUseOf https://ift.tt/2VxgP9a
via IFTTT

Boost Your Mind, Body, and Soul With This Bundle of Learning Apps

We all know that one person who speaks multiple languages, earns endless promotions at work, and owns the perfect body. Deep down, you are probably a little bit envious of their abilities. But in truth, anyone can adopt this dream lifestyle with a little effort. To put you on the right path, the Superhuman Lifetime Subscription Bundle offers five top-rated learning apps. You can get it now for just $79 at MakeUseOf Deals.

Mind, Body, and Soul

Covering a range of life skills, this bundle brings together some of the best apps currently available.

To kick things off, you get lifetime access to uTalk. Trusted by over 30 million users, this app offers 180 hours of training on 60 different topics. You learn real-world vocabulary, and you can even study offline.

A former Apple App of the Day, MindFi helps you relax and focus through guided meditation. The sessions only take 10 minutes, and they include powerful haptic breathing exercises.

Also in the bundle, Fitterclub offers personalized nutrition and workout plans, while 7 Speed Reading helps you read up to 3.471 times faster. In addition, you get lifetime access to Integrity Training — an online library of more than 600 professional courses.

Save Over $2,800

Lifetime access to all five apps would normally cost you $2,957.99, but you can grab the bundle now for just $79.

Read the full article: Boost Your Mind, Body, and Soul With This Bundle of Learning Apps


from MakeUseOf https://ift.tt/2VuHmEc
via IFTTT

6 Apps to Read or Listen to the Best Free Short Stories Online

Reading Short Stories

A lot of people want to cultivate the habit of reading regularly. Start small with the best free short stories on these websites and apps, and work your way upwards.

Short stories are a gateway drug to the world of literature. In fact, most respected authors have a collection of short stories that are, at times, more entertaining than their larger works. Even for amateur writers, novels might be too daunting but short stories are more doable.

So the internet now has a storehouse of great short stories, from famous and unknown writers, that these apps have curated for your reading pleasure.

1. Storypony (Web): Community of Varied Short Stories

Storypony is a community to read and write free short stories across categories

Storypony is a community for short story writers and readers. Each story has a maximum of 10,000 words, with most being around five to fifteen minute reads. The editors are particular about only accepting finished works and not chapter-by-chapter stories, so as a reader, you know you aren’t going to be left on a cliffhanger.

As you might expect, Storypony categorizes the short stories in genres like crime, drama, humor, fantasy, adventure, mystery, and so on. You can browse the most-voted, most-viewed, or most-recent submissions in any category, or go through the trending stories in all submissions.

Each story has its own comments page to discuss it with the author. Many of these short-story websites focus more on building a community, which eventually leads to a mutual admiration society. So far, Storypony seems like it hasn’t devolved into that, and the articles are picked on merit.

2. Bungo Search (Web): Filter Project Gutenberg by Time Taken to Read

Filter short stories on Project Gutenberg by time taken to read at Bungo Search

Some of the world’s greatest authors have written incredible short stories, including the likes of O. Henry, Sir Arthur Conan Doyle, and Edgar Allen Poe. After the copyright period expires on these, you can read them for free on Project Gutenberg. Bungo Search is a new web app to filter titles on Project Gutenberg by reading time.

The length of the short story is up to you, with the options being 5 minutes, 10 minutes, 30 minutes, one hour, two hours, or three hours. This reading time is based on the average person reading 300 words per minute. To choose the title, Bungo Search gives you the name of the short story and the author’s name, along with an excerpt of the beginning and its popularity on Project Gutenberg.

Bungo Search also adds the NGSL percentage, an excellent tool for those trying to learn English by reading. NGSL, or New General Service List, is a collection of 2800 words seen as an integral core of the English language. The higher the NGSL percentage of a story, the more easily you’ll pick up the language. For experienced English readers, a high NGSL usage also means that you’ll read the story quickly, without looking up words in the dictionary constantly.

3. The Short Story Project (Web, Android, iOS): Classic and Translated Short Stories

The Short Story project has a fantastic collection of translated classic short stories from different languages and regions

The Short Story Project finds little pieces of fiction worth reading from myriad sources: original publications, translated works from other languages, and a retelling of the classics. The mobile apps are especially great at collecting the pieces you want to read.

Translation is a central focus of The Short Story Project, which in itself opens up the world to so many more stories. Through categories like Latin, Arabic, German, Russian, and Israeli literature, you’ll come across fiction that breaks barriers. Yes, it’s available to read in English, and while the language might not be perfect all the time, it’s good enough to enjoy the new flavor of different worlds.

Each short story has an estimated reading time and a short description before you dive in. The project features audio retellings of classic English short stories too. Some of the stories and features are behind a paywall, but the bulk of free offerings on The Short Story Project are enough to enjoy it.

Download: The Short Story Project for Android | iOS (Free)

4. 1001 Classic Short Stories & Tales (Podcast): Soothing Narrations of the Classics

Jon Hagadorn's podcast offers a soothing narration of 1001 Classic short stories and tales

Narrator and podcast specialist Jon Hagadorn has a free podcast full of classic short stories and tales. Hagadorn, known for his “1001 Stories” podcast series on horror, history, and other genres, brings the classics to life with his inimitable narration style.

Hagadorn’s voice is the selling point of this podcast. He doesn’t have the deep voice you’ve come to expect from movie trailers or audiobook narrations. Nor does he act out different characters or situations to add flavor. It’s a humble retelling in a clear and endearing voice, which puts the story in the forefront. And after all, you’re here for the story, right?

The 1001 Classic Short Stories & Tales podcast releases a new episode every week. So far in its 200-episode run, it has already covered Agatha Christie, H. P. Lovecraft, Anton Chekov, Bram Stoker, and other literary giants. It’s a soothing podcast to listen to before you doze off.

Subscribe: 1001 Classic Short Stories & Tales podcast on Apple | Stitcher | PlayerFM | Megaphone RSS Feed

5. Short Story Award (Web): The Best Contemporary Short Stories

The Sunday Times Short Story Award is a great way to discover contemporary authors and the best short stories in the 2010s

The Sunday Times Short Story Award, ongoing since 2010, offers a massive prize of 30,000 British pounds to the best short story of the year. All stories are under 6,000 words, and surprisingly, many of them are available for free online.

The Short Story Award makes you work for it though. It’s easy to browse all nominations dating back to 2010. But you won’t find an easy link to go read any nominated story. Instead, you’ll have to type the author and story title in Google and find a free place to read it at. The 2020 and 2019 list’s stories aren’t all free, but go back a few years, and you’ll find that those stories are now freely available online.

The award is a nice way to find new authors spinning short stories that are relevant for current times. While it’s great to read the classics, some contemporary literature is going to be a future generation’s classic, so why wait to read it?

6. Shortly (Android, iOS): Curated Short Stories From Reddit

Reddit’s r/writingprompts community is an excellent place to discover new short stories every day. Shortly takes the best stories from that forum and turns it into a pleasurable reading experience.

You can sort stories on Shortly by reading time, namely one minute, three minutes, or five minutes. It’s a gorgeous reading interface too. We’ve talked in more detail about Shortly in previous articles like apps to discover Reddit’s best posts and recommendations.

Download: Shortly for Android | iOS (Free)

Read More Free Short Stories

If you enjoy fanfiction, you’ll find websites catering to your favorite franchise, whether it’s Star Wars, the Marvel Cinematic Universe, or anything else. There are even people who turn short stories into tweets or tell fiction over text messages.

When it comes to free short stories, this is only the tip of the iceberg, folks. Try a few of these other free apps to read quick, short stories, and then do a Google search to find your niche.

Read the full article: 6 Apps to Read or Listen to the Best Free Short Stories Online


from MakeUseOf https://ift.tt/3dKYV9c
via IFTTT

7 WhatsApp Web Tips and Tricks All Users Should Know

whatsapp-web-tricks

WhatsApp Web is the easy way to use WhatsApp on any computer in the world, as long as you have your phone to sign in. Once you know how to use WhatsApp Web on your PC, these tips and tricks will make WhatsApp Web even better.

Now that you know the basics of using WhatsApp Web, including what it can and can’t do, it’s time to enhance WhatsApp Web with some simple tips and tricks…

1. Learn WhatsApp Web’s Keyboard Shortcuts

keyboard shortcuts for WhatsApp Web

In order to take full advantage of using WhatsApp Web on your computer, you need to learn some keyboard shortcuts. These can make you a typing ninja who does everything a bit faster. Here’s a list of keyboard shortcuts that work in WhatsApp Web:

  • Ctrl + N: Start new chat
  • Ctrl + Shift + ]: Next chat
  • Ctrl + Shift + [: Previous chat
  • Ctrl + E: Archive chat
  • Ctrl + Shift + M: Mute chat
  • Ctrl + Backspace: Delete chat
  • Ctrl + Shift + U: Mark as unread
  • Ctrl + Shift + N: Create new group
  • Ctrl + P: Open profile status

Apart from these, you can also employ all of the universal Windows keyboard shortcuts, such as Ctrl + Shift + Equals to zoom and enlarge text. The same goes for Mac keyboard shortcuts too, of course.

2. Type and Search Emojis With a Keyboard

Instant messaging feels incomplete without emojis. But it takes forever to change from the keyboard to the mouse, click the emoji icon next to the text box, and then find the right emoji. There’s a faster WhatsApp Web trick for keyboard warriors.

While in the regular text box, type colon (Shift + ;/: Key) followed by the first two letters of the emotion you want to express. You will get a prompt of matching emojis that change with each letter you type.

:th will show this:

add emojis quickly in WhatsApp Web

:thu will show this:

type a colon followed by letters to see emoji previews in WhatsApp Web

Use the keyboard’s arrow keys to switch back and forth between the emojis displayed. Press Enter to accept.

You can also access the emojis, stickers, and GIFs button by pressing Shift+Tab when in any chat window. This will highlight the emoji icon, so press Enter to bring up the emojis, stickers, and GIFs menu. Press Tab and Shift+Tab to cycle through the three choices. Navigate within their menu with the arrow keys.

It’s a much faster way to type, and it will help if you familiarize yourself with the emoji to English dictionary.

3. Auto-Change Emoticons to Emojis (or Not)

Whatsapp Web auto-changes a set of text emoticons to emojis as a great keyboard shortcut

Some emojis don’t need the colon-and-type trick above because one of the best features of WhatsApp Web is to auto-convert them from the classic text emoticons. A helpful redditor extracted the full list of auto-converted emoticons, pictured above.

Again, learning these WhatsApp Web shortcuts for the keyboard will make your typing much faster if you practice them regularly.

That said, this auto-conversion can be annoying for some people, so there’s an easy fix to keep them as emoticons. All you need is a userscript called WhatsApp Emoticon Preserver.

  1. Install Tampermonkey, a cross-platform userscript manager, on your browser of choice.
  2. Go to WhatsApp Emoticon Preserver.
  3. Click the blue Install button.
  4. Refresh the WhatsApp Web tab in your browser.

Please note, this will show emoticon characters on your screen, but the recipient will still see them as emojis.

4. Use Multiple WhatsApp Accounts on the Same PC

How to use multiple WhatsApp Web accounts on your computer at the same time

Some people have two phones with separate WhatsApp accounts, or maybe you use a dual-SIM phone with multiple WhatsApp apps. If you want to run two WhatsApp Web accounts on your computer, you can’t just open two tabs in Chrome and sign in separately.

The best WhatsApp Web trick to use multiple accounts is to open an incognito window or different browser. So if you have one account signed into Chrome, start a new window in Incognito Mode, or fire up a second browser and go to WhatsApp Web through that. Log in as you normally would, using your other account to read the QR code.

In Incognito Mode, you can use WhatsApp Web for an hour before it automatically logs you out.

5. Read Messages Without Blue Tick Notifications

Use this WhatsApp Web trick to read messages without the blue ticks to notify the other user

As long as you have those blue tick marks enabled, people can see the exact time you read their text. You can switch off Read Receipts on your phone if you want to disable this, but there’s a cool WhatsApp Web trick to get around this.

If you are talking with someone on WhatsApp and want to read their messages without them getting a read receipt, here’s what you do:

  1. Open the chat in your WhatsApp Web window.
  2. Open a Notepad file (or any other window), and change its size so that you can see the full WhatsApp Web chat in the background.
  3. Click in the Notepad file and keep your cursor there. This is the critical step, as the computer thinks you are working in a different window.
  4. Messages will load in the background chat window, which you can see, without being marked as read with the blue ticks. Right now, they will be double grey ticks, meaning the messages are received by you, but not read.
  5. When you’re OK with marking them as read, click the WhatsApp Web chat window and those ticks will instantly turn blue.

The limitation of this method is that you can only read the content of one chat at a time. But how often do you really need to use this WhatsApp Web trick anyway?

6. Get WAToolkit Extension for Message Previews

WAToolkit is a Chrome Extension that makes up for missing WhatsApp Web features

In WAToolkit, Chrome users have an excellent extension to add extra features to WhatsApp Web. It adds two cool tricks to built-in WhatsApp Web features, including one that lets you again read conversations without triggering the Read Receipt.

  1. Background Notifications: When you get a new message in WhatsApp, you no longer need to switch to the WhatsApp Web tab to read it. The WAToolkit icon’s badge shows how many unread messages you have. Hover over the icon and you’ll be able to preview the messages, without registering them as having been read in your main chat.
  2. Full-Width Chat Bubbles: By default, WhatsApp doesn’t stretch a person’s chat bubble across the full width of the chat window. That’s why you get multi-line texts when it would easily fit in a single line of your wide desktop window. WAToolkit fixes this by changing the text bubbles to full-width.

Remember, you can also use Google Chrome extensions in Opera and other browsers.

Download: WAToolkit for Chrome (Free)

7. Enable Dark Mode for WhatsApp Web

Dark WhatsApp Web extension for Chrome enables and disables Dark Mode for WhatsApp Web in one click

Dark Mode is a hidden WhatsApp Web feature that the company hasn’t yet launched to the public. You will find articles online about how to change the code in a browser tab to enable Dark Mode, and it’s not too hard, but might seem daunting for some.

But the easier way is to download the Dark WhatsApp Web extension. It’s a neat WhatsApp Web shortcut to implement exactly what the code changes bring about, but without all that hassle. With one click, you can switch Dark Mode on and off in WhatsApp Web.

Download: Dark WhatsApp Web for Chrome (Free)

You Can Also Use WhatsApp Web on Apple Devices

All of these tips and tricks require you to use WhatsApp Web on a desktop computer, ideally through the Google Chrome web browser.

However, you can also trick your Apple devices into working with WhatsApp Web, so here’s how to use WhatsApp Web on your iPad.

Read the full article: 7 WhatsApp Web Tips and Tricks All Users Should Know


from MakeUseOf https://ift.tt/2tTBOnO
via IFTTT

How to Get Someone Off Your Best Friends List on Snapchat

hide-friends-snapchat

Snapchat is the go-to social media platform for many people between the ages of 13 and 25. Although Snapchat has stolen some of its glory in recent years.

The app lists your contacts in the Send To function, and right at the top, you’ll find your “Best Friends”. But what does Best Friends mean on Snapchat? Can anyone else see who you’re friends with? And how can you get someone off your Best Friends list on Snapchat?

In this article, we explain all of this and more, helping you figure out Snapchat’s Best Friends feature once and for all.

How Does Snapchat’s “Best Friends” Work?

Your Best Friends list on Snapchat keeps track of the people you chat with most often. It appears at the top of your main friends list, making those users more accessible when you’re sending a new snap.

But how does Snapchat calculate who your Best Friends are? It’s pretty simple.

You may have noticed that every user has a Snap Score—a measure of the total number of Snaps sent and received since joining. A similar score is assigned to individual conversations between you and your friends. The more you chat with a particular person, the higher your friendship score becomes.

To determine your Best Friends list, Snapchat analyzes these scores and lists the friends you chat with the most, in order of your friendship score.

What Do Snapchat’s “Friend Emojis” Mean?

hearts emoticon snapchat mean Best Friends

How can you tell who your Snapchat Best Friends are? Most importantly, they’ll appear at the top of your Send To screen. You can also click on your profile (the circle to the top-left of your interface), then My Friends, and your Best Friends are listed at the top.

When you swipe to your Chat screen, you’ll see your contacts listed alongside emojis. These show your Best Friends too.

Here’s what some of them mean:

  • Baby: You’re new friends.
  • Double pink heart: This is your #1 Best Friend; you’ve also been their #1 Best Friend for at least two months.
  • Red heart: You’ve been each other’s #1 Best Friend for two weeks.
  • Gold heart: You’re each other’s #1 Best Friend, albeit for fewer than two weeks.
  • Smile: Your Best Friends, though not your #1 Best Friend.
  • Fire: This appears when you’re on a “Snapstreak,” along with the number of consecutive days you’ve snapped each other. Learn about Snapstreaks and how to get a lost one back.

Emojis are also used by contacts in Snaps and Chats. If you use the service, you need to understand the meanings of Snapchat emojis.

Best Friends on Snapchat: Your Questions Answered

Before we show you how to get someone off your Best Friends list, let’s cover some of the related questions you may have about the feature.

Can Other Users See Your Best Friends List on Snapchat?

You might be concerned about privacy and want to know how to hide Best Friends on Snapchat. But don’t worry: no one else can see who you’re friends with on the app.

Others used to be able to see Best Friends lists. For instance, a smirking emoji showed when you’re someone’s Best Friend, but they’re not one of yours.

Fortunately, Snapchat saw the light and deleted this feature. Beware: the “Oops” and “Smiling-Face-With-Sunglasses” smileys still indicate shared Best Friends.

How Many Best Friends Can You Have on Snapchat?

You can have up to eight Best Friends.

Some only have one or two. Others converse with so many people, the Best Friends emojis shift between contacts daily.

How Can You Make Someone Your Best Friend on Snapchat?

You can’t specifically “set” someone as your Best Friend. Snapchat’s algorithm works by analyzing who you converse with most.

If you want someone to be your Best Friend on Snapchat, send them lots of Snaps and Chats! Of course, you should make sure the feeling’s mutual—there’s little point in bombarding someone with Snaps if it’s just going to annoy them.

And while one user might be your Best Friend, that doesn’t mean you’re necessarily theirs.

How To Remove Snapchat Best Friends

Remember, only you can see who your Best Friends are anyway. Nonetheless, you might still want to remove Best Friends from your Snapchat. It can be easy, but it depends on how frequently you Snap or Chat to them. You used to be able to block someone and then add them again, but this method no longer works.

You have three options.

How to Delete Friends on Snapchat

The first is to remove that friend entirely. This might be because of a break-up, and you don’t want to be reminded of them every time you open the platform.

Open the Chat function, to the left of your camera interface. Then click on the vertical ellipsis at the top-right of your screen, and tap either Remove Friend or Block.

Remove Friend is a temporary option: it’s easy to undo and they can still message you. Block is more permanent—this option will remove them from your Best Friends list, and indeed the app overall.

That user will no longer be able to see your Snap Score, so may presume they’ve been removed or blocked. And here’s how to tell if someone blocked you on Snapchat.

How to Get Rid of Your Best Friends on Snapchat

This isn’t ideal, but since Snapchat removed the loophole that let you block then add users again, it’s the only way. You’ve got to use the algorithm to your own advantage.

How? You need to send fewer Snaps and Chats to the person you don’t want listed as a Best Friend any more. Prioritize someone else.

So how long do the Best Friend emojis last on Snapchat? This depends largely on how many contacts you have and how many you talk to frequently.

If you know very few people on Snapchat, sending one Snap might mean they instantly become your Best Friend. If you know lots of people and have numerous Snapstreaks going, you’ll probably have many Best Friends.

How to Hide Best Friends on Snapchat

The third option disguises who your Best Friends are. Let’s posit that someone you know often checks your smartphone and wants to know who you’re regularly in contact with. You should really implement better security, but perhaps you don’t want to lock someone out of your phone completely.

There’s nothing you can do to hide Best Friends on the Send To screen, but you can mask it on the Chat screen (which someone else is most likely to check).

You can hide who your Best Friends are by changing the related emoji.

Open your profile then click the cog icon in the top-right. iOS users should go to Manage > Friend Emojis then click on whichever field you want to toggle. These include Super BFF, BFF, Besties, and BFs. You can change the emoji to whatever you want, as long as two fields don’t share the same one.

Android users can do this by clicking on Customize Emojis, also found after clicking on the cog icon.

Don’t Worry About Being Best Friends on Snapchat

Knowing you’re not someone’s Best Friend on Snapchat shouldn’t concern you. Maybe you just don’t talk enough on the app, but that doesn’t mean you’re not good friends in real life. After all, Snapchat’s Best Friends feature doesn’t account for SMS, messaging platforms, or face-to-face conversations.

Nonetheless, plenty of people take Snapchat seriously. So, if you use the service, you should at least learn some common Snapchat terms, to familiarize yourself with the lingo.

Read the full article: How to Get Someone Off Your Best Friends List on Snapchat


from MakeUseOf https://ift.tt/2NGc3BP
via IFTTT