Friday 31 January 2020

Gateron’s Mechanical Switches for 2020: Waterproof, Magnetic, and Low-Profile

gateron 2020 switches displayed on a table

Gateron, a top-tier manufacturer of mechanical switches for keyboards, announced their newest and greatest products for 2020: a range of colored switches which include magnetic, low-profile, waterproof, tactile, linear, and clicky options. Most are simply upgrades of their 2019 models but a handful are entirely new technologies.

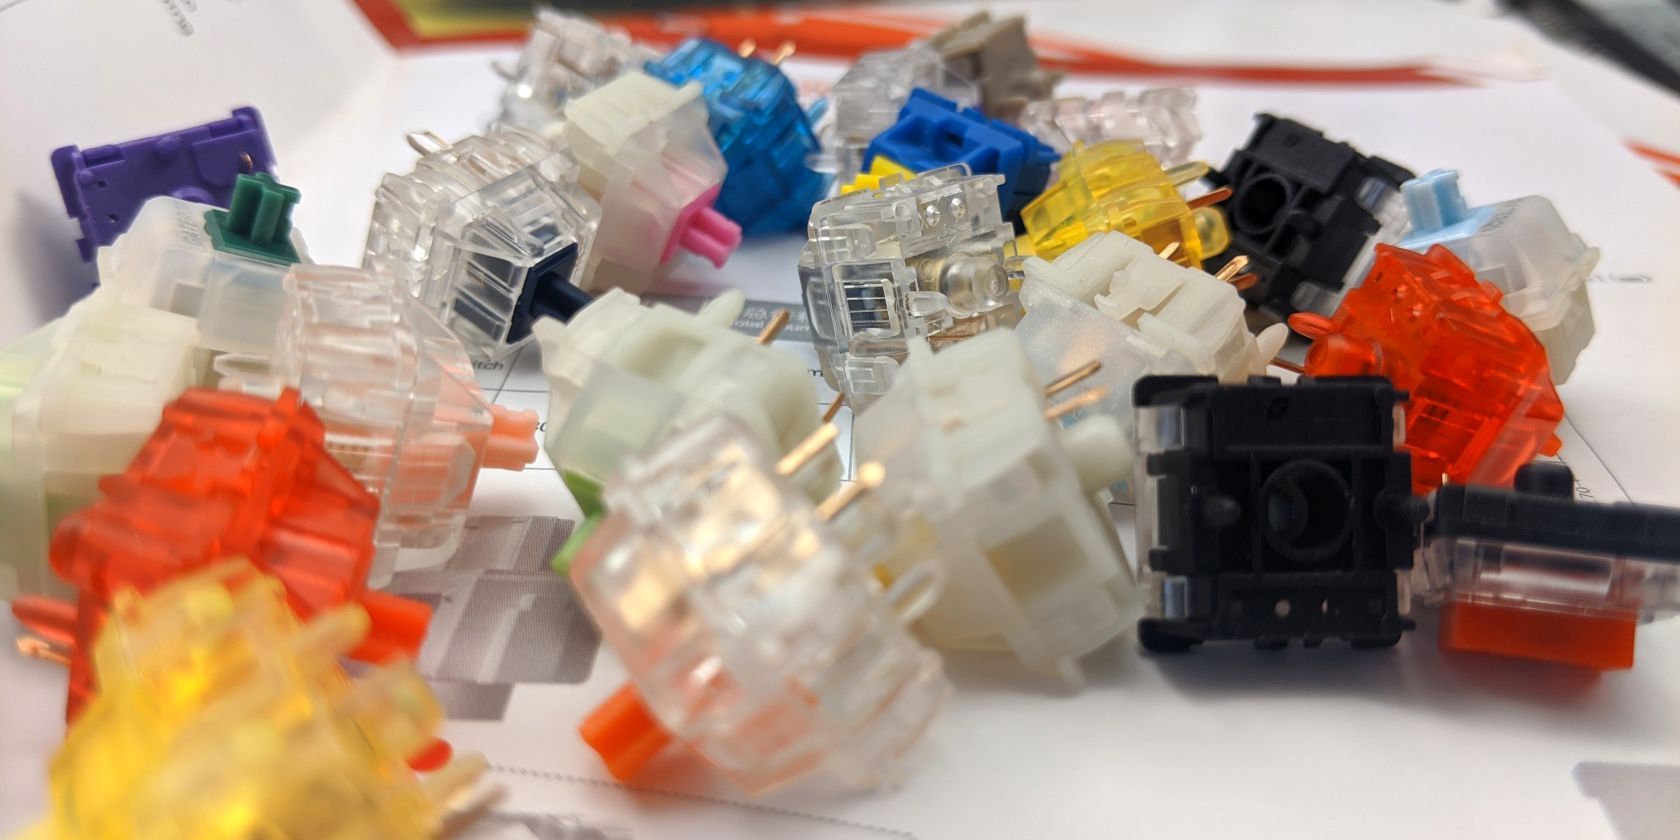
Gateron provided me with a grab-bag of their old and new switch options. This very brief summary will cover Gateron’s new switch options and how they compare to already announced products from their competitors at Cherry.

The 2020 Gateron Lineup

The current Gateron lineup includes magnetic, waterproof, and low-profile switches, which require special Printed Circuit Boards (PCBs) in order to work. In other words, magnetic, waterproof, and low-profile switch technologies are not compatible with the Cherry-MX standard which dominates today’s keyboard market. However, the magnetic and waterproof switches will work with Cherry-MX key-cap stems.

Gateron Low-Profile KS-21 Switches

gateron low profile red switch

Gateron’s newest switches include three special low-profile switches which come in Blue, Brown, and Red. As with Cherry’s color-nomenclature, they are as follows:

  • Brown: tactile, 2.5mm travel, 1.5mm actuation, 50g force
  • Blue: clicky, 2.5mm travel, 1.5mm actuation, 52g force
  • Red: linear, 2.5mm travel, 1.5mm actuation, 45g force

The new switches will compete against Kailh’s Chocolate line of low-profile switch and Cherry’s similarly slender competitors. To be honest, I cannot tell the difference between Kailh and Gateron. In dimensions, the Gateron low-profiles come in at 8.3mm height from the top of the stem to the bottom of the switch housing. The plastic PCB anchor is another 2.6mm in height (total height of 10.9mm). Gateron’s offering comes in at 0.10mm longer, equivalent to the Kailh Chocolate switches. Cherry advertises a height of 11.9mm.

While Gateron’s Cherry-clones generally, depending on the model, feel smoother and less scratchy than products from Cherry and Kailh, its low profile options seem virtually identical to the Kailh Chocolate switches. But that’s not bad. The low-profile keys are rattle-free designs as they incorporate box housing for their key caps. In face, going off the measurements, it appears that Gateron also supports Kailh’s key caps while sticking to the same pinouts as Cherry’s low-profile standard. In other words, the KS-21 is compatible with the same boards as Cherry’s low-profile switches but cannot use Cherry-MX key caps. Instead, it requires Kailh Chocolate key caps.

gateron low profile red side view

Gateron Magnetic KS-20 Switches

gateron magnetic switch displayed fro the bottom

Gateron’s magnetic switches (model number KS-20) will bring with them the deep 4mm of travel expected of desktop class mechanical switches along with extreme lightweight actuation force of 30 grams of weight. The magnetic switches also have less variation in their actuation force (+/- 10 grams instead of 15 grams).

Their key selling point is their massively enhanced durability versus standard mechanical switches: they last for double the amount of time of regular Cherry switches. Instead of 50 million presses, the KS-20 is rated for 100 million. However, I doubt anyone in history has reached the mechanical durability limits of 50 million key actuations so 100 million is superfluous.

gateron switch magnetic displayed from the side

Unfortunately, the KS-20 will require its own custom PCB. So you cannot retrofit older boards with the newer switch technology. On top of that, while the actuation force was described as 30-grams of force in the product guide, their actual force came out in the ballpark of 45-grams of force when I tested two switches. It could be that the magnetic switch, on the PCB, actually has a lower actuation force.

Gateron KS-12 Waterproof Switches

Unfortunately, Gateron did not show me their waterproof switch, which unfortunately requires its own specialized PCB. The switch contains four plastic stabilizers on its base, though, which means you cannot simply stick one on a random Cherry-MX compatible PCB. So if you wanted to spray a waterproof coating on your favorite PCB and throw some KS-12 switches on it, you’re out of luck.

Gateron 2019 Vs. Gateron 2020

Gateron’s older lines of keyboard switches included more or less copies of Cherry’s color scheme with their own unique take. These models (KS-3, KS-8, and KS-9) included the following colors:

  • Blue: midweight, 55g actuation, clicky
  • Brown: lightweight: 45g actuation, tactile
  • Black: midweight, 50g actuation, tactile
  • Red: lightweight, 45g actuation, linear
  • Green: heavy, 80g actuation, clicky
  • Clear: lightweight, 35g actuation, linear

Other than the KS-12, KS-21, and KS-20, there isn’t much new to announce. Many of its 2019 switches, like the Ink series, are not much different from its 2018 switches other than in aesthetics. Whiel there are many Gateron switches on the market, a few of the new products provided to me appear to be new options. It appears that Gateron issued updated switches of their KS-9 series and has more or less increased the bottoming-out force of some of its main switches. It also reissued these with different colored housing, mismatched against the color of the stem. The stem-color represents the actuation force and the housing color seems to indicate the bottoming-out force. Unfortunately the Gateron rep didn’t fully understand my questions regarding these new, unlabeled, products.

I did not see revisions of any other switches. For example, in 2019, Gateron announced an infrared switch, known as the KS-15. And it eventually added its Ink series, which was more or less colored, clear-bodied switch housings with slightly deeper actuation points. Neither line seems to have received an update.

Overall, Gateron’s 2020 lineup represents a more radical departure from its competitors and its 2019 offerings.

Read the full article: Gateron’s Mechanical Switches for 2020: Waterproof, Magnetic, and Low-Profile


from MakeUseOf https://ift.tt/2QWpr7d
via IFTTT

How to Stream British TV Using BritBox

Fans of British TV can now stream all of the British television they can stand using BritBox. BritBox is a streaming TV service solely focused on British TV shows. And it’s available in the US and Canada (for Anglophiles and expats) and in the UK (for fans of classic TV).

A Streaming Service Full of British TV

As a Brit I can admit that US TV is king right now. There are so many quality American shows available that there aren’t enough hours in the day to watch them all. However, British TV has its fair share of great shows, including these unmissable British comedies.

This is where BritBox comes into its own, as it’s packed full of British TV shows. BritBox offers thousands of hours of programming, including classic shows such as Miss Marple, newer shows such as Downton Abbey, and original shows such as Lambs of God.

How to Stream British TV Using BritBox

BritBox is available in the US, Canada, and the UK. BritBox launched in North America in March 2017, with the British version launching in November 2019. There are some differences in the two services, but both offer British TV for a monthly subscription.

In the US, BritBox costs US$6.99/month, in Canada, BritBox costs CAD$8.99/month, and in the UK, BritBox costs £5.99/month. The streaming service is available on a range of different devices and platforms, so you should be able to watch it at home and on the go.

To get started with a BritBox subscription, just head to BritBox.com for more details. There’s a 30-day free trial available, so you can try BritBox for free before deciding whether to pay for the privilege. There are no ad breaks, and you can cancel at any time.

BritBox Is Yet Another Streaming Service

As you may have already noticed, there are a growing number of streaming TV services available. However, while many offer the same mix of movies and TV shows, BritBox has focused entirely on British television. And it’s this niche that makes it worthwhile.

Proving how popular British TV shows are in the US, American viewers have another option in the form of Acorn TV. This streaming service also focuses on classic British TV shows, so be sure to read our article pitting BritBox vs. Acorn TV to find out which is best.

Image Credit: AK Rockefeller via Flickr

Read the full article: How to Stream British TV Using BritBox


from MakeUseOf https://ift.tt/2S249Vf
via IFTTT

Enjoy In-Studio Sound With Soundcore’s Liberty 2 Pro Earbuds

Soundcore Liberty 2 Pro Featured

If you’re in the market for great-sounding truly wireless earbuds that have long-lasting play time and an affordable price tag, the Liberty 2 Pro earbuds from Soundcore are the ideal choice.

Here’s what we thought of them after giving the buds a try.

Liberty 2 Pro Sound Quality

There’s a reason that the Liberty 2 Pro earbuds’ sound quality is excellent: Soundcore developed the first ACAA (Astria Coaxial Acoustic Architecture) driver.

The innovative design of this driver incorporates a customized Knowles balanced armature and an 11MM dynamic driver. The ACAA driver removes interference while it produces synchronized treble and bass.

Soundcore Liberty 2 Pro Earbuds With Case

So what does this mean for you? Amazing sound, period. It’s consistent and flawless without a crackle or a blip. You hear nothing except the song you’re playing with such incredible detail it’s as if you’re hearing it live on private stage.

What’s more, the Liberty 2 Pro earbuds are endorsed by 10 Grammy Award-winning audio producers. If they don’t know fantastic sound quality when they hear it, who would?

Customizing the Liberty 2 Pro Earbuds

In addition to the ACAA driver, the Liberty 2 Pro earbuds have a feature called HearID for custom sound. HearID analyzes your listening profile to provide you with the best possible sound, personalized just for your ears.

To set up HearID, download the free Soundcore app. The HearID test takes just a few minutes; it’s definitely worth the time to customize and enhance your listening experience unlike any other earbuds can.

In addition to the HearID profile, the Soundcore app lets you choose from different sound settings if you like. Pick from bass booster or reducer, dance, classical, rock, and more, along with custom equalizer settings.

For even more personalization, you get to decide how to control your Liberty 2 Pro earbuds. As an example, you can set the earbuds to skip to the next or previous track with a double-tap, or instead use that action to increase or decrease the volume.

This is a favorite feature of ours because it puts you in control, not the manufacturer.

Download: Soundcore for Android | iOS (Free)

Charging and Play Time

As with any wireless device you buy, you’ll want to know how long you must charge it and how long it lasts between charges, right?

With the Liberty 2 Pro earbuds, you’ll get eight hours of play time from a single charge and another 32 hours from the charging case. Need a fast recharge? Use the included USB-C cable to charge for 10 minutes, and you can then listen for two hours!

What’s Included With the Liberty 2 Pro

Along with your wireless Liberty 2 Pro earbuds, you’ll receive all of this in the box:

  • Seven pairs of ear tips and three pairs of ear wings. These let you select the perfect combination of sizes for ultimate ear comfort.
  • A versatile charging case and USB-C cable. You can charge the earbuds in the case with a wireless charger or the included cable.
  • The Liberty 2 Pro quick start guide. Connect to your device via Bluetooth in seconds and start listening.

Ready to Buy the Liberty 2 Pro Earbuds?

Though they’re regularly priced at only $149.99, you can buy the Liberty 2 Pro earbuds right now for $30 off at Amazon. This is an amazing price for the value you receive.

You get flawless customizable sound quality, simple setup, an array of ear tips and wings for all ear shapes and sizes, and personalization of controls for both earbuds.

So what are you waiting for? Get your Liberty 2 Pro earbuds today and start enjoying your music in a way that you never have before!

Read the full article: Enjoy In-Studio Sound With Soundcore’s Liberty 2 Pro Earbuds


from MakeUseOf https://ift.tt/36FcMdB
via IFTTT

How to Create a Flowchart in Microsoft Excel

excel-flow-chart

Plenty of options exist for creating flowcharts, but you may not need one if you’re already subscribed to Microsoft Office 365. We’ve shown how you can create a flowchart in Word, but Excel works just as well.

Unlock the FREE "Essential Excel Formulas" cheat sheet now!

This will sign you up to our newsletter

Enter your Email

In this article, we’ll show you how to set up a flowchart environment and create awesome flowcharts in Excel. We’ll end with some links where you can download free Microsoft Excel flowchart templates.

How to Create a Flowchart in Excel With SmartArt Graphics

The easiest way to create a flowchart in Excel involves inserting the preset flowchart designs. You can still customize your worksheet and page layout before inserting a SmartArt flowchart. But we’ll save those specific instructions for when we create an Excel flowchart from scratch.

To start creating a flowchart in Excel with SmartArt graphics, open your worksheet.

Insert Your SmartArt Graphic

With your open worksheet, click the Insert tab at the top of Excel. Press the Insert a SmartArt Graphic button under the Illustrations group.

smartart graphic button location

The choose a SmartArt Graphic dialog box will appear. Pay attention to the items listed on the left, and select Process.

insert smartart graphic dialog box
Look through the available options and choose the flowchart template you want to use. Press OK to close the dialog box and insert your new flowchart design.

How to Create an Excel Flowchart From Scratch

While it’s easy to create a flowchart using SmartArt designs, sometimes you need a specific type of flowchart design. To do this, you want to prepare your worksheet before inserting any shapes. Afterward, you can freely design a flowchart to your precise situation.

Set Up a Flowchart Grid in Excel

When creating a flowchart in Excel, the worksheet grid provides a useful way to position and size your flowchart elements.

Create a Grid

To create a grid, we need to change the width of all the columns to be equal to the default row height. The worksheet will look like graph paper.

First, select all the cells on the worksheet by clicking the box in the upper-left corner of the worksheet grid. Then, right-click on any column heading and select Column Width.

Select all cells, then select Column Width in Excel

If you’re using the default font (Calibri, size 11), the default row height is 15 points, which equals 20 pixels. To make the column width the same 20 pixels, we must change it to 2.14.

So enter 2.14 in the box on the Column Width dialog box and click OK.

Change Column Width in Excel

Enable Snap to Grid

The Snap to Grid features makes it easy to place and resize shapes on the grid so you can consistently resize them and align them to each other. Shapes snap to the nearest grid line when you resize and move them.

Click the Page Layout tab. Then, click Align in the Arrange section and select Snap to Grid. The Snap to Grid icon on the menu is highlighted with a gray box when the feature is on.

Enable Snap to Grid in Excel

Set Up the Page Layout in Excel

You should set up the page layout for your flowchart so you know your boundaries before laying out your flowchart. For example, if you’re going to insert your flowchart into a Word document, you should set the margins in Microsoft Excel to the same margins as your Word document. That way you won’t create a flowchart larger than the pages in your Word document.

To set up items like margins, page orientation, and page size, click the Page Layout tab. Use the buttons in the Page Setup section to change settings for the different layout options.

Change Page Orientation in Excel

Now that your worksheet is set up for flowcharts, let’s create one.

Add a Shape Using the Shapes Tool

To add your first shape to your flowchart, go to the Insert tab and click Shapes in the Illustrations section. A dropdown menu displays a gallery of various types of shapes like basic shapes, lines, and arrows.

Select a shape in the Flowchart section of the dropdown menu.

Select a Shape in Excel

Drag the shape to the size you want on the worksheet. If Snap to Grid is enabled, the shape automatically snaps to the gridlines as you draw it.

Draw a shape on the grid in Excel

Add More Flowchart Shapes Using the Format Tab

Once you draw your first shape and select it, a special Format tab becomes available. You can use this tab to add more shapes to your flowchart and to format your shapes, which we’ll cover later.

A dropdown gallery of shapes displays, just like when you clicked Shapes in the Illustrations section on the Insert tab. Select the shape you want to add and draw it on the worksheet.

You can also double-click a shape on the gallery menu to add it to the worksheet. To resize the shape, select it and drag one of the handles along the edges.

To move the shape, move the cursor over the shape until the cursor becomes a cross with arrows. Then, click and drag the shape to where you want it.

Open the Shapes gallery on the Format tab in Excel

Add Text to a Shape

To add text to a shape, simply select the shape and start typing. We’ll show you later how to format the text and change its alignment.

To edit the text in a shape, click on the text in the shape. This puts you in edit mode allowing you to add, change, or delete the text.

Click outside the shape or select the shape like you were going to move it as we talked about in the previous section.

Type text in a shape in Excel

Add Connector Lines Between Shapes

After adding some shapes to your flowchart, it’s time to connect them.

Select Line Arrow on the shapes gallery either on the Insert tab or the Format tab.

Select Line Arrow in Excel

The cursor becomes a plus icon. Move the cursor over the first shape you want to connect. You’ll see dots at the points that represent connection points for that shape.

Click on the connection point where you want the line to start and drag the line to the next shape until you see the connection points on that one. Release the mouse on one of those points.

An arrow displays where the line ends. When a line is properly connected to a shape, the connection point is solid. If you see a hollow connection point, the line didn’t connect to the shape.

Draw a connector line on a flowchart in Excel

Add Text to Connector Lines

In flowchart programs like Visio and Lucidchart, you can add text directly to connector lines. In Microsoft Excel, you can’t do that. But you can do the next best thing.

To add text to a connector line, you create a text box and position it along the line or on the line.

Select a shape or a connector line to activate the Format tab. Click the tab and then click Text Box in the Insert Shapes section.

Click Text Box in Excel

Draw the text box near the connector you want to label. Move the text box to where you want it the same way you move shapes.

You may want to turn off Snap to Grid when positioning text boxes on connector lines. This allows you to fine-tune the size and position of the text boxes.

To add text, select the text box and start typing. We’ll show you how to format and position text boxes a bit later.

Add a text box near a connector line on a flowchart in Excel

Add Notes Using Callouts

You can also use text boxes to add notes to your flowchart the same way you used them to add text to connector lines. And you can use a connector line to point to the area relating to the note.

But, that might be confusing and look like a step in the flowchart. To make a note look different, use a callout.

Select a callout from the shapes gallery either on the Insert tab or the Format tab.

Select a callout shape in Excel

Draw the callout on the worksheet just like you would draw a shape.

Add text to the callout and use the handles to resize it the same way you would on a shape.

Initially, the part of the callout that points shows on the bottom border. To make the callout point to where you want, click and drag the point. When the point connects with a shape, the connection point turns red.

Draw a callout in Excel

How to Format a Flowchart in Excel

Excel has many formatting options, too many to cover here. But we’ll show you a few basics so you can format your shapes, text, and connector lines.

Format Shapes

An easy way to format shapes and the text in shapes is to use Theme Styles.

Select all the shapes you want to format with the same style. Click on the first shape, then press and hold down Shift while clicking the other shapes. Then, click the Format tab.

Click the More arrow in the lower-right corner of the Theme Styles box in the Shape Styles section. A gallery of styles displays in a dropdown menu.

When you move your mouse over the various theme styles, you’ll see how they look on your shapes. Click the style you want to use.

Change the Theme Style for shapes in Excel

Format Text in the Shapes and Text Boxes

Formatting text in shapes and text boxes is done the same way you normally format text in cells.

First, we’ll format shapes. Select all the shapes containing the text you want to format using the Shift key while clicking the remaining shapes after the first one.

Click the Home tab and use the commands in the Font and Alignment sections to format your text. For example, we used the Center and Middle Align buttons in the Alignment section to center the text in the shapes horizontally and vertically. Then, we applied Bold to all the text.

Do the same thing with the text boxes along the connector lines to format and align the text.

Format text in shapes using the Home tab in Excel

Format Connector Lines

The default format on the connector lines is a bit thin. We’re going to make them thicker.

Select all the connector lines you want to format using the Shift key while clicking the remaining lines after the first one. Then, click the Format tab.

Click Shape Outline in the Shape Styles section and select a color from the Theme Colors section or Standard Colors section. Then, on the same menu, go to Weight and select a thickness for the connector lines from the submenu.

Change color and weight for connector lines on a flowchart in Excel

Use SmartArt Tools Design

When editing SmartArt flowcharts, the main difference centers around the Design tab. While you can individually select all the shapes and connector lines to format them, the Design tab allows you to modify the flowchart collectively by selecting the entire graphic.

smartart tools design add shape

The Design tab allows you to add shapes, change your flowchart’s layout, collectively change the colors of your graphic, and more. It’s similar to using the Format tab, but the changes occur primarily via a single button click. It’s great for quick edits where you don’t have to personalize your flowchart much.

smart art tool design change colors

If you convert your SmartArt graphic into shapes, it’ll act as if you made the flowchart from scratch and only allow you to use the Format tab.

Get Started With These Excel Flowchart Templates

Excel flowchart templates provide a quick start when creating your own flowcharts. We’ve previously covered flowchart templates for Microsoft Office, but these are specifically for Microsoft Excel.

Here are more templates you can download:

Organize Your Life With Excel Flowcharts!

The ability to create flowcharts in Microsoft Excel makes it a very useful and versatile tool for keeping yourself organized. It’s not the only option, though. You’ll find several good free flowchart tools for Windows.

Are you a Macbook user? There are great free flowchart makers for macOS, or you can use Pages on Mac for simple flowcharts.

Read the full article: How to Create a Flowchart in Microsoft Excel


from MakeUseOf https://ift.tt/2mObwR5
via IFTTT

How to Fix an Unmountable Boot Volume in Windows 10

fix-unmountable-volume-windows-10

The Unmountable Boot Volume Windows stop code error is a pain. Since it usually keeps you from getting into Windows, you can’t troubleshoot it like you would with other errors.

Unlock the FREE "Ultimate Windows Keyboard Shortcuts" cheat sheet now!

This will sign you up to our newsletter

Enter your Email

However, it’s possible to fix this error with the right methods. We’ll show you how to fix the unmountable boot volume error and get back into your PC.

What Is the Unmountable Boot Volume Error?

The “boot volume” is the partition of your hard drive that holds Windows. This error occurs when your computer can’t load Windows properly, resulting in a blue screen of death.

A “stop code” is the specific error message that identifies the problem Windows ran into—in this case, it’s the unmountable boot volume stop code.

Windows Blue Screen of Death

It usually occurs due to a damaged file system or corrupted Windows files. Often, you’ll see it after applying a major Windows update. While this error can also stem from an improperly configured BIOS, that’s rarely the case unless you’ve modified the BIOS on your own.

Thankfully, this error doesn’t always mean that your hard drive is dying. Though that may be the case, we’ll walk through other troubleshooting steps first.

Step 1: Reboot and See If It Happens Again

Like most blue screen messages, the unmountable boot volume error isn’t always something to worry about if you only see it once. Sometimes Windows runs into a temporary hiccup that you never have an issue with again.

If you see the unmountable boot volume error blue screen while working, restart your PC and try to log in again. You should be clear if the error doesn’t return for some time.

Usually, though, you’ll see the unmountable boot volume error when you try to boot into your PC and it won’t let you load Windows at all. In that case, proceed with more in-depth troubleshooting.

Step 2: Create a Windows 10 Install Disk

Since you can’t boot Windows normally, you’ll need to create a Windows installer on a USB drive or DVD using another machine. This will let you access Windows’s troubleshooting tools by booting from a different device.

Thankfully, the Windows 10 Media Creation Tool makes it easy to create Windows 10 installation media. Once you’ve created your installation media, plug it your PC and boot from the USB or DVD. You’ll probably need to change the boot order on your PC to do this.

Step 3: Use Windows Automatic Repair

Let Windows start from your USB until it loads up, then click the Next button. You’ll see the Install now screen. But you’re not interested in reinstalling Windows; click Repair your computer in the bottom-left instead.

Windows Repair Your Computer

On the following screen, select Troubleshoot to get a list of Advanced Options. Choose Startup Repair and choose the target OS: Windows 10 (or your current version).

From here, Windows will run an automatic repair that will hopefully take care of your issue. Once it’s done, exit the installer and try to boot your computer normally.

If Windows still shows an unmountable boot volume error after this, continue onto the next step.

Step 4: Repair the Master Boot Record

The Master Boot Record (MBR) contains information about where Windows lives on your hard drive and helps it load properly when you turn your computer on. If this becomes corrupted, it can lead to an unmountable boot volume message.

To repair the MBR, boot again from your Windows 10 install media and select Repair your computer > Troubleshoot. This time, on the Advanced Options screen, choose Command Prompt.

Command prompt startup options

At the Command Prompt, type the following command to run an MBR repair:

bootrec /fixmbr

Wait until it completes, then run the following commands one at a time to attempt additional repairs:

bootrec /fixboot
bootrec /rebuildbcd

Enter exit to leave the Command Prompt once these finish running. Then reboot again and see if the error continues to pop up.

Step 5: Run the Ckhdsk Command

If an automatic repair and MBR repair didn’t solve your problem, you should next try Chkdsk. This important Command Prompt tool lets you check the hard drive for errors, which may cause the unmountable boot volume message.

Follow the above steps again to open a Command Prompt from the recovery menu, then enter the following command:

chkdsk /r c:

The /r flag locates any bad sectors on your disk and fixes those errors. If you don’t include this, Chkdsk will simply report errors it finds. You need to include c: so the operation scans your Windows partition (the most common location for it). Replace c: with d: or another letter if you’ve moved yours somewhere else.

Chkdsk may ask you to run next time the system restarts. If it does, enter Y for yes and reboot to start it.

Chkdsk Reboot message

This can take some time, so you may have to wait a bit. Once it’s done, reboot again and see if the issue has cleared up.

Step 6: Try an SFC Scan

For the final Command Prompt solution, you can try another important utility. SFC, or System File Checker, looks for corrupted Windows system files and attempts to fix them. If none of the above has fixed your issue yet, this is worth a try.

Open a Command Prompt on your recovery drive again, and enter the following command:

sfc /scannow

Wait until the process completes. It will tell you if it fixed anything. Like the other commands, after it completes you should reboot and try to load into Windows again.

Still Not Working? Test Hardware and Reinstall

If you’ve completed all the above and continue to see an unmountable boot volume error every time you boot, your problem is deeper. You have two options for further solutions.

First, you may have a hardware issue. Your storage drive could be corrupted, dying, or have a faulty connection. If you’re confident, open your computer (which is easier on a desktop than a laptop) and check to make sure the hard drive cable is securely connected. Sometimes faulty RAM can also cause this problem, so make sure the RAM is properly seated.

If you check the connections and everything looks OK, you should run some diagnostic tests to determine if a component is dying. Replacing it should fix your issue, but you’ll need to talk to an experienced computer technician if you can’t swap the components yourself.

After ruling out hardware, your Windows installation may be corrupted in a way that the above utilities can’t repair. In that case, your only option is to reinstall Windows. This is a pain and takes time, but isn’t as bad if you have a backup.

Solve the Unmountable Boot Volume Error for Good

We’ve looked at several steps for solving an unmountable boot volume stop code error in Windows 10. Since this is usually caused by file corruption, running the above scans from a Windows recovery disk should fix it most of the time. But in the worst cases, you’ll need to diagnose your hardware or even reinstall Windows.

For more like this, have a look at our general guide to troubleshooting blue screen errors in Windows.

Image Credit: Xalanx/Depositphotos

Read the full article: How to Fix an Unmountable Boot Volume in Windows 10


from MakeUseOf https://ift.tt/2J6Icyu
via IFTTT

The Best Walkie Talkie App: Turn Your Phone Into a Two-Way Radio

best-walkie-talkie-apps

Unless you’re a security guard or the foreman on a construction site, you probably haven’t used a walkie talkie since you were a kid. Yet the idea of instant voice chat with individuals or groups is still pretty compelling.

There are heaps of free Android and iPhone walkie talkie apps that give you exactly this. Let’s take a look at them.

Why Use a Walkie Talkie App?

Walkie talkie apps work like the real devices. You listen to all the activity on your chosen channel, then hit the big Speak button when it’s your turn to talk.

Walkie talkie apps require Wi-Fi or data connections, although due to the heavily compressed audio, they use very little data. As a result, they can even work on an ancient 2G connection, should you find yourself with slow internet speeds on your phone.

Here’s our guide to the best walkie talkie apps for Android and iPhone.

1. Zello PTT Walkie Talkie

Zello is the best walkie talkie app you can get. It’s available for both Android and iPhone, and requires you to set up an account before you can get started.

This is a comprehensive messaging app with the walkie talkie feature at its heart. It offers high-quality audio and full support for your Bluetooth headset. You can chat over public or private channels, with up to 2,500 users at a time. The app runs quietly in the background, so you’ll never miss an incoming call.

But there’s more. The app offers a text messaging service and support for Apple Watch and Android Wear smartwatches. It also integrates with your phone’s contacts, so you can speak to anyone who also has the app installed. If you prefer, you can also share your Zello contact info via the built-in QR code feature.

The Zello walkie talkie app first gained popularity in the US during the 2017 hurricane season. Despite some reports at the time, the app doesn’t turn your phone into a fully functioning walkie talkie. It still needs some kind of data connection to work, although that can be something as slow as a 2G connection.

Download: Zello for Android | iOS (Free)

2. Two Way: Walkie Talkie

Two Way: Walkie Talkie could not be any simpler. Just open it up, dial into a random channel, and start talking. There’s no signup, no usernames or passwords, and no configuration.

There’s also no privacy. All channels are public, so if you happen to pick one that someone else is already using, you’ll be able to hear their conversation—and join in, if you want. With a million channels to choose from, it’s an unlikely scenario. Just make sure you steer clear of the obvious channel numbers, like 000000.

You need to share your chosen channel number with your friends so they can dial in. Also, you must keep the app running to hear their calls. For a no-frills, no-fuss service, this is hard to beat.

Download: Two Way: Walkie Talkie for Android | iOS (Free)

3. Voxer Walkie Talkie Messenger

A full-blown messaging app built around walkie talkie functionality, Voxer is one of the most polished offerings of its type. It has most of what you’d expect in any messaging app, including the ability to create group chats with friends and have private, encrypted conversations.

The chat part is easy. Just hold down the walkie talkie button while you speak, then release it to hear what others have to say. If anyone’s offline, you can leave voice or text messages. You can also share files and photos at the touch of a button.

Voxer works best if you give it access to your contacts. You have to create an account to use it, which includes adding your phone number.

Download: Voxer for Android | iOS (Free, subscription available)

4. Walkie-talkie

Two way radio apps don’t come any easier than Walkie-talkie. It’s simple to use and is great-looking, too. The app works on Android, iOS, and in any desktop web browser. Just tune your devices to the same frequency, push the button, and you’re ready to talk.

You don’t have to set up an account, and the app doesn’t require any special permissions. The only point to keep in mind is that your chosen channel is not private, so if anyone else happens to tune to the same frequency, they’ll be able to listen in.

Download: Walkie-talkie for Android (Free) | iOS (Free, in-app purchases available)

5. Walkie Talkie ODT Audio

While it’s designed primarily for outdoors sports use—the app is compatible with Outdoor Tech’s Chips 2.0 snow helmet speakers—Walkie Talkie ODT Audio works for anyone.

You need an account to get started, but it’s quick and easy to set up. Once done, you create your own group and then add your friends as members. This doesn’t happen via your contacts list. Just search for them by name or email address to add them.

The ability to organize your friends into separate groups makes it useful for working on projects or organizing events. You can see when people are online, and the sound quality is good. The app has no other features—it lacks messaging, for example—but that helps keep it lightweight and easy to use.

Download: Walkie Talkie ODT Audio for Android | iOS (Free)

6. Modulo PTT Walkie Talkie

If you’ve ever used Slack, the popular messaging app for work teams, you’ll be able to get to grips with Modulo quite quickly. It works along similar lines.

You create a team, and your friends or colleagues can sign up and join the team individually. You’ll then set up channels within the team to keep everyone organized.

It makes the setup process a lot more complicated than some of the other apps we’ve looked at. But the result is that you get a private and secure area to chat, reserved solely for your team.

Once you’re all logged in, you can chat in real time or leave voice messages that anyone who’s offline at the time can pick up later. There’s also support for text messaging, including the ability to share files with other team members.

If you’re looking for a voice app for business, this is the one to choose.

Download: Modulo PTT Walkie Talkie for Android | iOS (Free)

7. Intercom

If you’re looking for a Bluetooth walkie talkie app, Intercom is worth a try. It’s great for communicating with people nearby, like in a school, shopping mall, or office building. It works without an internet connection by using your phone’s wireless technologies (including Wi-Fi and Bluetooth) to transmit to other users.

There’s not much to it, but that’s part of the appeal of Intercom. It’s the ultimate pick-up-and-play app. You don’t need to register or worry about granting important permissions. It simply connects you to whomever else is nearby. And it works across platforms, too.

Download: Intercom for Android (Free, in-app purchase available) | iOS ($2)

Enjoy the Best Walkie Talkie Apps

Walkie talkie apps are much quicker and more convenient than having to make normal voice or data calls, and they can be a lot cheaper, too. Just by leaving the app running you can always speak to your friends or colleagues, without needing to leave a call connected for minutes or even hours.

A good walkie talkie app is an essential addition to any phone’s messaging tools. You should take a look at our guide to the best physical walkie talkies if you’d rather have a real device.

Read the full article: The Best Walkie Talkie App: Turn Your Phone Into a Two-Way Radio


from MakeUseOf https://ift.tt/2JV2Xll
via IFTTT