Wednesday, 31 July 2019
How to Make Notepad++ Compare Two Files With a Plugin

Notepad++ is a free, open-source, code and text editor jampacked with lots of features for both casual users and programmers. It supports various programming languages with custom syntax highlighting, auto-completion, and code folding.
The inclusion of sophisticated editing tools, user-defined style options, and support for plugins is like icing on the cake. One such powerful plugin is the Notepad++ Compare plugin which lets you see the visual difference between the two files. We’ll show you how to use this plugin to compare two files in Notepad++.
Basics of Plugins Admin in Notepad++
Plugin Admin or Manager is the repository of dozens or more plugins to extend the functionality of Notepad++. Before you start using them, there are a couple of settings you should watch out for while installing the app.
On the Choose Component screen during installation, make sure to select the Custom option from the dropdown list and check Plugins Admin box. Many users skip the installation steps. If you do so, then the plugin manager will not get installed. Slowly proceed with the steps while installing Notepad++.

Notepad++ keeps configuration files in the \Users[User Name]\AppData\Roaming\Notepad++\plugins folder.
If you plan to use this app on another computer or store in a USB drive, then check Don’t use %APPDATA box.
Your configuration files will remain in the Program Files folder.

Plugins Admin lists all the available and installed plugins. From here, you can install, update, or remove installed plugins. A revamped version came into effect in version 7.6 and above. If you want to use the plugins, then upgrade Notepad++.
Installing the Compare Plugin
Open Notepad++. Navigate to Plugins > Plugins Admin to open plugins manager. In the popup window that appears, type in Compare on the search bar. Check the box, then click Install. Once the plugin gets installed, the app will restart.

Click the Compare tool option from the Plugin menu. As of now, you can download the latest iteration of this plugin (version 2.0.0) from Github. Both 32-bit and 64-bit versions are available.

How to Compare Two Files in Notepad++
The compare plugin assumes that you want to compare an old version of your work versus the new version. Open any two files (A, B) in Notepad++ which you want to compare. File B (new) gets compared to File A (old).
Then, navigate to Plugins > Compare Menu > Compare.

It shows the difference/comparison side by side, as shown in the screenshot. You can set any open file as the default by clicking Set as First to Compare. You can then choose this selected file to compare it with other ones in whatever mode you decide.
Colors and Symbols
The compare plugin uses various colors and symbols to denote the changes in your file. You could have added, deleted, moved, or changed the line.
- Added (+): The line only exists in the new file and not the old ones. The highlight color is green.
- Removed (-): The line does not exist in the new file and only present in the old file. The highlight color is red.
- Moved: The line appears once in the other file and a different location.
- Changed: Most of the line is identical in both files. You’ll see the changes highlighted in orange.
Note: If you uncheck the Detect Moves option in Plugins > Compare Menu the meaning of symbols changes. Therefore, whenever you’re comparing two files in a session, always check for this option.

Navigation Bar
The navigation bar to the right side of the Notepad++ comes handy when you’re comparing big files. In a big file, navigating the whole file by going up and down to find the difference is difficult and time-consuming. The navigation bar works like a sitemap and bookmark browser.

Click the selected area to scroll in your file. Since it uses the same convention for colors and symbols, you’ll come to know which line was added, removed, and more with a glance.
Changing the View Modes
By default, when you compare two files, it does so in double-view mode. Right-click the gripper and choose Rotate to right or left. It either splits the window horizontally or vertically.

And if you continue rotating, your old file appears in the left while the new file appears in the right panel. It is recommended to restart Notepad++ after shifting from horizontal to vertical split or vice-versa.
Time-Saving Uses of the Notepad++ Compare Plugin
We often need to compare two files. The tool enables you to compare the original and modified files and list the lines you’ve changed. It has many practical uses:
- If you’re working on a code and want to see the changes other people made, then a compare tool can make comparison easier.
- You can precisely check the line with any code errors, defects that you don’t remember, and find the source of your problem.
- Any difference gets highlighted in various light and dark color hues to help you identify changes.
- You can compare files in a folder and know which directory is missing what files. This is useful if you have a large collection of music or ebooks on your computer.
When you click the Compare menu, it shows a popup with all the commands and options. It even lists down the keyboard shortcuts for those commands.
Explore the Settings
The compare plugin has all the basic features of a standard Diff tool. Click Settings to see the list of options you can tweak.
- Color Settings: This option allows you to set color coding for Added, Deleted, Moved, and Changed line. For each option, you can choose a different color, change the highlight color, and its transparency.
- Menu Settings: This option enables you to customize the file positions. First is determines whether you’re comparing the old or new file. Old file position allows you to position the old file at the left or right view (top/bottom in vertical split). Single-view default compare to lets you compare the active file in a single-view mode with the previous or next file.
- Warn about encodings mismatch: shows you a warning message on trying to compare two files with different encodings.
- Wrap around diffs: Determines whether it should enable the Next command on reaching the last diff and go to the first diff.
- Go to first diff after re-compare: When unchecked, the caret position will not change on re-compare.

Compare Microsoft Office Files
Notepad++ is a flexible code and text editor app. You can customize it to any level depending on your needs. The compare plugin is a solid example which shows the power of plugins. You can compare a text, markdown file, or any programming language file.
With the flexible view modes and settings, this plugin is just as good as a Diff tool. But for some reasons, you cannot compare proprietary file formats like DOCX, XLSX, and more. If you want to know the procedure, look at our guide on how to compare two excel files and Microsoft word documents.
Read the full article: How to Make Notepad++ Compare Two Files With a Plugin
from MakeUseOf https://ift.tt/2LU0xnA
via IFTTT
What Is Credential Dumping? Protect Yourself With These 4 Tips

It’s bad enough when hackers get their hands on one of your accounts or logins. But sometimes they can use one stolen password to steal many of your other passwords as well. If your computer is on a network, they may be able to steal other users’ passwords too.
This is achieved using a technique called credential dumping. We’ll explain how it works and how to protect yourself from it.
What Is Credential Dumping?

Recently security researchers have been talking about the dangers of credential dumping. This is a technique used by hackers to access multiple accounts from one person.
It begins when hackers get access to a victim’s computer. From this one computer, they are able to extract usernames and passwords for multiple accounts. These could include logins for bank accounts, email accounts, and login information for other machines or networks.
This can make it easier for hackers to steal someone’s identity and take over all of their accounts. They can also use this technique to grab login details for other users on the network, spreading a vulnerability from a single machine to an entire system.
How Are You at Risk of Credential Dumping?
It is possible for hackers to access many passwords when they access a computer due to the way operating systems handle passwords. Your operating system doesn’t want to annoy you by asking for passwords all the time, so once you have entered a password it is stored in the computer’s memory for later use.
If the hacker is able to access a file called the Security Account Manager, they can see a list of the passwords stored on that computer. The passwords are hashed, meaning each character is transformed into something else to hide it. This is the same process used for passwords on secure websites. But if the hashing is not strong enough it can be broken for each stored password. Then the hacker will have access to all the different accounts for that user.
If another user has logged onto the same machine, the hacker might be able to find their passwords too. If a business user has problems, they may call IT support and get a network administrator to come and check their machine. Once the network administrator logins in to a compromised machine, the hacker can steal the administrator’s login information as well and do more damage.
How to Protect Yourself From Credential Dumping

You can see the threat posed by credential dumping. But there are some simple steps you can take to protect yourself and your device from this technique:
1. Don’t Store Your Passwords on Your Computer
A bad habit many people have picked up is storing all their passwords in an unencrypted text file on their hard drive. They know that they mustn’t use the same password for multiple sites, and that passwords should be hard to guess. So they use random passwords. But they can’t remember all of them so they write them down in a file on their computer.
The reason this is a problem is that if an attacker accesses that one text file, they have access to all of your passwords for every site. This is a big security risk and makes credential dumping very easy, so it should be avoided.
2. Use an Online Password Manager
So if you shouldn’t store passwords on your computer, what should you do with them? It’s a good idea to use a trustworthy online password manager like LastPass or 1Password.
Online password managers work by storing your credentials online. This data is encrypted before it is uploaded to the internet, so you can access your passwords from any device. This has the advantage of protecting you from credential dumping. But it can also be a disadvantage; if someone finds out the master password for your password manager, they can access every single one of your accounts.
On balance, an online password manager is the option that many people choose for the best security. But you need to be very careful with your master password and make sure you never write it down anywhere, either on a computer or on paper. This is one password you really need to memorize.
3. Enable Microsoft Defender
If you’re a Windows user, you should definitely make sure Microsoft Defender, Microsoft’s antivirus solution, is enabled. There’s even a version of Microsoft Defender available for Mac.
Microsoft says that Defender will protect against credential dumping by protecting the lsass.exe process which is the target of many credential dumping attacks. When you enable Defender, it will run automatically in the background to protect your computer.
Defender should be enabled by default on Windows machine. To check, go to Settings in Windows, then to Update & Security. Choose Windows Security from the menu on the left. Now click Open Windows Defender Security Center. Here, check that Virus & threat protection and Account protection are enabled.
4. Use Two-Factor Authentication
One of the best ways to protect yourself from password theft is to use two-factor authentication wherever possible. This means that when you go to log in to a site, you first enter your username and password. Then, if the password is correct, you enter a second piece of information.
Usually, you will enter a code that is generated by an app on your phone. Alternatively, you can enter a code which is sent to your phone via SMS.
The idea is that even if an attacker knows your password, they don’t have access to your phone or your email. The only way to access your account is when you have both the password and access to your device.
The annoying thing about two-factor authentication is that you have to enable it individually on every site you use. But you should definitely start by enabling it on your most essential websites, like your email account, your online banking, and PayPal or other payment services.
Beware the Threat of Credential Dumping
Credential dumping is a technique used by hackers to steal passwords for multiple accounts when they have accessed one computer. It can happen because of the way operating systems store passwords once you have entered them.
You can protect yourself from this threat by using a password manager, enabling Microsoft Defender, and enabling two-factor authentication.
To learn more about how passwords can be compromised, see our article explaining the most common tactics used to hack passwords.
Read the full article: What Is Credential Dumping? Protect Yourself With These 4 Tips
from MakeUseOf https://ift.tt/315BDVC
via IFTTT
Privacy Precautions for Travel, Use Technology for Vacations

Planning a trip this summer? Looking forward to a hot vacation, or simply traveling to see family and friends? Whatever you’re up to, it helps to plan in advance, stay secure, and not share your activity online.
In this Really Useful Podcast we take a look what precautions you can take for travel and vacations and how technology can help.
Really Useful Podcast Season 3 Episode 9 Shownotes
In this week’s show:
- Don’t post these things online
- Hide memory sticks
- Plan a vacation with Google
- Best portable Wi-Fi travel routers
Want to hear more from James Frew and Christian Cawley? They’re on Twitter, so why not give them a follow?
This is the tech podcast for technophobes. It would be great if you could share our podcast with any friends or family you think would benefit from clarity and honesty about technology. Show them how to subscribe to the Really Useful Podcast on:
We’re taking a few weeks off for the summer—we’ll see you in September.
Read the full article: Privacy Precautions for Travel, Use Technology for Vacations
from MakeUseOf https://ift.tt/333s4Za
via IFTTT
The New Nintendo Switch Lite Is Available for Preorder Now

Nintendo recently announced a new version of its beloved Switch console, and it comes with some pretty sizable changes. Only a short time after revealing that the new console would be available, the Switch Lite has shown up on Amazon for preorder, meaning you can lock a console in for yourself without worrying about it selling out.
What’s the Nintendo Switch Lite?
Essentially, the Switch Lite is a cheaper, feature-light version of the Switch. In terms of price, Nintendo managed to shave quite a bit off, as the new console retails for only $199, while the original Switch sells for $299.
Obviously, in order to shave $100 off the price, Nintendo had to shave some features off the console as well. The biggest change comes from the ability to dock the console and use it on the big screen. The change is that, well, there’s no video out at all, so you actually can’t dock it.
Because the console can only be used in handheld mode, Nintendo also nixed the removable Joy-Cons from the console, so the controls are always attached. This could add a little bit of durability to the console, as there are fewer moving parts, which might make this a better option for parents looking for a device for their kids.
Another positive that comes from having the controllers attached is a better d-pad since there’s no need to use both Joy-Cons on their own.
Everything else about the Switch Lite is the same as the original Switch, so there’s no need to worry about the cheaper console suffering any performance issues when playing games—they’ll run exactly the same as they do in handheld mode on the original Switch.
Nintendo Switch Lite Release Date and Price
While you can lock in the device on Amazon now for $199.99, the device is actually scheduled to release on September 20, so you’ll need to be patient and wait for a console to actually arrive.
The Switch Light is available in three colors: grey, turquoise, and yellow. The price is the same regardless of which color you go with.
Read the full article: The New Nintendo Switch Lite Is Available for Preorder Now
from MakeUseOf https://ift.tt/2Yh29yf
via IFTTT
The Award-Winning FIDO Smart Lock Has 4 Secure Entry Methods

Smart locks are one of the cooler pieces of smart home tech out there. But with one, you’re entrusting access to your home to a device that’s connected to the internet.
A new smart lock called FIDO offers the same connected features as many other devices on the market, but it does it with four different unlock methods and an extra layer of security. It offers a very minimal design that doesn’t look like a smart lock at all.
FIDO Smart Lock Features
The main thing that makes FIDO cool is the fact that it can be unlocked in four different ways, which makes it easier to use than a lot of other locks on the market. You can open the door with a smartphone app, your fingerprint, Bluetooth, or an inducted access card.
Of course, FIDO also offers remote locking and unlocking through its mobile app. You can also grant other people access to your lock temporarily. If you have other people living in your home, you can see who has entered the home at any time with the app, which makes it easy to find out when your kids have come home from school, or whether your roommate is currently home.
As far as security, FIDO employs 128-bit encryption. The team promises that it’s impossible to break and hack by mere brute force and checking all possible key combinations.
Here are some other cool features of FIDO:
- Automatic locking
- 365-day battery life on two AAA batteries
- Forced entry alarm
- Works with any US door
- Support for Alexa, IFTTT, Google Assistant
- Waterproof for outdoor use
FIDO Smart Lock Price and Availablity
UJIA Smart Lock, the company behind FIDO, is seeking funding for its smart lock on Indigogo. It has far exceeded its funding goal, so assuming everything goes according to plan, the device should be delivered to backers by its September delivery date.
In terms of price, the lock is actually quite reasonable at $129 (though it’ll be more once the device hits retail).
The lock actually won a Red Dot Design Award, which definitely makes it worth a look. However, even with that, it’s important to keep in mind that there are risks involved with backing a crowdfunding project, and nothing is guaranteed when you put down your money on one.
Read the full article: The Award-Winning FIDO Smart Lock Has 4 Secure Entry Methods
from MakeUseOf https://ift.tt/2Ov7GwS
via IFTTT
Waze Now Lets You Carpool With More People
Waze has experimented with carpooling since 2016, but is now upping the ante. Since its relaunch in 2018, Waze Carpool has only allowed drivers to pick up one passenger at a time. However, you can now add multiple passengers to a Waze Carpool.
What Is Waze Carpool and Carpooling?
Waze Carpool is a standalone app designed to help people carpool. The driver and passengers are matched based on various criteria, including the route and time of day of travel. The app then splits the cost of gas, and is used to manage the payment.
Carpooling has several benefits. It reduces the number of cars on the road (reducing traffic congestion and pollution), reduces the cost of commuting (thanks to sharing the price of gas amongst several people), and helps you make friends in the process.
How to Add More People to Waze Carpool
As detailed in this post on Medium, Waze now lets you add more people to a carpool. All you need to do is tape the + icon to invite more riders after you’ve confirmed the first one. You can add up to four people, potentially filling every seat in your car.
Adding more riders to your carpool means saving more money on your commute. As a driver you’ll get a little extra for each rider (with the price adjusted to match the cost of gas and wear and tear). And as a passenger you’ll pay slightly less for sharing the ride.
Download: Waze Carpool on Android | iOS
Beyond Carpooling: Other Ways to Use Waze
Waze Carpool is currently available in the US, Brazil, Israel, and Mexico. It’s free to use, with Waze not taking any commission for facilitating the ride-sharing. At least for the time being. Which is a major advantage over Uber and Lyft.
Waze Carpool is a relatively new concept, but there are plenty of other ways to use Waze. Waze is primarily a navigation tool, and one of the best Google Maps alternatives around. And in 2017, Waze started offering hands-free navigation for drivers.
Read the full article: Waze Now Lets You Carpool With More People
from MakeUseOf https://ift.tt/2SS2scV
via IFTTT
Tuesday, 30 July 2019
5 Free Mac Apps to Visualize Your Ideas, Tasks, and More

Do your thoughts show up as Venn diagrams, pie charts, and other colorful images in your mind? Chances are that you’re a visual thinker and a picture is really worth a thousand words to you.
Pictures add both effectiveness and enjoyment to your learning and communication. And since that’s the case, why not use utilities that support such visual thinking to organize your work and life? Start with our list of these visual tools for your Mac.
1. To Generate Mindmaps: SimpleMind Lite

SimpleMind Lite lets you create an unlimited number of mindmaps for free, without ads. There are also no limits on the number of elements a single mindmap can have.
The app doesn’t trip you up with unnecessary toolbars and buttons. Apart from the toolbar at the top, you’ll see three main sections:
- A list of your mindmaps on the left
- The active mindmap in the center
- Tools for the active mindmap on the right
SimpleMind Lite is no slouch, but as you’d expect, the premium version of the app lets you do much more. Get that if you want to add images and checklists, share and print your mindmaps, organize them into folders, and more.
Download: SimpleMind Lite (Free) | SimpleMind ($30)
2. To Draw Flowcharts and Diagrams: Draw.io

Draw.io gives you access to all the basic tools and graphics you need to come up with decent diagrams. You can even import your files from Visio, Lucidchart, and similar programs. Export options include XML, HTML, PDF, JPG, PNG, and SVG formats.
Finding your way around this no-nonsense open source app is easy. While it’s not the most advanced app, it’s good at what it does. To get a feel for Draw.io’s Mac app, give its web app a test run at draw.io. There’s no need to sign up for an account, either.
We must also mention the open source app Mermaid here. It takes a unique approach to flowcharts and diagrams, as it allows you to generate these graphics using a text-based Markdown-like language. Give it a shot.
Download: Draw.io (Free)
3. To Build Charts and Graphs: Numbers

Did you know that you can create interactive charts in Numbers on Mac?
Numbers, the native spreadsheet program on your Mac, has built-in tools to create a variety of graphics. Look under the Insert menu to discover the types of charts and shapes you can add to your spreadsheets.
If you’re not sure how to begin setting up your chart, why not start off with a template that gives a rough representation of what you want to see on the screen?
The templates show up in the Template Chooser, which pops up when you open the Numbers app and also when you set up a new spreadsheet. You’ll find templates for managing your finances, planning trips and parties, and even for saving recipes.
Basic graphics tools are also available in your Mac’s word processing app, Pages. You can use them to create flowcharts. To get started with that, learn how to create a simple flowchart in Pages on Mac.
Download: Numbers (Free)
4. To Create Cards: Zoho Notebook
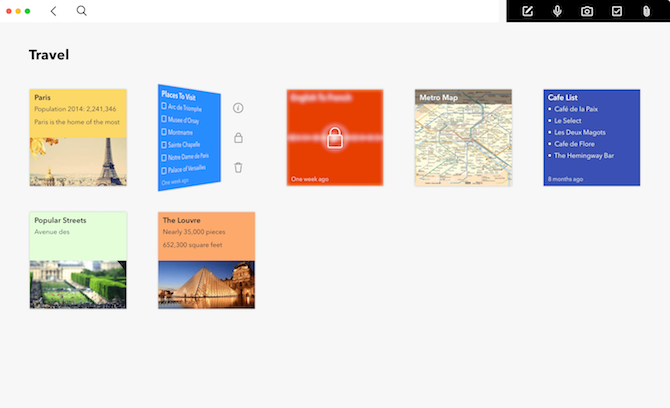
Zoho Notebook is one of the best note-taking apps for macOS. Depending on the type of content you’d like to add to a note, you can create textual notes, photo notes, audio notes, checklists, and so on. With such a mix of content, you end up with colorful notebooks that are a pleasure to use.
Since you can add images to any type of note (not just to a photo note), why not attach a suitable image to the top of every card? Think of this makeshift card cover as a picture bookmark. It can be a great way to capture the essence of an idea, or even to jog your memory about the contents of a note.
If you want to bring the card approach to task management, the reminders app Doo can help you. And remember, the popular tool Trello also takes a card-based approach in keeping with the Kanban technique on which it’s based, so that’s another option to consider.
Download: Zoho Notebook (Free)
5. To Plan Your Month: Mini Diary

If you’re expecting a fancy app to create color-coded task lists, timelines, or anything like that, Mini Diary will underwhelm you. But its simplicity is exactly the reason we’ve chosen it as a planner tool.
Mini Diary is a journal app that gives you a monthly calendar with space for notes on the right. And it’s this basic layout that makes it perfect to plan and see your entire week’s or month’s activity without fuss.
All you have to do is pick a date on the left and list your most important tasks for that day on the right. (To plan ahead, you’ll have to enable the Allow entries in the future option from the app’s settings.)
The dates for notes with text in them get highlighted in blue text, while those for blank notes stick to the default (black) text. This feature gives you a simple way to track your productivity: if you haven’t finished your tasks for a particular day, move that day’s task list to the notes section for a weekend date.
Now, the days appearing in blue in the calendar are the days you wrapped up everything on your to-do list. Mini Diary gives you basic formatting options for your entries and a search box to look up notes.
Download: Mini Diary (Free)
Paid Visual Apps Worth a Look
If you’re willing to pay for an app to get your hands on the right set of features, take a closer look at these Mac apps:
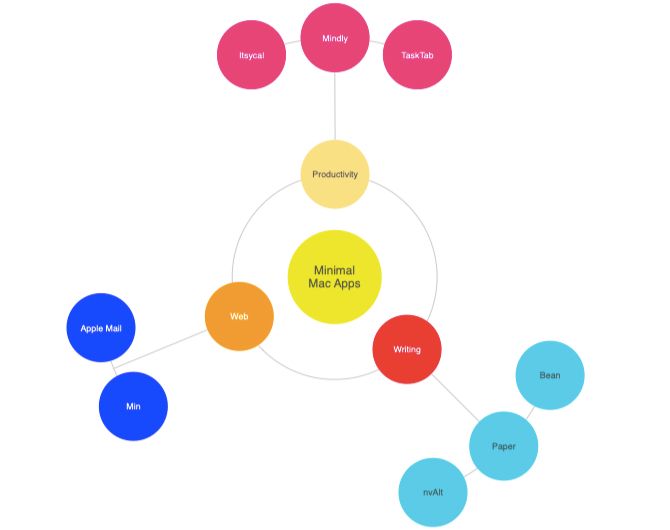
- Mindly: Easy-to-use mindmapping app with mindmaps that resemble the solar system.
- Omnigraffle: Versatile app for creating all kinds of graphics, including diagrams and wireframes.
- Taskheat (Available on Setapp): Uses flowcharts to help you outline your goals and tasks.
- MindNode (Available on Setapp): Powerful mindmapping tool that works with Siri shortcuts.
- Scapple: Unique app to get your ideas down in random order and then connect them in different ways.
- Clear: A tasks and reminders app that uses color-coding for effectiveness.
- BigHairyGoal: A subscription-based alternative to Scapple.
Some of these paid apps list their price as Free (with in-app purchases) on the Mac App Store, which can create some confusion. To be clear, in some of these apps, your documents remain viewable, but not editable, after the trial period expires.
Capture Your Picture-Perfect Ideas as They Flow In
Visual, auditory, kinesthetic, tactile—there are many types of thinkers. No matter how you process information on a regular basis, you can learn to switch to a different mode and do so effectively. But when you’re facing a pressure situation or a time crunch, it’s best to stick to your default mode of thinking.
And for you visual thinkers, there’s more help at hand in the form of portable visual lists for productivity.
Read the full article: 5 Free Mac Apps to Visualize Your Ideas, Tasks, and More
from MakeUseOf https://ift.tt/318U9MX
via IFTTT
How to Factory Reset Your Kindle Fire

When your Amazon Kindle Fire suffers from random errors, a reset may be the only way to resolve the issue. But how do you reset your Kindle Fire and what does that do? Let’s find out.
How to Soft Reset Your Kindle Fire
Before you attempt to factory reset your Amazon Fire, you should try a soft reset. A soft reset simply reboots your Fire Tablet; all your data and settings will remain intact. Use this when your device shows minor symptoms or has frozen up.
To soft reset your Kindle Fire, press and hold both the Volume Down and Power buttons until the device shuts down. This should take no longer than 10-15 seconds. If it asks for confirmation to power off, press OK.

If you have a first to fourth-generation Kindle Fire, press and hold only the Power button to shut down the device.
After the device has turned off, boot it up and see if the issue has disappeared.
How to Factory Reset Your Kindle Fire
When the issue persists after a soft reset, you can try a hard reset to restore your Fire Tablet to factory settings. A factory reset will wipe all your data, apps, and personal information from your Amazon Fire, so be sure to prepare a backup first (find this at Settings > Device Options > Backup & Restore).
Note: Your Kindle needs at least a 30 percent charge before you can initiate a factory reset.

To hard reset your Kindle Fire from within Fire OS, go to Settings > Device Options > Reset to Factory Defaults. Read the warnings and press Reset to initiate the process. Your Kindle Fire will immediately reboot and erase all content.

To factory reset an Amazon Fire without booting into Fire OS—useful if your device doesn’t start up properly anymore—follow these steps:
- If your Kindle Fire is still running, turn it off.
- Now press and hold the Volume Down and Power buttons.
- After a few seconds, your Kindle will boot into the Amazon system recovery screen.
- Use the Volume buttons to navigate to the wipe data/factory reset option.
- Press the Power button to proceed.
- Again, use the Volume buttons to select the Yes — delete all user data option.
- Press the Power button to confirm.

Note: First and second-generation Kindle Fires don’t respond to a physical hard reset. Your only option for a factory reset is to boot into Fire OS and go through the Settings menu.
Your Kindle Fire, Restored
With your Kindle Fire restored to factory settings, any issues should be resolved. If you made a backup, you can now restore it via Settings > Device Options > Backup & Restore.
By the way, did you know you can remove ads from your lock screen and install Google Play on your Kindle Fire?
Read the full article: How to Factory Reset Your Kindle Fire
from MakeUseOf https://ift.tt/31dKODF
via IFTTT
The All-in-One OmniFob Controls Your Entire Home and Fits in Your Pocket

It’s starting to feel like smart homes are actually giving us more remotes and other devices than we had before everything was connected to the internet. A new device from Keyport called OmniFob aims to rectify that problem by being the one tiny keyfob that can control just about anything you could ever want or need it to.
Why OmniFob Is Worth a Look
The quickest way to describe what OmniFob does is to say it’s like a universal remote for your keychain. It can perform actions such as opening a garage door, integrate with a smart home system, or even send an SOS message if you find yourself in an unfortunate situation where getting to your phone is impossible. If there’s something you can control with your phone, OmniFob will probably be able to control it.
Rather than run a different smartphone app or carry around a different remote, OmniFob is designed to pair up and just work. This is going to sound like a big-time first world problem, but with this fob, you won’t need to dig your phone out of your pocket and launch a dedicated app when you just want to do something simple like unlock your car or turn on your lights. Instead, you can just hit a button and make it happen.
Essentially, the small fob features two buttons and motion sensing that make it work. Different button combinations and shakes will perform different actions, which are customizable depending on the needs of the user.
OmniFob is designed to work with all kinds of smart home systems like Samsung SmartThings and Yonomi. For cars, it’s designed to work with connected systems such as MoboKey and Blue Eclipse. It supports Sire, Google Assistant, and Alexa, which opens it up to a wide range of possible functions.
The device can also work like a Tile tracker to find your phone. And going the other way, you can use your phone to find your OmniFob (and by extension, your keys). It can be used as a remote shutter for a phone camera, and as a mini flashlight, so even without the connected services, the device is pretty cool.
OmniFob Price and Availablity
Keyport, Inc. is seeking funding for its OmniFob on Kickstarter, and its already more than doubled its initial goal. If you’re interested in ordering a device, which the creators plan to ship in February 2020, you can do so for $91. By ordering it early, you save a little bit of money and the creators claim you won’t have to pay an annual fee to connect it with your devices and services, while buyers who purchase at retail may have to pay a subscription.
Obviously, there are risks involved with backing a Kickstarter project, and you should definitely be aware of these before you drop your hard-earned cash on one.
Read the full article: The All-in-One OmniFob Controls Your Entire Home and Fits in Your Pocket
from MakeUseOf https://ift.tt/30XnABs
via IFTTT
Master Six Sigma Project Management With This Huge 15-Course Training Bundle

Most big companies use a framework such as Six Sigma to keep things running smoothly. Anyone who wants to work at a senior level (and secure a top salary) needs to understand the system. The Complete Six Sigma Training Suite Bundle helps you master both Six Sigma and Lean management, with 15 video courses and over 1,300 tutorials. Right now, you can pick up the lot for just $39.99 at MakeUseOf Deals.
Six Sigma Methodology
Originally developed at Motorola and then championed by GE, the Six Sigma framework is now used by thousands of major companies around the world. Whether you’re an aspiring project manager or simply trying to improve your résumé, it’s a good idea to learn this methodology.
The Training Suite Bundle brings together a huge selection of high-quality Six Sigma courses. Through concise video lessons, you learn the vocabulary of Six Sigma and how to apply the framework in any working environment. Along the way, you learn valuable management skills and get full prep for official certification exams.
In addition to Six Sigma, this training covers Lean — a related framework used mostly in manufacturing and tech. You also get an introduction to Minitab, the statistical software of choice for many project managers.
15 Courses for $39.99
Order now for just $39.99 to get lifetime access to this huge learning library, worth $2,843.
Read the full article: Master Six Sigma Project Management With This Huge 15-Course Training Bundle
from MakeUseOf https://ift.tt/2K1FXj1
via IFTTT
5 Faster Chrome Extensions to Speed Up Web Browsing

Google Chrome is the browser we all love to hate. It’s fantastic, but it gets slow with time. Here are five tools to speed up web browsing on Chrome, especially on slower connections.
Now, none of these are going to make your computer faster. They attack the web browsing aspects of Chrome, which is all about how quickly the pages load. If the browser itself is sluggish and freezes up often, the best thing you can do is to reduce Chrome’s memory usage and free up RAM.
1. FasterChrome (Chrome): Speed Up Browsing by Smart Preloading

FasterChrome is an extension that claims to be smart enough to figure out which page you are about to click and starts loading it before you click. Sounds incredulous? Here’s how it works.
The extension tracks your mouse’s movements across the browser. Once the cursor hovers a link for 65 milliseconds, FasterChrome starts preloading the link. Apparently that 65 milliseconds is the magic point where you have a 50% chance of clicking the link or not. And this gives the extension about 300 extra milliseconds to preload the page. It only preloads the HTML to save bandwidth and resources.
The result is that your web browsing feels much faster than before, as the human brain perceives actions taking less than 100 milliseconds as instant. FasterChrome is also smart enough to not activate on pages where you need to sign out.
Download: FasterChrome for Chrome (Free)
2. Web Boost (Chrome): Secure, Open-Source Speed Tweak

Instead of attacking each page to load it faster, or preloading certain pages, Web Boost has a different philosophy to enable faster browsing. Its focus is to make Chrome do less work by storing building blocks.
By building blocks, Web Boost means elements that are common across several web pages. For example, the social media sharing buttons or Google Adsense code used in many websites is the same. So why should your browser download these from the website every time?
By identifying common website building blocks and refusing to download them again, Web Boost speeds up page loading times. The extension doesn’t require any configuration or any caching. Also, videos and images don’t lose quality too.
Download: Web Boost for Chrome (Free)
3. AMP Browser Extension (Chrome): Load AMP Pages on Desktop
AMP, or Accelerated Mobile Pages, is a Google project to speed up how web pages are loaded on mobile phones. The AMP Browser Extension brings this feature to the desktop in an unofficial capacity.
AMP analyzes and optimizes a page’s HTML, JavaScript, and CSS, while also adding it to Google’s cache. The combined effect is that when you click a page from a result on Google search or Google News, it opens faster. Some tests by independent developers have found pages to load faster by about 300-400%.
You can stick with the AMP pages or go back to the full-featured Web pages by clicking the blue AMP extension icon. You’ll also see a highlight on AMP links in Google search results.
Do note that the extension hasn’t updated in a long time, but it works as advertised. The developers are now trying to build a standalone AMP Browser based on Chromium that not only accelerates pages but also reduces data consumption.
Download: AMP Browser Extension for Chrome (Free)
4. McAfee Web Boost (Chrome): Stop Auto-playing Videos

The most annoying new trend among websites is to feature videos that start auto-playing as soon as you visit the page. Now only does this slow down browsing, but there doesn’t seem to be a clear and easy fix for it.
People find methods to block auto-playing videos on Chrome, and developers keep coming with new ways to circumvent the methods. It’s like an eternal dance. For now, the easy solution seems to be installing McAfee Web Boost, which works better than any other extension I’ve seen. And don’t go by the “zero videos stopped on this site” notice sometimes, it’s doing the job without the counter getting added.
Please note that McAfee routinely gets called up for privacy issues about sharing consumer data, but no one has so far pointed out any flaws with this extension.
Download: McAfee Web Boost for Chrome (Free)
5. Shut Up (Chrome): Block Comments Everywhere

Comments are often a time sinkhole that you inadvertently fall in. Thus derailing your web browsing session into a vitriolic exchange with a random internet commenter. Shut Up blocks comments everywhere on the web by default.
This is especially true on websites of major news media outlets, YouTube and Twitch, and other similar portals. While comments aren’t necessarily bad, they are a distraction that can also negatively affect your mood. Shut Up hides all comments on any web page, so you aren’t tempted to see them, participate in them, or find a rabbit hole to dive into.
If you still want to see the comments on any page, in a couple of clicks, you can filter that website to always allow comments.
Download: Shut Up for Chrome | Firefox | Safari (Free)
Fix Annoying Chrome Issues
Extensions aren’t a foolproof solution to speeding up a sluggish Chrome browser. In fact, extensions can also end up taking more CPU and RAM resources, and thus slow down the whole computer.
That’s why, apart from these extensions, you should first fix some common annoying Chrome issues. For all you know, deleting the Web Data file is the only thing you need for a faster Chrome browser.
Read the full article: 5 Faster Chrome Extensions to Speed Up Web Browsing
from MakeUseOf https://ift.tt/2YrB4DH
via IFTTT
Discord Adds Server Folders to Organize Your Chats

Discord has finally added server folders to help you organize your chats. Discord users have been requesting server folders for years, and the chat app has finally delivered. Now, you just need to decide which servers to organize into which folders.
How to Organize Your Discord Servers Into Folders
Until now, Discord hasn’t supported folders. This meant that users have been stuck with a list of servers in the sidebar. This was fine for those people who only ever joined a handful of chats, but was an organizational nightmare for those in tens or hundreds of chats.
Now, you can now organize your Discord chats into server folders. All you need to do to create a server folder is drag one icon on top of another. To remove a server from a folder, simply drag it away. You can see this process in Discord’s cinematic video below.
As explained on Discord Support, there are a few other things you can do with Discord’s new server folders. Either right-click or long-hold the folder (depending on your device) to access Folder Settings. You can then rename each server folder or change its color.
The new server folders are available on all platforms, and the only change made to the Android app. However, on desktop and iOS, Discord has made a number of other changes, including reducing CPU usage (desktop) and opening links in their native apps (iOS).
Everything You Need to Know About Discord Servers
While server folders aren’t the biggest feature in the world, they should make it much easier to keep your Discord chats organized and easy to find. Which, for those users who are members of a high number of different chats, should make Discord easier to use.
Now that you know how to organize your Discord servers into folders, you should discover the best Discord servers available to join. Alternatively, perhaps now is the time to set up your own Discord server, which is probably easier to do than you think.
Read the full article: Discord Adds Server Folders to Organize Your Chats
from MakeUseOf https://ift.tt/2MqC5JN
via IFTTT
9 Free Fan-Made Pokémon MMOs All Trainers Will Love

Pokémon Go isn’t just a game. For a select few, it’s the realization of a dream. Since its inception, fans have craved a Pokémon MMO (massively-multiplayer online) game that allows players to compete with one another like real Pokémon trainers.
While Pokémon Go is still wildly popular, some fans have made their own renditions of the game. The following are the best fan-made Pokémon MMOs available online. They integrate all of the familiar aspects of the Pokémon games for free!
Disclaimer: The following games, while the products of monumental effort, are not official and are therefore liable to shut down at Nintendo’s discretion.
1. Pokémon Revolution Online

When it comes to fan-made Pokémon MMORPG games, Pokémon Revolution Online is at the top of the heap. From the sprite detail to the soundtrack, everything about this game is tailored to feel like an actual Pokémon game. The game also incorporates excellent ambient graphics which change with the time and weather.
The base game is fantastic in itself, but Pokémon Revolution Online also continually adds new features every month. For free, of course. You have the option to join or create your own guild while exploring the Kanto, Johto, Hoenn, and Sinnoh regions.
This game absolutely promises hours of entertainment. The map is huge, and the game is truly massively multiplayer. Not only that, you can join guilds and partake in player-versus-player (PvP) battles just like an actual MMO. Pokémon Revolution is definitely one of the best—if not the best—multiplayer Pokémon game.
2. PokéMMO

Another top contender for best fan-made Pokémon MMO out there, the aptly named PokeMMO brings the Pokémon franchise into the modern era.
Of course, it has everything a Pokémon fan would want: a large Pokémon library, huge map, dynamic graphics, beautiful sprite animations, and so on. You can also build bases reminiscent of the secret base feature in Pokémon Ruby, Sapphire, and Emerald.
This is a facet I enjoyed in those Pokémon games and am glad to see in a Pokémon MMO. It’s much better than emulating old Pokémon games on your Android when you want to work on a base.
Better yet, it’s massively popular and polished. To install this game, you’ll need to access, download, and unzip a ROM of Pokémon FireRed. Other optional ROM installations will provide further graphic and visual content. Head to the developer’s instructions for a rundown of how to get PokeMMO working on your PC.
3. Pokémon World Online

Pokémon World Online (PWO) is an old-timer as far as Pokémon MMOs are concerned. Despite its age, it’s still one of the best online Pokémon games. It’s also, in my opinion, one of the most in-depth in terms of Pokémon statistical information and feature availability.
PWO is a standalone installation, which makes it a bit more immersive than browser-based alternatives. That also allows for a particular smoothness and finish that makes it feel like a serious Pokémon MMO compared to the other, more popular versions of the same type.
It’s also interesting in that the UI is largely customizable. Instead of a dynamic environment, you can cater the game design to your needs and focus on the battle rather than the environment. It’s a familiar Pokémon feel with more calculated gameplay, likely to entertain both old and new Pokémon players for hours.
4. Pokémon Planet

Pokémon Planet is not only fun, but impressive. The play area and Pokémon library are massive, and the game is true to the Pokémon series. You don’t need to download it, making it one of the best free browser games.
Pokémon Planet also hosts a multiplayer event called Clan Wars, wherein players of different clans—which you can start and join—battle each other at specific times throughout the week.
You can play with friends or go the solo route. While this game doesn’t provide much in the way of a single-player story mode, it’s a fantastic browser-based multiplayer experience and provides plenty of items and Pokémon to keep even the most hardcore Pokémon fans entertained.
5. Pokémon MMO 3D

Pokémon MMO 3D‘s focus concerns battle animation rather than environment modeling, but I’m still impressed by it every time I log in. Keep in mind, this isn’t some official endeavor on behalf of professional developers. It’s fans making dreams come to life.
Pokémon MMO 3D provides little in story. What is does offer, however, is exactly what users would want from a 3D version of Pokémon: you can summon and battle Pokémon in a 3D environment. Best of all, the developers are constantly working on both the user interface and Pokémon selection.
6. PokéOne

PokéOne is the newest addition to the collection of Pokémon multiplayer games. So far, this game is very promising—it may even surpass some of the above games as the best Pokémon MMO. PokéOne comes from the creators of Pokémon Revolution Online, and it shows. This amazing take on Pokémon 0ffers fun tournaments and events, and also allows you to interact with other trainers.
The development team is still working on PokéOne, so you can’t expect to see every type of Pokémon just yet. Right now, you can access the Johto and Kanto regions, in remarkable 3D graphics.
In order to download PokéOne, you’ll have to join the PokéOne Discord first. From there, you can find the download link, along with any other game updates.
7. Pokémon Legends

If you’re not in the mood for downloading an entire game on your computer, you can play Pokémon from the comfort of your own browser. Simply sign up for an account with Pokémon Legends, and access an entire Pokémon community. Pokémon Legends holds tournaments every hour, giving you the chance to win prizes (such as a Shiny Pokémon).
If you’re familiar with the history of Pokémon, you’ll notice that Pokémon Legends has an art style reminiscent of classic Pokémon games. It also comes with the option to auction off your Pokémon, purchase Pokémon from other players, and even trade them.
8. Pokémon Rise

Pokémon Rise makes you feel as if you’re playing a full-sized Pokémon game. This browser-based Pokémon game comes with everything (and more) that your typical Pokémon game comes with. Explore 25 different towns on a huge map, catch over 700 different Pokémon, and engage in battles with other players.
Not only does Pokémon Rise come with a plethora of features, but it also has an engaging storyline. Your character arrives in a new region after receiving an assignment from Professor Aspen. In that particular region, Pokémon Trainers started creating clans to overtake every Gym.
As you work to catch every Pokémon, you get the chance to form the most successful clan. The developers are constantly updating this game, so expect to see more features soon.
9. Pokémon Pets

Pokémon Pets may look a little old-school, but it’s still just as enjoyable as every other Pokémon online MMORPG on this list. This Pokemon browser game has been around since 2014, giving the developers plenty of time to add awesome features.
The game features 2,500 Pokémon—however, not all of them hail from the original Pokémon games. These made-up Pokémon are called “Fakemon,” and are created by the members of the Pokémon Pets community.
In addition to having exciting PvP battles, Pokémon Pets also has daily boss battles, daily rewards, and puts your skills to the test in endless tower battles. Once you get good enough, you might see yourself at the top of the Pokémon Pets leaderboard.
Play With a Team of Trainers in These Pokémon MMOs
You’ve played all the Pokémon games, tried your hand at Pokémon Go, and you’re still asking for more. So why not try a multiplayer experience with the Pokémon MMO games listed above?
If you’re more of a Pokémon purist, you can also try a selection of the best free, fan-made Pokémon games which—in my humble opinion—take the regular playstyle up a notch. Either way, you’ll have an awesome time celebrating Pokémon.
Read the full article: 9 Free Fan-Made Pokémon MMOs All Trainers Will Love
from MakeUseOf https://ift.tt/2yp21NK
via IFTTT
The Pakt Coffee Brewing Kit for Travel: Portable, Durable, Delicious

Sometimes, you just need to make a really delicious cup of coffee when you aren’t at home. Unfortunately, if you’re into a really good cup of joe, most hotel room coffee makers just aren’t up to the task of creating one for you.
That’s where a new coffee kit called Pakt comes into play. It’s designed to make a cup of coffee that’s as good or better than what you’d make at home but in a small size. It’s portable enough to bring with you even in the smallest pieces of luggage.
A Closer Look at the Pakt Coffee Kit
Obviously, the main thing that makes Pakt worth a second look is the size of it when compared to what it’s capable of doing. It features a pour-over design that Pakt, which is also the name of the company responsible for the kit, promises will make barista-quality coffee drinks. But it does it while only weighing in at 3.76 pounds. The whole kit 12.5-inches long with a 4.5-inch diameter, which is pretty small for a fully-featured coffee creation station.
To put the size into perspective, Pakt says that its coffee kit takes up around the same amount of space as a pair of shoes in your luggage. What’s more important, another pair of shoes or a delicious, caffeinated cup of coffee? Well, that’s for you to decide.
Basically, the kit includes a kettle, a collapsable dripper, and a travel mug, which are all the parts you’ll need to heat up the water and pour over some delicious coffee grounds.

The image above shows a little breakdown of what you’ll need to do to craft your perfect cup of coffee, and the process looks quite painless.
Pakt Coffee Kit: Pricing and Availablity
Pakt is seeking funding on Kickstarter to bring its new coffee kit to market. The portable device has already exceeded its funding goal. Assuming everything goes according to plan (there are certain risks that come with backing a Kickstarter project), the team expects to deliver the kits to backers in December.
If you’re interested in purchasing a Pakt Coffee Kit for yourself, you can order one right now for $139. When the device hits retail, the creators say it will sell for $189, so the early price is a pretty decent deal.
Read the full article: The Pakt Coffee Brewing Kit for Travel: Portable, Durable, Delicious
from MakeUseOf https://ift.tt/2MqC3Sb
via IFTTT
How to Fix an Unexpected Store Exception Error in Windows 10

Getting a blue screen of death (also known as a stop code error), where your system unexpectedly crashes, is frustrating. Especially when you don’t understand the problem. If the error is named “Unexpected Store Exception,” we can help.
Despite what you might think, this error has nothing to do with the Microsoft Store. We’re going to show you various ways to troubleshoot this error to determine the cause of an Unexpected Store Exception in Windows 10.
1. Check the Health of Your Hard Drive
The error often indicates that you’re using a failing hard drive. It’s easy to check this with a program like CrystalDiskInfo. Download the standard edition, run the installer, and open the program.

The tabs at the top let you change between drives if you have multiple. Look at the Health Status, which is being determined from the values listed in the table beneath.
Good means exactly that and shows your drive is in fine health. Bad or Caution are obviously negative.
If you see either Bad or Caution status then you need to replace the drive as soon as possible because it’s at risk of failing imminently. In fact, even if you see Good, it’s worth switching the drive if you have one spare—the number one cause of the Unexpected Store Exception stop code is a faulty hard drive.
See our guide on how to replace a hard drive if you need help with replacing yours.
2. Update Your Display Driver
Display drivers causing incompatibility issues can also trigger this error. It’s worth ensuring they are updated.
To begin, boot your system into Safe Mode. Check out our guide on booting Windows 10 in Safe Mode if you need a hand.
Press Win + X and click Device Manager. Once here, double-click on Display adapters. This will display your graphics card. Right-click the result and click Uninstall device. Confirm it and restart your PC.

Press Win + I to open Settings and click Update & Security. Once here, click Check for updates. Windows should automatically find the latest driver and update your system.
If that doesn’t work, go to your graphics card manufacturer’s website to download the drivers, following their instructions. See our guide to replacing outdated Windows drivers for more information on downloading and updating drivers.
3. Run System File Checker
Faulty system files could also cause this error. Handily, Windows includes an easy way for you to scan your system and have it automatically attempt to repair any problematic files.
Press Win + X and click Command Prompt (Admin). Once opened, type sfc /scannow and press Enter.

This will initiate the scan. It’ll display a message once completed. It might “not find any integrity violations”, which means all is fine. Alternatively, it might say:
- Windows Resource Protection found corrupt files and successfully repaired them. Details are included in the CBS.Log %WinDir%\Logs\CBS\CBS.log
- Windows Resource Protection found corrupt files but was unable to fix some of them. Details are included in the CBS.Log %WinDir%\Logs\CBS\CBS.log
If so, input the following in Command Prompt to view that log:
findstr /c:"[SR]" %windir%\Logs\CBS\CBS.log >"%userprofile%\Desktop\sfclogs.txt"
This will output the log to your desktop, where you can review the problematic files. If the errors can’t be fixed, as per the second message listed above, you may want to consider reinstalling Windows to get fresh copies of everything.
4. Disable Your Antivirus
Your antivirus software could be interfering with your system and causing the error. Try temporarily disabling your antivirus and see if the error still occurs. How to disable will vary depending on your software, but chances are it’ll be somewhere in the program’s Settings menu.
If you’re using Windows Defender, press Windows key + I to open Settings. Go to Update & Security > Windows Security > Virus & threat protection > Virus & threat protection settings and slide Real-time protection to Off.

Alternatively, if using any third-party antivirus software, you could try uninstalling it entirely. Press Win + I to open Settings and go to Apps. Find your antivirus on the list, click it, then click Uninstall.
Of course, it’s not the best practice to leave your system unprotected. If this doesn’t fix the Unexpected Store Exception error, enable your antivirus again to help keep your computer secure.
5. Turn Off Fast Startup
Fast startup is a feature that is enabled by default on up-to-date Windows 10 systems. With this, your computer uses a type of hibernation in order to give you quicker boot speeds, especially on hard disk drives.
While great, it can cause some drivers to not load properly, which can lead to the Unexpected Store Exception error. As such, it’s worth disabling fast startup to see if it gets rid of the error.

Press Win + R to open Run. Input control panel and click OK. Click Power Options, then Choose what the power buttons do from the left-hand panel.
Once here, click Change settings that are currently unavailable. Untick Turn on fast startup (recommended) and click Save changes.
Need More Help?
Hopefully, the steps above have helped you troubleshoot or solve the issue. Most commonly, the culprit for the Windows 10 Unexpected Store Exception blue screen error is faulty hardware. If not, the other steps mentioned are worth perusing.
If you still need help, check out our guide to troubleshooting blue screen of deaths, which contains loads of tips on how to find the root cause.
Read the full article: How to Fix an Unexpected Store Exception Error in Windows 10
from MakeUseOf https://ift.tt/2sL3aPS
via IFTTT