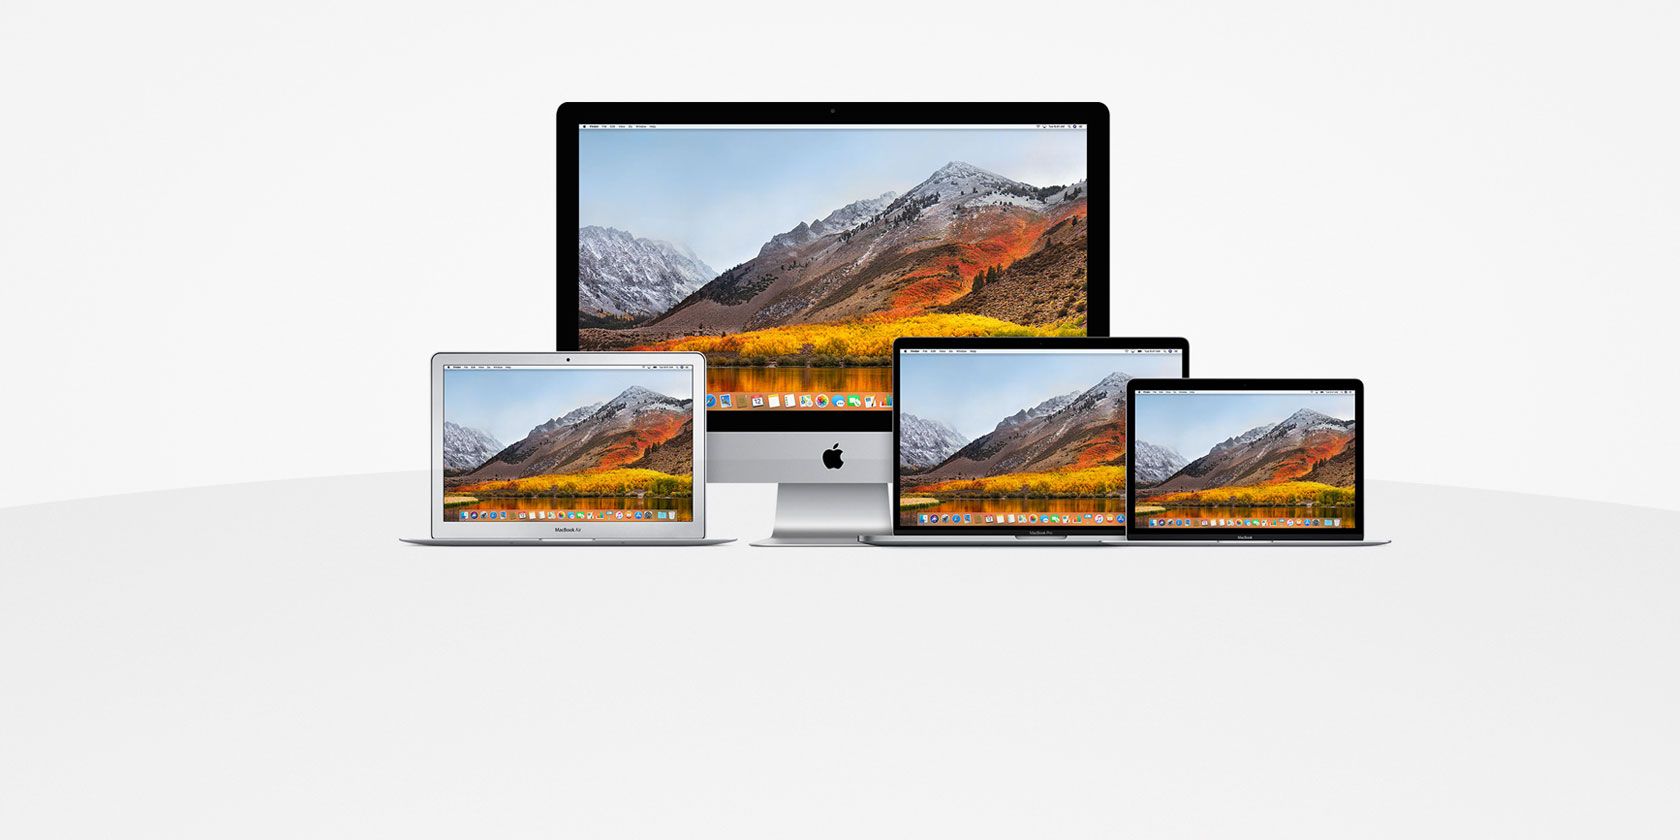
So you took the plunge and finally bought a Mac. Congratulations on your new purchase—now it’s time to learn how to use it!
macOS is well-known for its ease of use, and we’re confident you will adjust to your new platform in no time. That said, there are a few tricks that will help you get started and avoid confusion later on.
So here’s our complete beginner’s guide to macOS that’ll teach you everything you need to know about the Apple ecosystem for iMacs and MacBooks, split into the following chapters:
- What Is macOS?
- Setting Up Your New Mac
- The Basics of Using macOS
- Understanding iCloud and macOS
- Backups and Maintenance on macOS
- Troubleshooting macOS Issues
1. What Is macOS?
macOS is the name of the operating system that powers all Mac computers, like Windows on PCs. Unlike Windows, macOS is only supplied with Apple computers. Many users cite the operating system as one of the reasons they buy Apple hardware.
The operating system receives regular security updates and one major upgrade each year. macOS was previously known as Mac OS X, and the first version (10.0) debuted in 2001. The current version is macOS 10.13 High Sierra, released in October 2017.
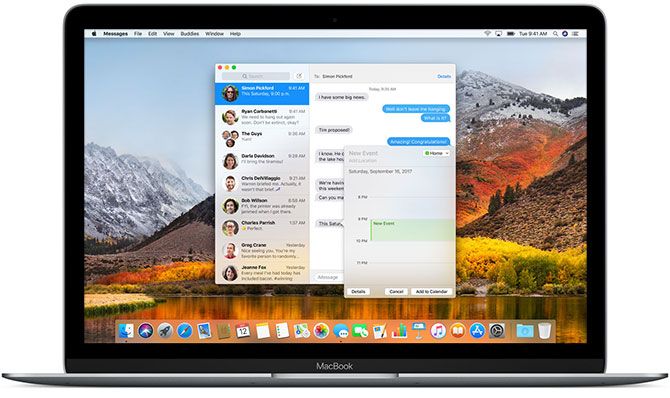
Unlike Windows, macOS is based on the Unix operating system, with routes tracing back to the 1970s. As a result it shares many similarities with Linux and other Unix offshoots, like the Bash command line interface and Unix permissions layer.
macOS is a fairly straightforward operating system. It comes with a rich suite of apps to simplify everyday tasks like email and web browsing. It integrates well with Apple’s family of mobile devices like the iPhone and iPad.
2. Setting Up Your New Mac
Setting up your Mac will take around 20 minutes, during which you’ll be guided through the setup process.
The first thing to do is take your Mac out of the box, connect the power cable and any relevant peripherals (keyboards and pointing devices), then hit the Power button. You’ll see Apple’s trademark logo appear on screen, then you can start setting up your computer.
This requires connecting to Wi-Fi almost immediately, so make sure you have those credentials ready. You’ll then see prompts to provide information like your time zone, keyboard layout, and whether you want to share anonymous usage data with Apple.
Your Mac requires an Apple ID for iCloud, the App Store, iTunes and other purposes. If you have an Apple ID that you’re already using for your iPhone or iPad, use the same account. Those who don’t yet have an Apple ID can create one now.
Once you’ve made it through the initial setup, your Mac will restart. You’ll see a clean desktop with a row of icons (the dock) at the bottom of the screen. You’re now ready to begin!
3. The Basics of Using macOS
Let’s start with the most important parts of using your Mac.
3.1. Desktop and Menu Bar
When your Mac first boots up, you’ll see the core user interface components. At the top of the screen is the menu bar, at the bottom is the dock, and behind all your windows is the desktop.
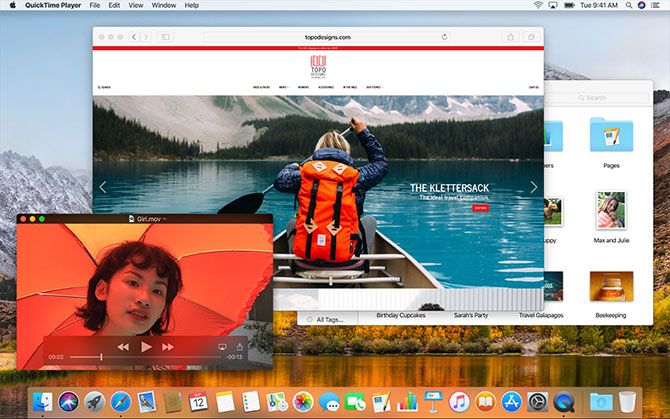
Like most other desktop operating systems, macOS uses a desktop as a temporary workspace on which to store files. Hard drives, external drives, and mounted disk images will all appear here when connected to your machine. You can right-click to create folders and drag to arrange your desktop as you see fit.
At the top of the screen, the menu bar changes based on the app currently in focus. The Apple menu is where you can Shut Down your machine, and access information related to your Mac under the About This Mac option.
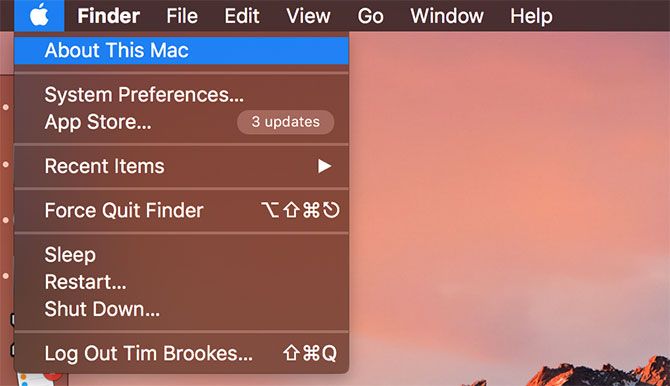
The menu bar displays application options like File, Edit, Help and so on. On the right-hand side of the menu bar are status indicators for system and third-party apps. These include Wi-Fi and battery meters, as well as apps like Shazam or Evernote if you’re using them.
You can re-arrange these items by holding Command while clicking and dragging. There’s a whole sub-category of menu bar apps built to reside in this easy-to-reach tray at the top of the screen.
3.2. The Dock
The dock is the closest equivalent macOS has to a Windows Start menu. It’s divided into two parts: shortcuts to apps, and pinned folders or minimized windows. You can arrange the dock to appear along the bottom, left, or right edges of the screen under System Preferences > Dock.
Launch pinned apps by clicking on them. Apps that aren’t pinned will also show up on the dock when in use. Right-click on any icon to decide whether or not to keep it in the dock, and drag apps to rearrange them. You can also drag icons out of the dock and release to remove them.
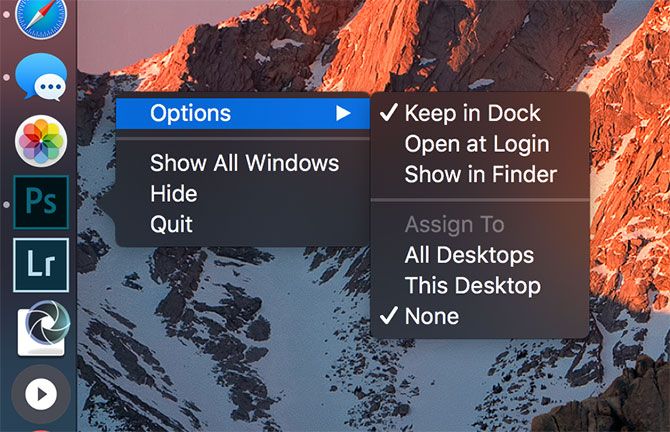
Dragging a file over an app icon and releasing will open the file in that app, assuming the app is compatible with the file. Dragging an application file into the dock will add it to the dock as a shortcut.
In the other (right-hand) section you’ll find a few pinned folders and the Trash. Drag any folder into the dock to pin it. Right-click to tweak its display, so it shows as a stack or regular folder. You can drag files into these folders to move them, just like you can drag files into the Trash to delete them.
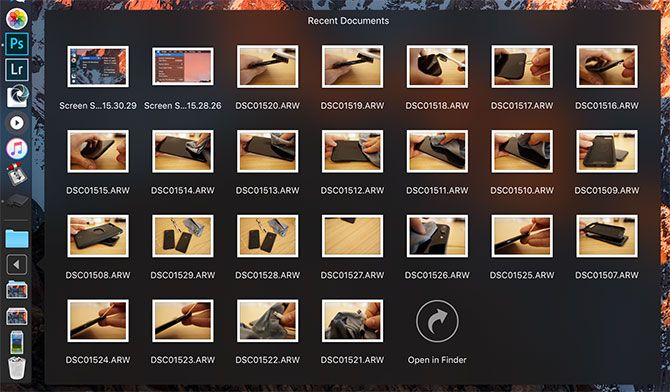
Finally, if you want to remove a mounted drive or disk image, simply drag it over the Trash. You can quickly empty the Trash by right-clicking and choosing Empty Trash.
3.3. Finder
Finder is the default macOS file management app. Just like Windows Explorer, Finder lets you browse your hard drives and other connected devices.
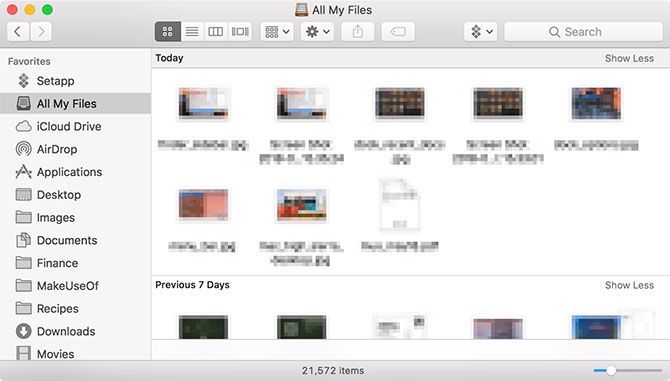
There are several components to the Finder window, which you can toggle under the View menu bar item:
- Tab bar: Automatically shows and hides when you open a new tab within Finder (Cmd + T).
- Path bar: Displays the path to the current folder at the bottom of the screen.
- Status bar: Lists the number of items in a location and available disk space.
- Sidebar: A list of favorite or frequently-used locations on the left-hand side.
- Preview: An expanded preview pane on the right-hand side of the window.
The sidebar is especially useful, since you can customize it to display your favorite locations. Right-click and choose Remove from Sidebar to delete an entry. Click and drag a folder into the sidebar to add it permanently.
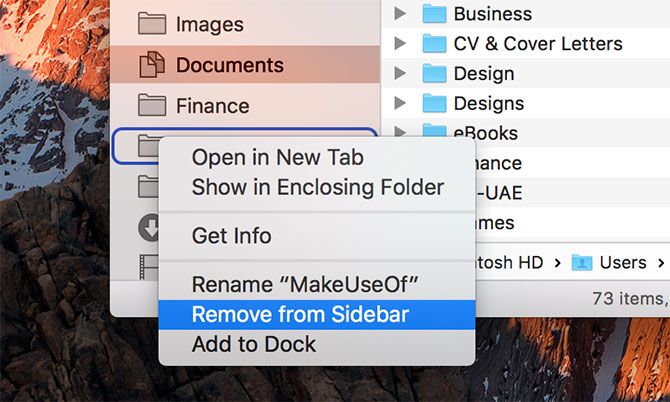
Scroll down to the Devices section to see currently mounted volumes and disks. Beneath that you’ll find shared network locations and tags. To remove or add sections, click Finder > Preferences in the menu bar at the top of the screen.
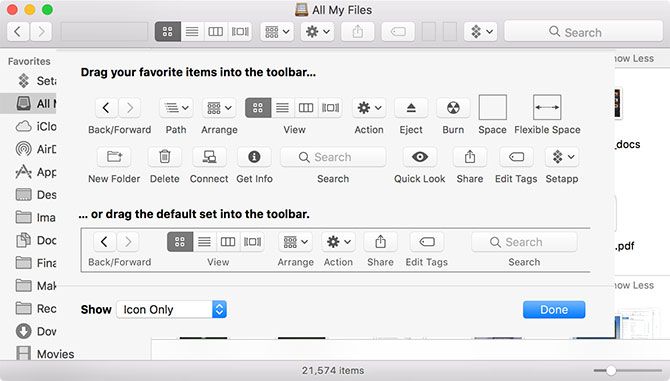
Finder uses a main toolbar to display common controls like back and forward. There’s also a healthy list of view options. You can view files and folders as icons, lists, columns, or in Apple’s “Cover Flow” preview mode. By default you’ll see Share and Tags buttons too.
Right-click on the toolbar to customize Finder. You can add or remove buttons and shortcuts, and rearrange fields like the search bar. By default the search bar is visible, and you can use it to search your entire Mac or simply the folder you’re currently viewing.
Finder supports copy (Cmd + C) and paste (Cmd + V) but not cut. On macOS, Move replaces cut. To “cut” a file you must first copy it, then move it (Cmd + Option + V). If you right-click and press the Option key, you’ll see “Paste” change to “Move.”
3.4. Spotlight
Spotlight is the name of your Mac’s search engine, and it appears in a floating window any time you press Cmd + Space. Simply type your query and macOS will respond with context-sensitive results. Hit Enter to action the top result, or scroll through what Spotlight has found till you find what you’re looking for.
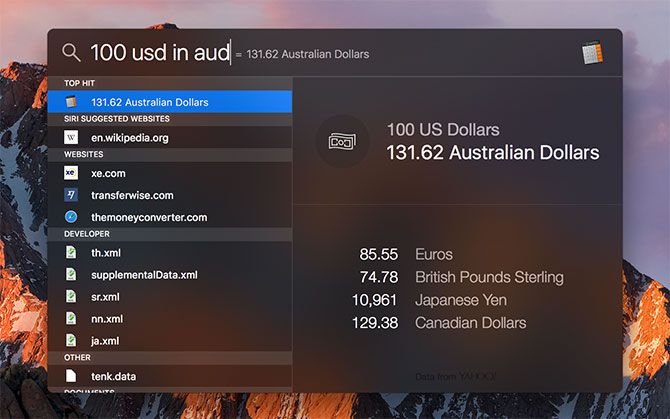
This handy search tool works not just for finding files, but also as an application launcher. Simply by typing you can:
- Find files, folders, documents, notes, email, messages, and more
- Launch applications and utilities
- Perform basic calculations
- Convert currencies, measurements, and other units
- Get suggested websites, definitions, Wikipedia entries, and more
- Use natural language for refining results
You should get used to using Spotlight to launch applications and find relevant results without ever taking your hands off the keyboard. It’s a powerful tool, especially when you know the best tips for Spotlight.
3.5. Applications
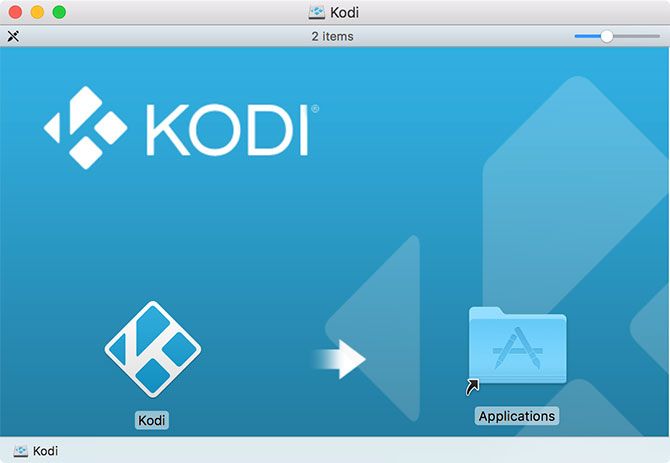
Most applications you download from the web will show up as a disk image (DMG) files at first. Double-click a DMG to mount it, after which it will show up to macOS like a read-only drive. Drag the application (APP) file to your Applications folder to install it. Deleting the APP file from this folder will remove the app from your system.
Some applications use a packaged installer (PKG), which is similar to how apps install on Windows. Run the PKG file and follow the on-screen prompts. Many PKG installers use packaged uninstallers to remove the app. These are the basics, but there’s more to installing and removing Mac software.
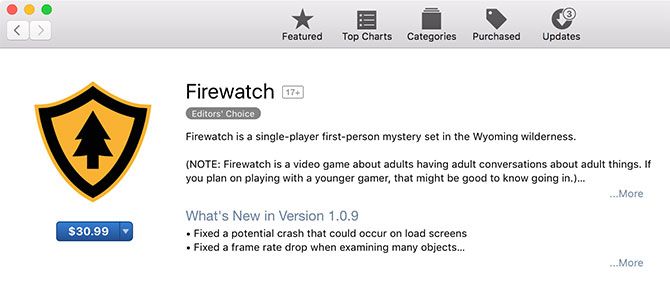
The other major way of installing Mac software is using the Mac App Store. This is an application which manages the install process for you. Launch the Mac App Store, and login with your Apple ID. Find an app to install, then click on Get or the item’s price, depending on whether the app is free or not. You can remove these apps as you would any regular app.
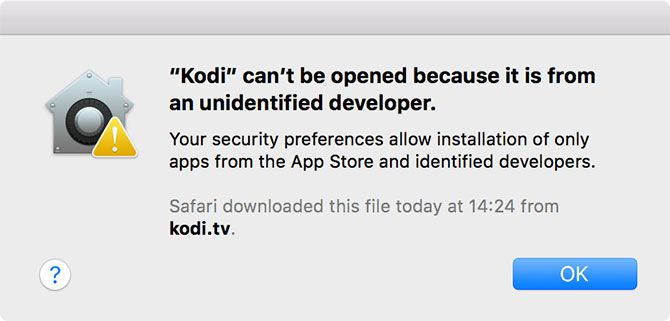
When installing some third-party applications, Gatekeeper will tell you that the installation cannot proceed because the source is not trusted. This is because the developer hasn’t applied to Apple for a developer license, something macOS requires when trusting new software. To bypass this protection, dismiss the initial dialog then head to System Preferences > Security & Privacy and click Open Anyway near the bottom of the screen.
There are other methods for installing software, like the command line utility Homebrew which pre-packages many open source projects into a repository.
3.6. System Preferences
You can configure pretty much everything under System Preferences, which is pinned to the dock by default. You can access it using the little silver cog icon, or right-click the icon to go straight to a specific section.
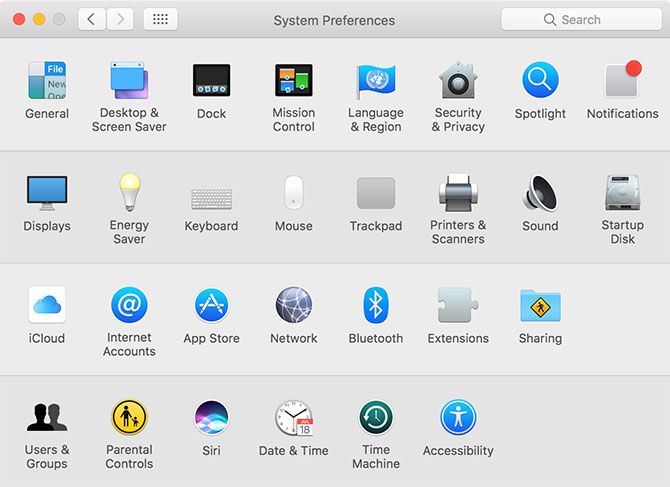
Note: Depending on your model of Mac and its features, you might see more or fewer options under your own System Preferences panel. Don’t worry if yours doesn’t look exactly like the screenshot above!
This should be your first stop if you’re looking to change something on your computer. Everything from adding a new user account, to changing trackpad sensitivity, to display resolution and security settings, lives here. You can use the search bar at the top to quickly find a specific preference pane, or click View to toggle alphabetic sorting.
You should take some time to familiarize yourself with the most common sections. A few tweaks you might want to make soon after you start using your new Mac are:
- Change your wallpaper under Desktop & Screen Saver
- Change the size, alignment, and behavior of the Dock
- Learn and adjust gesture controls under Trackpad
- Add new email and social media accounts in internet Accounts
- Specify a backup location with Time Machine
Remember: You can always search for any of these preference panes using Spotlight with the Cmd + Space keyboard shortcut.
3.7. Notifications and Today Screen
Click on the three-line icon in the top-right corner of your screen to display Notification Center and Today screen. You can also swipe with two fingers from the right edge of the trackpad, or set up hot corners to make triggering this feature even easier.
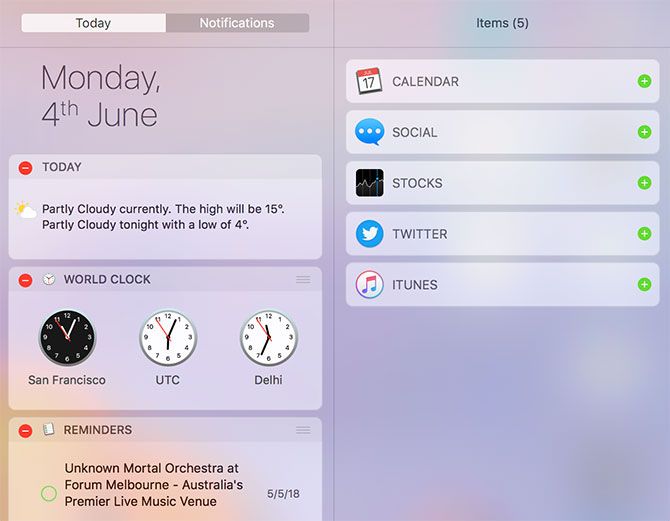
The Today screen is essentially an area for widgets, which are small snippets of information and interactive elements that tie in to your other apps. Scroll to the bottom of the list and click Edit to view your available widgets. Drag them to reorder them, and click on the green Plus or red Minus symbols to add and remove widgets.
When an app wants to send you notifications, you will receive a request that you can approve or deny. Incoming notifications will appear in the top-right corner of the screen, just below the menu bar. You can customize or revoke notification permissions under System Preferences > Notifications.
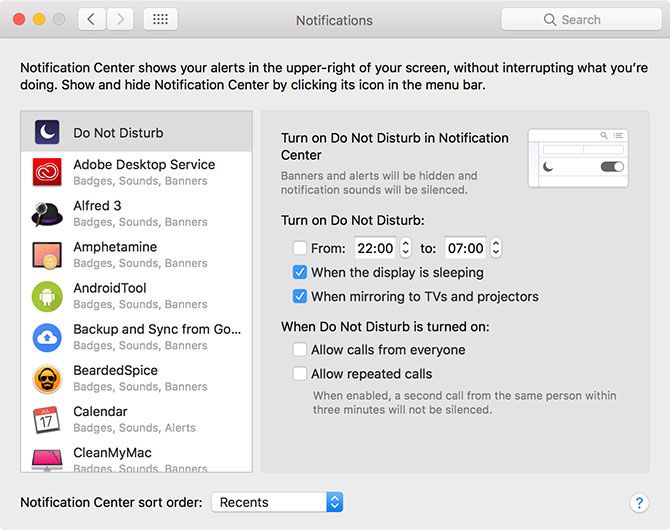
It’s common for websites to request access to Notification Center, but they will show up as separate apps rather than using Safari.
3.8. Gestures and Navigation
If you’re using a trackpad, either on a MacBook or with Apple’s Magic Trackpad accessory, you’ll have access to a range of gestures in macOS. Gestures trigger certain features and speed up navigation. You can customize these gestures and view some handy example videos under System Preferences > Trackpad.
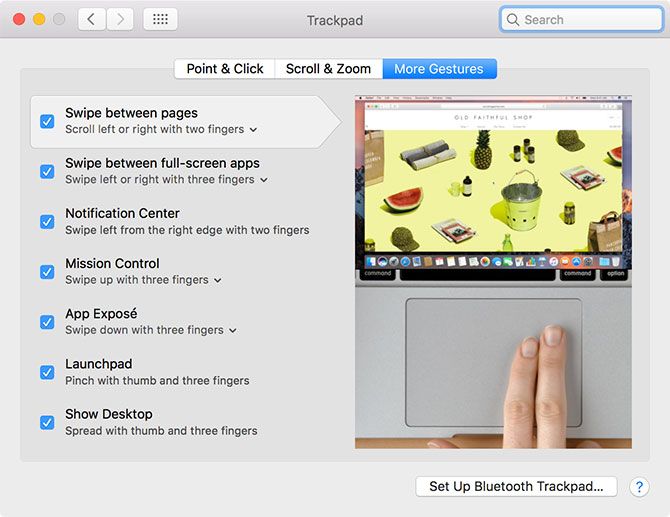
This is also where you can change scroll behavior (two-finger drag), enable tap to click (so you don’t need to fully depress the trackpad), and change the gesture for swiping between desktops (horizontal three-finger drag).
Some modern MacBooks have Force Touch trackpads, which is the same basic technology behind 3D Touch on an iPhone. By pressing slightly harder than you would to trigger a regular click, you can trigger a Force Touch—essentially a whole new mouse button for context-sensitive operations.
You can vastly speed up your interactions with macOS by learning a few basic Mac keyboard shortcuts. Some useful ones to start you off are:
- Copy: Cmd + C
- Paste: Cmd + V
- Move (after copying): Cmd + Option + V
- App Switcher: Cmd + Tab
- Screenshot: Cmd + Shift + 3 (captures the whole screen; you can also take screenshots in other ways)
- Spotlight: Cmd + Space
- Siri: Cmd + Space (hold)
- New Tab (Safari, Finder, and more): Cmd + T
3.9. AirPlay and AirDrop
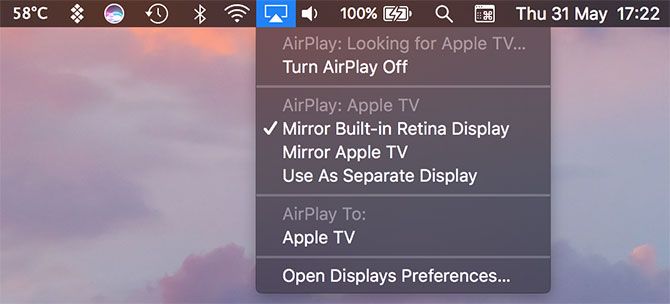
AirPlay is Apple’s proprietary wireless streaming technology. You can send video or audio (or both) to an AirPlay receiver like an Apple TV by clicking on the AirPlay icon (below) in the menu bar at the top of the screen. You can also send media to receivers using the AirPlay icon when you see it in other apps, like iTunes and Spotify.

Click on the AirPlay icon to enable mirroring, which sends your Mac’s screen to an AirPlay receiver of your choice. This is ideal for presentations and sharing photos, but performance will depend on your network speed and interference. You can choose to output your Mac’s sound to AirPlay devices by choosing them as an Output device under System Preferences > Sound.
AirDrop is Apple’s proprietary wireless file sharing technology. Use it to send files between Mac computers and iOS devices like the iPhone and iPad. Launch Finder and click on AirDrop in the sidebar to scan for a list of available recipients. If you’re trying to receive a file on your Mac, make sure you have this screen open.
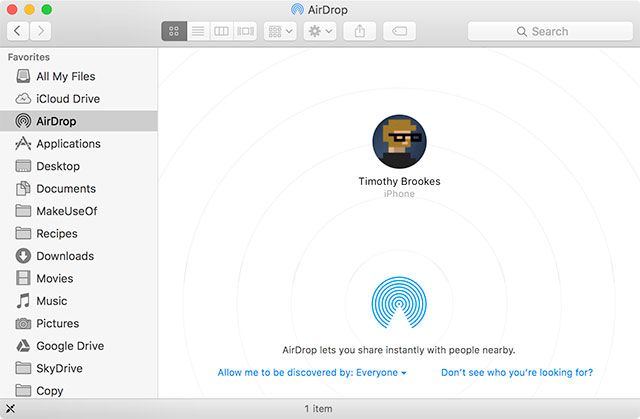
You can share virtually anything using AirDrop from your Mac. The quickest way is to right-click on a file or link, then click Share > AirDrop. You can also use the Share button built into many Mac apps, like Safari and Notes. AirDrop is handy when it works, but it’s notoriously hit and miss. Check out our AirDrop troubleshooting guide if you’re having issues.
3.10. Siri
Siri on Mac is just like Siri on iPhone. By holding the Cmd + Space shortcut you can ask Siri to find files, fetch information from the web, send email and messages, and even call people—right on your Mac desktop.
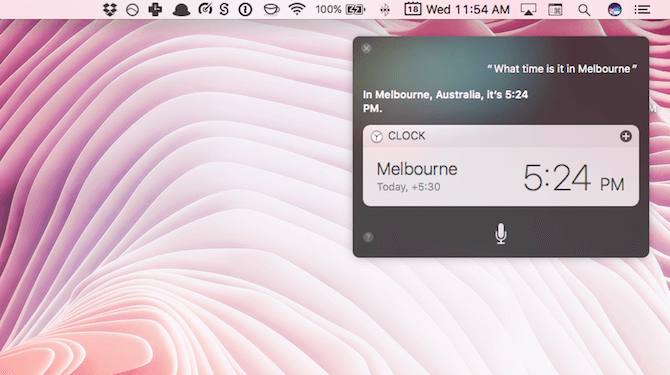
As an example, you can ask Siri queries using natural language like:
- “Show me PDFs I opened last week”
- “Remind me to buy milk tomorrow”
- “Who are the Giants playing this week?”
- “What’s the weather like on Sunday?”
With some queries, you can drag and pin them to your Today screen, and they’ll update automatically based on new data. Examples include stock data, sports fixtures and tables, local weather forecasts, and calculations made with Wolfram Alpha.
4. Understanding iCloud and macOS
You’ll find iCloud all over macOS, so it’s vital that you understand it.
4.1. What Is iCloud?
iCloud is a catch-all name for Apple’s online cloud services. You’ll see it appear before other services, like iCloud Drive or iCloud Music Library. In short, it basically means that particular service’s data is stored online, in the cloud.
Not all iCloud services require iCloud storage. iCloud Music Library, for example, is a cloud-based library for Apple Music subscribers. It maintains the same library contents across devices, and requires no storage space online or otherwise unless you decide to save content offline.
4.2. Storage Space
Apple provides 5GB of free space per Apple ID, whether you buy an iPhone, Apple TV, or brand-new MacBook. That doesn’t go very far, especially if you’re using it to back up personal devices like an iPhone or iPad. You can check your current storage allocation under System Preferences > iCloud.

Eventually, you’ll need to consider a storage upgrade. When you upgrade your storage, you’ll keep the 5GB you got when you joined with the option of adding:
- 50GB for $1/month
- 200GB for $3/month
- 2TB for $10/month
You can share the 200GB and 2TB tiers with your family, provided you set up iTunes Family Sharing. To upgrade your storage space, head to System Preferences > iCloud > Account Details and choose an upgrade.
4.3. iCloud on Mac
You’ll find a smorgasbord of iCloud features available to you in macOS, many of which you can turn on or off under System Preferences > iCloud.
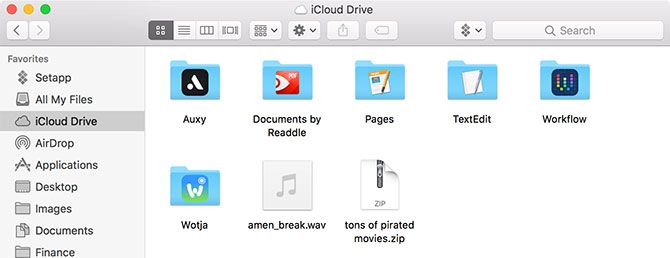
iCloud Drive is a basic cloud storage platform. You can upload files to the cloud and then access them on other Apple devices, with no limits on the type of file or how often it’s accessed. Just make sure file sizes are under 50GB.
iCloud Photo Library within the Photos app. This uploads the contents of your Photos library to Apple’s servers, while giving you the option of keeping only optimized, lower-quality copies. You can retrieve the contents of your library on any iCloud-connected device.
Many other apps push and pull data to and from Apple’s servers, including Contacts, Calendars, Reminders, Notes, Safari, and Mail. These services don’t use any iCloud storage space, but rather use the service as a go-between to keep all your Mac and iOS devices in sync with each other.
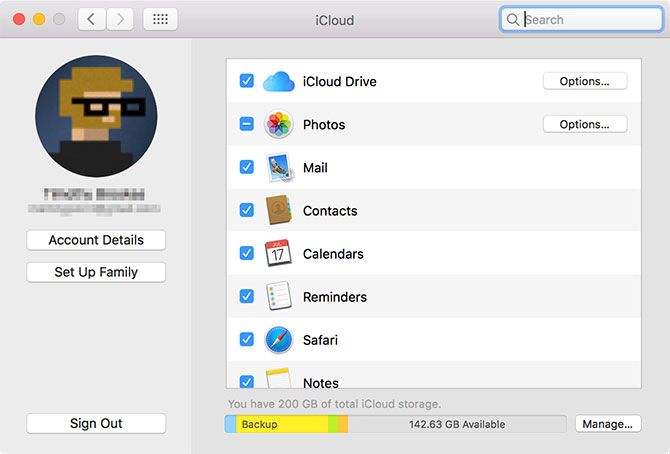
Finally there are services that use iCloud as a conduit, including Find My Mac and Back to My Mac. The former allows you to track your laptop from the web and other Apple devices; the latter is a remote control (VNC) solution.
4.4. iCloud.com
iCloud has a web frontend at iCloud.com which allows you to access certain services from any device. These include basics like Mail, Contacts, Calendar, and Notes. It also holds the Find My iPhone service (which works for finding your Mac), Photos for viewing iCloud Photo Library, and a web-friendly version of iCloud Drive.
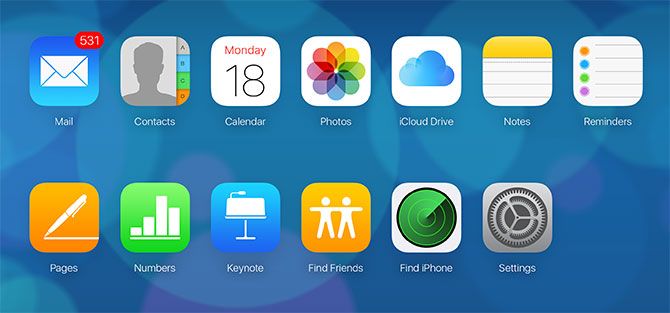
You’ll also find iWork for iCloud apps here, including Pages, Numbers, and Keynote. These are web-based versions of Apple’s iWork suite, and you can work on any documents you have chosen to keep in the cloud (or create new ones).
This web frontend is most useful as a webmail service for iCloud mail, for tracking your devices and friends, or for working on documents remotely.
5. Backups and Maintenance on macOS
Generally speaking, you don’t have to actively maintain macOS. By simply running updates and keeping your machine safely backed up, you’ll be prepared for most eventualities.
5.1. macOS Updates
macOS delivers updates via the Mac App Store. For important system downloads including security fixes, firmware updates, and new versions of first-party Apple software, launch the App Store app and click on the Updates tab.
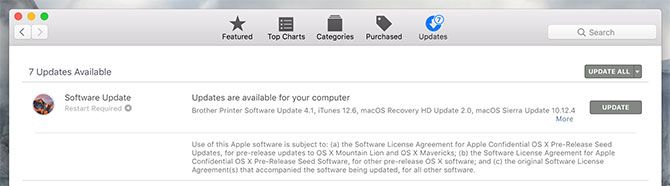
Any third-party apps you install from the Mac App Store will also receive updates in this manner. Apps you install from the web or through other means will require updating manually. Most applications will automatically notify you of updates and offer to download and install them for you.
5.2. Backing Up With Time Machine
Time Machine is Apple’s automatic backup solution. It works using an external drive, though you can specify network locations if you want. To get started, plug in a (blank) external hard drive with at least as much space as your Mac’s system drive. More space is better, since you’ll have a greater archive of backups to peruse.
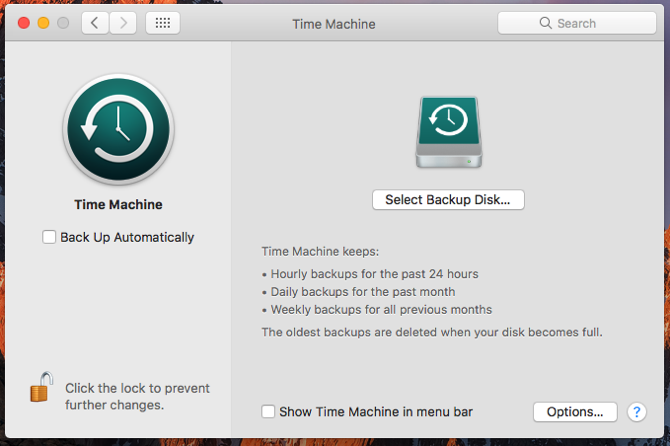
With your drive connected, head to System Preferences > Time Machine and click Select Backup Disk. Specify the drive you want to use to back up your Mac. This will erase all its contents, so you might want to create a partition if you also intend to store other files on that drive.
With a disk specified, Time Machine will start backing up your Mac. Every time you connect this hard drive, Time Machine will kick in and create a backup. It won’t back up everything every time, but rather copies the changes and creates a browsable snapshot of your computer at a specific moment in time.
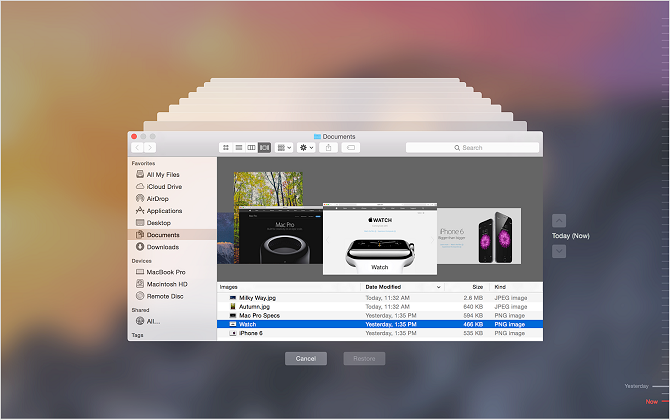
When your drive becomes full, the oldest backups are deleted first. You can browse your backups at any time by connecting your Time Machine hard drive, then clicking the Time Machine icon in the menu bar and selecting Enter Time Machine.
The purpose of this backup is to restore your Mac to its current glory if something goes wrong. That includes hardware or operating system failure, or even moving to an entirely new Mac. For proper backup redundancy, consider creating non-Time Machine backups too.
5.3. macOS Maintenance
You don’t need to babysit your Mac, but there are a few basic forms of maintenance you should remember to do on a regular basis to keep your machine running smoothly. The most obvious one is maintaining a decent buffer of free space.
Your Mac will experience performance issues when it runs low on space. The operating system and many third-party apps rely on usable free space for regular operating. If possible, try to maintain a bare minimum of 10GB of space on your Mac at all times.
By using the Storage Management app under Applications > Utilities you can see exactly which files are taking up the most space by clicking on the various categories. The Store in iCloud feature lets you automatically upload and download files to iCloud as needed.
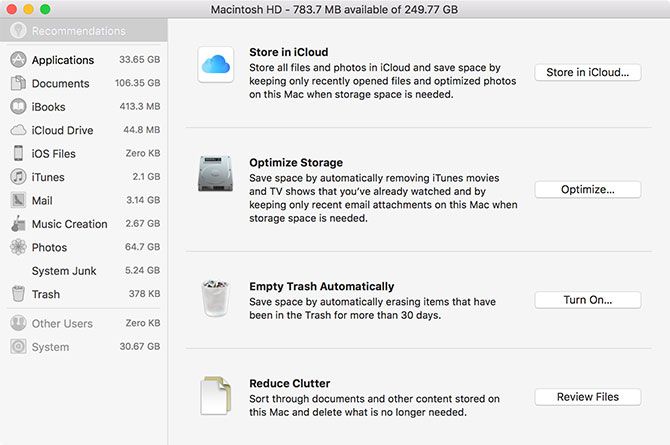
You can also choose to enable the Empty Trash Automatically feature, which permanently erases items in your Trash after 30 days. Finally, click on the Review Files button to see a breakdown of the largest and least-used files on your Mac. From here you can delete what you don’t need.
There are many third party Mac apps that can help you create free space. You can also delete your internet and other caches. If you’re really stuck, consider adding more storage to your MacBook to ease the strain.
5.4. Annual macOS Upgrades
Apple’s yearly update cycle means a new version of macOS is available free of charge each fall. This usually happens in October, about a month after the yearly iOS update lands. Provided your Mac is compatible, you can download the update from the Mac App Store when it’s ready.
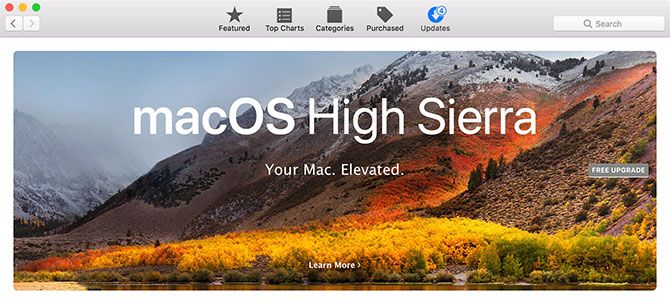
These major updates represent a brand-new version of macOS, with a new name and set of wallpapers to differentiate it from the last. Apple debuts new features and technologies in yearly revisions, as well as major new versions of core apps like Safari, Photos, and Notes.
If you want the latest features, you’ll need to install these upgrades when they arrive. One word of caution though: if you rely on a particular app, make sure that app is compatible with the newest version before upgrading. If you don’t do this, you might not be able to use your old video editor, audio workstation, or other such software.
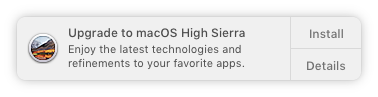
Before you install a major operating system upgrade, always create a backup using Time Machine. You should also ensure you have adequate free space to install the upgrade. Apple hardware can and will have problems while installing updates from time to time, and it never hurts to be prepared.
6. Troubleshooting macOS Issues
Your Mac is not immune to problems, and issues will rear their head occasionally. You should know what you can do to prevent issues and get everything rolling again when needed. This is one of the reasons that creating frequent backups (as discussed above) is so important.
6.1. Boot Modes
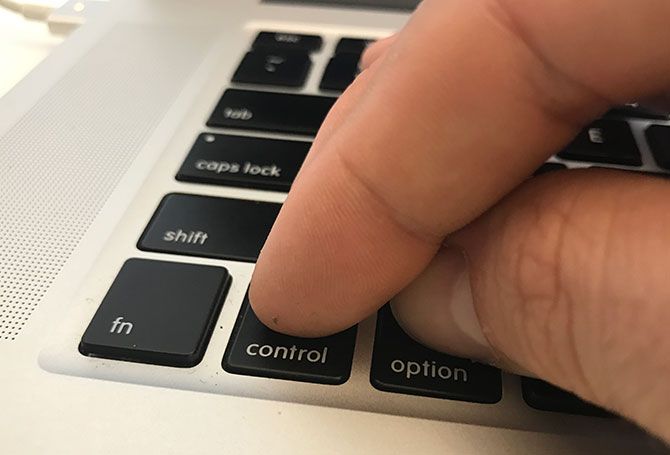
By holding a specific combination of keys while starting your Mac, you can enter specific boot modes. These help troubleshoot your Mac, install other operating systems, or run hardware diagnostics.
Shut down your Mac, press the power button, then immediately press and hold the required combination. Some useful boot modes to remember are:
6.2. PRAM and SMC
Some problems can only be solved by resetting your Mac’s parameter random access memory (PRAM) and system management controller (SMC). These play an important role in keeping your Mac running smoothly, whether it’s remembering the time and date or controlling physical elements like fans and LEDs.
You might want to reset PRAM if you have issues with your Mac’s sound, you can’t find the boot volume, your keyboard or pointing device behaves strangely, you notice erratic display resolution changes, or your computer shuts down slowly.
On the other hand you might want to reset your SMC if you notice odd fan and LED behavior, the power light on your adapter is acting up, your MacBook doesn’t wake up when you open the lid, you have Wi-Fi connection issues, or your computer runs very slowly under low load.
Depending on the age of your machine, there are different combinations of keys to hold down at startup to initiate a PRAM or SMC reset.
6.3. Diagnostics and Fixing Your Mac
You have two options when it comes to running diagnostics on your Mac:
- Use Apple Diagnostics (Apple Hardware Test) via the relevant boot mode, discussed above.
- Find relevant Apple Service Diagnostics (ASD) for your machine to try and isolate the issue.
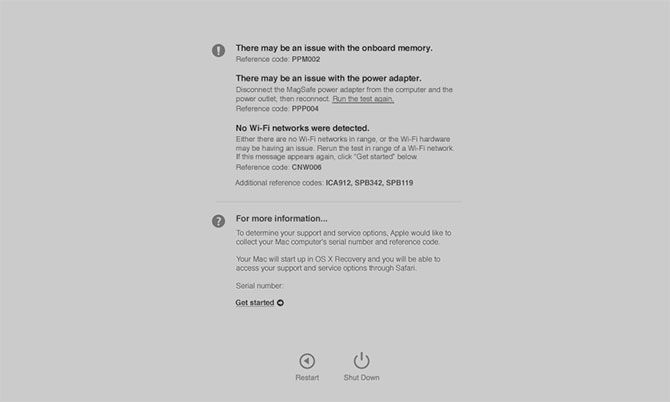
By testing your machine using Apple’s online tool, you should get some limited information about any particular problems. You might be able to isolate the problem to a specific component, but you won’t get much information about what’s wrong.
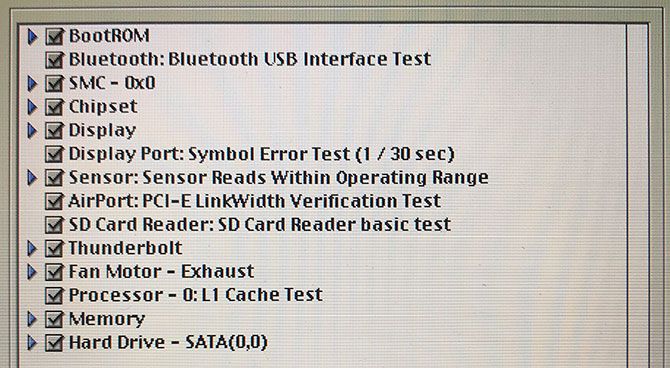
However if you go to the trouble of tracking down the relevant ASD release for your machine (pre-2015 Macs only), then you’ll get as much relevant information as you can handle. Apple technicians use ASD to isolate and fix problems with Apple hardware.
If your Mac is still under warranty and you think there’s a problem, take it to Apple. You can find out whether or not it’s still covered by putting your serial number (found on the bottom of your machine, and under Apple > About This Mac) into Apple’s warranty checker.
If your Mac is out of warranty, you can still have Apple fix it, but this is an expensive route. You could also opt for third-party authorized Apple service points, which are slightly cheaper.
Finally, you can take it to any repair shop or choose to fix it yourself. While it’s not impossible to fix your own Mac, it might not be the best choice for newcomers and those lacking in hardware experience.
Think Different: Be Comfortable With macOS
macOS is meant to be user-friendly. You’ll have a hard time “breaking” the operating system, based on the safeguards Apple has put in place. Once you’ve adjusted to the keyboard layout, gesture-based navigation, and Apple’s way of doing everything, you’ll likely find macOS a productive and reliable platform in which to spend your time.
If you’re coming from a Windows PC, you’ll need to adjust to Apple’s way of computing. We’ve thrown together a quick guide to using a Mac for Windows users and compiled a list of default Mac app equivalents to Windows software, which should get you up to speed with the basics.
Read the full article: A Complete Beginner’s Guide to macOS: Getting Started in Under 1 Hour
from MakeUseOf https://ift.tt/2lOpamo
via
IFTTT