Your work can go haywire if your laptop is plugged in but not charging. You obviously can’t use the computer once the battery is dead. But in many cases, you can figure out where the charging issue lies to correct it.
We’ll show you what to do when your laptop battery isn’t charging while plugged in. Whether you have a Dell, Lenovo, HP, or another machine, these tips will help.
1. Check the Physical Cable Connections
Before you move to deep troubleshooting, first check for the basics. Make sure you have inserted the laptop charging cable firmly into the laptop’s charging port. Then double-check its connection to the wall—consider trying another outlet in case the current one isn’t working.
Don’t forget to review the connection where the cable plugs into the AC adapter brick, also. That could have become loose if someone tripped over it.

Keep in mind that we’re trying to fix your laptop not charging even though it’s plugged in. If this isn’t your issue, we’ve also looked at how to fix an incorrect battery percentage in Windows 10.
2. Remove the Battery and Connect to Power
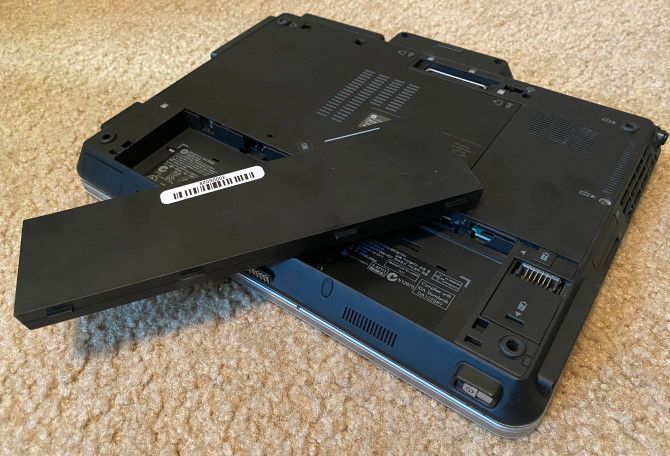
Next, you should determine if the battery is working or not. If your laptop has a removable battery, completely remove it from your machine. You should always shut down your computer before doing this (if it’s not already dead) and unplug the charger.
Once you remove the battery, hold the power button for several moments to clear any remaining charge in the system. After that’s done, connect the charger and try to turn your laptop on.

If it works normally, then the problem lies with your battery. Re-seat the battery in its compartment and make sure all the contacts are lined up. If this doesn’t fix the problem, you most likely have a dead battery that you’ll need to replace.
In case your laptop doesn’t have a removable battery, you can try opening up your machine and removing it yourself. However, doing so will likely void your warranty, and you can cause more damage to your computer if you make a mistake. It’s safer to take your computer to a technician who can analyze the battery using professional tools.
3. Make Sure You’re Using the Right Charger and Port
Moving on, you can next check that power (and enough of it) is getting to your computer.
Make sure that you have your charger plugged into the right port on your laptop. Many laptops only have one spot for the charging plug, but if you have a newer computer, it might use USB-C to charge. Try all the USB-C ports on your laptop, as some might be for data transfer only.

For the best results, you should use the original charger that came with your laptop. Fake chargers can harm your battery and cause lasting damage. Third-party models might not use the right wattage, which can result in your laptop charging extremely slowly or not at all. This is especially true with USB-C cables, as some aren’t meant to charge devices as big as a laptop.
4. Review Your Cable and Ports for Damage
Even though you did a cursory check for cable connection issues earlier, it’s a good idea to review the power cord more thoroughly now.
Look down the entire length of the power cord for fraying or other damage. Try grabbing it to see if any parts feel bulgy or otherwise misshapen. It’s also a good idea to smell the AC adapter part of the charger—if you smell burning, something has likely gone wrong inside the box, and you’ll need to replace it.
Finally, take a look at the port for the charger on your laptop. You should have a fairly snug fit when you connect the charger. If it feels loose, try jiggling it around a bit to see if you can get a good connection.
Also check for debris inside the port, which can prevent you from making a good connection. You can clean this out with a toothbrush, toothpick, or any other small object.

Speaking of this, to prevent damage in the future, you should keep some slack in the cable, so it doesn’t put unnecessary stress on the charging port. Avoid letting the AC adapter brick dangle off a table, which will pull down on the connector and can ruin the connection over time.
5. Reduce Resource Usage
There’s a chance that your battery not charging even when it’s plugged in isn’t related to hardware. If your computer is working extremely hard, your charger might not be replenishing the battery quickly enough.
For instance, if your computer is getting hot, the fan has to work harder to cool it, which will take more battery power. When you have many power-hungry programs and processes running at once, they will suck up more battery power at a high rate. Open the Task Manager (Ctrl + Shift + Esc) to check current resource usage.

If you suspect this is the root of your charging issue, try closing some programs and/or shutting down your PC to let it cool down. Once it’s back to normal, power on and see if your charger can keep up with the battery at a usual workload.
6. Check Windows and Lenovo Power Options
Other software issues can also cause your laptop battery not to charge. While Windows power plans don’t have any specific options that would prevent your battery from charging, you may have your system configured to shut down at a certain battery level or similar.
Visit the Windows power settings page by going to Settings > System > Power & sleep and clicking Additional power settings on the right side. There, click Change plan settings next to your current plan.
You can click Change advanced power settings if you want to look through those, but it’s easiest just to select Restore default settings for this plan. See if that makes any difference.

If you have a Lenovo laptop, there’s a manufacturer specific app that can cause a charging problem. Use the Start menu to search for Lenovo Vantage (called Lenovo Settings on older systems).
Once it’s open, click Power on the Hardware Settings panel, then scroll down to find Charge Threshold.
If the Custom battery charge threshold slider is enabled, you can select a minimum and maximum battery percentage for charging.
For example, if you chose 50 percent for Start charging when below and 80 percent for Start charging at, your computer would start charging when it dropped to 50 percent and stop when it got back up to 80 percent.
This could cause your computer to stop charging as you expect, so try disabling this if it’s enabled.
7. Update or Reinstall Battery Drivers
Since your battery is an external device, Windows uses certain drivers to interface with it properly. If your computer is still plugged in and not charging, updating or removing those drivers can kick-start the charging process.
Right-click on the Start button or press Win + X, then select Device Manager from the resulting menu. Expand the Batteries section and you should see two entries: Microsoft AC Adapter and Microsoft ACPI-Compliant Control Method Battery.

Right-click on each of these and choose Update driver; chances are that this won’t find any updates, but it’s worth a try. You can try updating the drivers manually, but your computer manufacturer probably doesn’t provide a specific one for the battery.
If updating doesn’t do anything, right-click on each of the battery drivers and choose Uninstall device. This will cause your computer to stop interfacing with the battery, but the driver will reinstall when you reboot, so don’t worry.
After rebooting, let Windows reinstall the battery driver, and it will hopefully start charging again. If that doesn’t work, repeat the process, but once you’ve shut down after the uninstall, unplug your charger, remove the battery, then put everything back and turn your PC back on.
8. Try Another Charger

At this point, you’ve tried everything that doesn’t cost money. A last-ditch solution is to order a new computer charger (or use one from a friend if they happen to have the same laptop) and see if that works.
While you’ll find cheap third-party chargers on Amazon and other retailers, we recommend using an official charger if at all possible. Third-party parts often aren’t up to the quality standards of genuine components, and in the case of a charger, using a cheap one could damage your computer or even cause a fire.
If a genuine charger isn’t an option, consult reviews to make sure that any charger you choose is safe.
Plugged in and Now Charging
Hopefully, some of the above steps fixed your laptop charging issue. If it’s still a problem, a part inside your computer may be damaged, causing the battery not to work properly. You should bring it to a computer repair shop to have an expert take a look at it—they might recommend a replacement battery.
Keep in mind that batteries wear out with age. After a certain number of cycles, no battery will hold as much of a charge as it used to. But unless your battery is completely shot, it should charge at least somewhat.
For more tools, see the best utilities to analyze your laptop’s battery health.
Read the full article: Laptop Is Plugged In but Not Charging? 8 Steps to Solve Your Issue
from MakeUseOf https://ift.tt/3hDWsQ6
via IFTTT
No comments:
Post a Comment