Thursday, 28 February 2019

Ableton vs. FL Studio: What’s the Best Music Maker?

best-music-maker

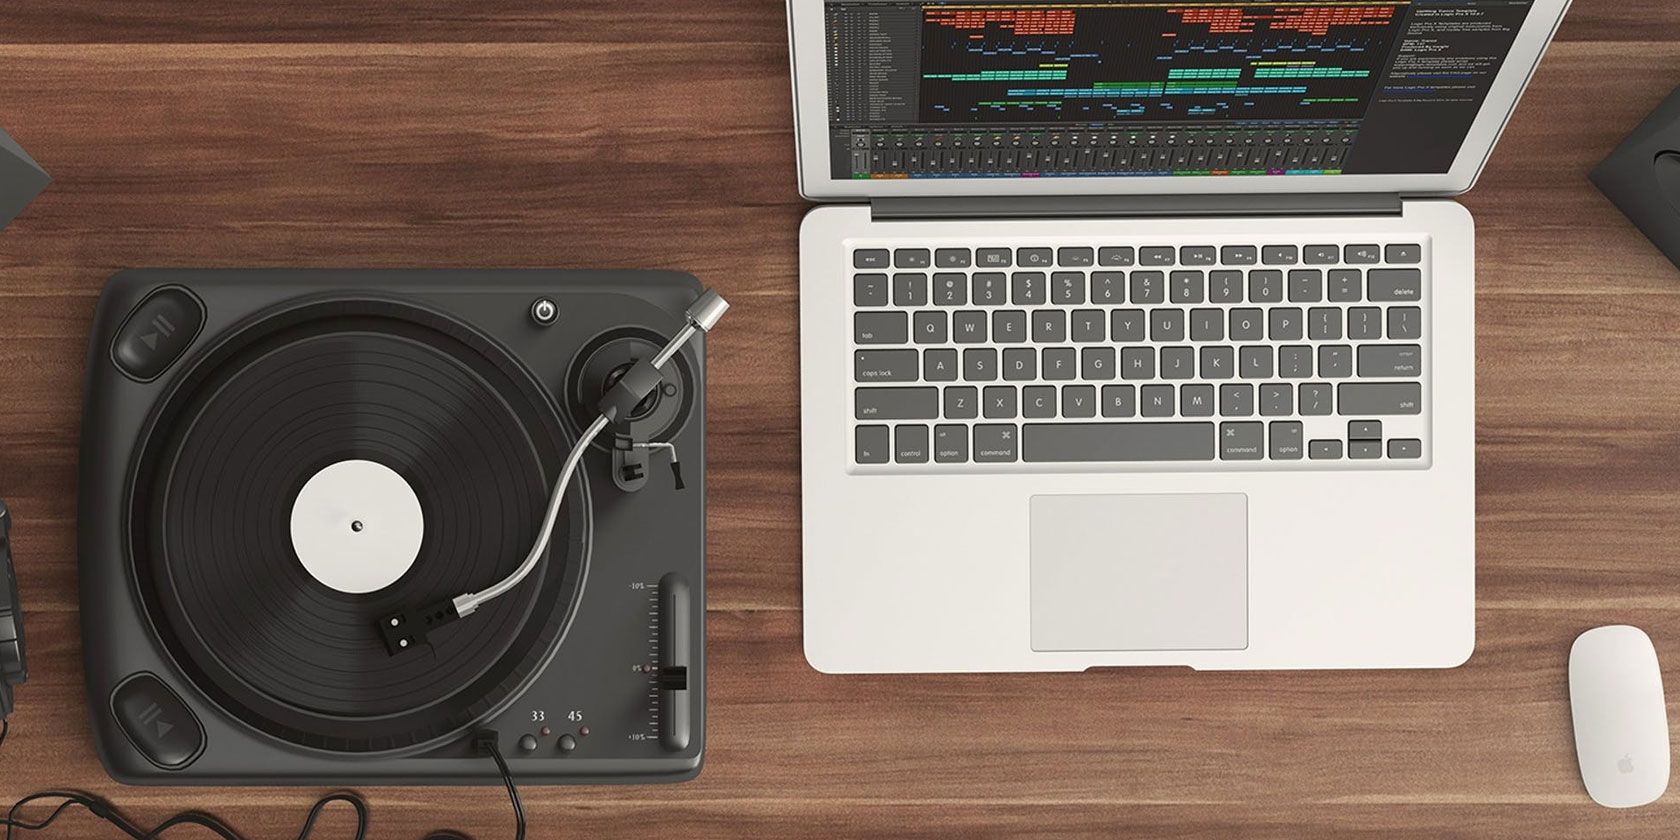
Producing music used to be prohibitively expensive. The advent of Digital Audio Workstations (DAWs) has changed this. Of the many DAWs available, Ableton Live and FL Studio are two of the best picks.

Ableton Live and FL Studio are pricey purchases, but both have free trial versions you can download and test. However, to help you decide between the two, we compared both Ableton Live vs. FL Studio.

The Best for Beginners: FL Studio

FL Studio Templates

FL Studio receives praise as one of the best DAWs for beginners. Ease of use is built into the design, and no previous digital music production experience is required. Many aspects of FL Studio aim at people who haven’t traditionally trained as musicians.

FL Studio also comes with template projects set up for different kinds of music production. These templates are the perfect way to get to grips with the software. The intuitive nature of FL Studio, along with the vast online tutorial community, make it ideal for first time producers.

The Best for Professionals: Ableton Live

The Ableton Live Session View

Ableton Live has a devoted following with good reason. Several features of the software are unique. While some beginners find it daunting, long time users swear by its advanced audio warping and envelope controls. FL Studio allows limited warping, and envelope control too, but it’s Live’s other features that set it aside.

The Session view, which enables users to arrange tracks in grids rather than on a timeline, is a good example.

Within the Session view, Follow Actions allow users to automate clip triggering, and even create music using random logic. Max for Live uses the visual programming language, Max, to create unique instruments and effects.

Ableton Live’s advanced workflows take time to learn, but once mastered it’s unmatched in its ease of use. The ability to approach music and sound creation from so many angles makes it the ultimate Swiss Army Knife of professional music production tools.

The Best for Mac Users: Ableton Live

While both pieces of software are available for Windows and macOS, Ableton Live takes the prize here. FL Studio is still in the process of being ported to macOS, whereas Live has been entirely cross-platform since early in its development.

Alongside being a better fit for macOS, Live has another advantage in this regard. Many people swear by Apple hardware for music production due to the reliability of the operating system. Setting up audio is also widely believed to be a much easier process in macOS.

The Best for Making Electronic Music: FL Studio

The Master control on a FL Studio Template.

If you are planning on making mostly electronic music, FL Studio has the workflow for you. The “everything in one place” nature of FL Studio makes it quick to get your ideas out. Many users find the Midi Piano Roll much better to use in FL Studio too, and it has been a long time go to product for Hip-Hop and Techno producers.

Templates and grouping make it easy to work on different groups of instruments and samples at a time. A single click can mute the entire set of drum or vocal tracks, allowing you to work on specific groups of sounds.

There are many effects in FL Studio designed with simple things in mind. The perfectly named “Soundgoodizer” is a perfect example, which can take any sound and give it more punch in your mix.

Both Ableton Live and FL Studio have a considerable amount of samples and presets which can help anyone build a track quickly. They both also allow for the use of external effects, and there are plenty of high-quality free VST effects available.

The Best for Audio Recording: Ableton Live

Ableton Live's Warp Feature

Early versions of FL Studio didn’t support audio recording. While it now does, Ableton Live is still far ahead in terms of audio recording and manipulation.

Ableton Live has a robust I/O system allowing simultaneous recording from multiple inputs. It also doesn’t skimp on the effects, with many presets explicitly designed for different types of voice and instrument. FL Studio also has this functionality, but Live has something else up its sleeve.

According to some, Ableton Live’s Warp feature is worth the cost of the software alone. In short, it takes any piece of audio and warps it to fit with another’s timing or pitch. Different Warp modes allow for different types of stretching, some natural, some strange sounding effects in their own right.

The ability to record audio and manipulate it without destroying its natural sound is one of Live’s most powerful features. Of course, your recorded audio will only sound good if you use these essential tips to help you record better audio.

The Best for Sound Design: Ableton Live

Alongside music production, DAWs used extensively in sound design for film and video games. Being able to import and manipulate sounds quickly is essential to fast production workflows. Adobe allows linking between Audition and Premiere/After Effects, but in terms of sound design Audition is somewhat lacking.

Live shines as a sound design platform due to the Session view and powerful Warp functions. You can quickly assemble a palate of sounds, and apply effects to them in batches. Export of each sound is possible as an individual clip for use in game development software, or a video editor.

The Best for Performing Live With a Midi Controller: Ableton Live

Ableton's Push Controller

Ableton Live lives up to the “Live” part of its name. For a long time, it has been the top name in live electronic music performance. Alongside countless DJs using the platform, many musicians use it in conjunction with live instruments.

Both Live and FL Studio allow the use of Midi Controllers to trigger samples and control FX. Both support almost every controller. Once again, however, Ableton Live does have the upper hand here.

Ableton’s Push controller was explicitly designed to use with Live and combines many different forms of Midi/software control into one package. The combination of pads, knobs, and screen of the push are designed to almost entirely free the user from the mouse and keyboard.

While a good Midi controller can help with both music making and performing on any platform, FL Studio doesn’t have an answer to the Push.

The Best Value for Money: FL Studio

Ableton's Upgrade Prices

So far, Ableton Live seems to be pulling ahead somewhat. However, price is the one area in which it suffers.

Ableton Live is currently on Version 10 and costs $449 for the Standard version and $749 for the Suite. FL Studio 20 has several versions, from the $99 Fruity edition all the way up to the $899 All Plugins Bundle edition.

This means that most of FL Studio’s options are cheaper than Ableton Live. Historically FL Studio has always been the more affordable option, adding to its beginner-friendly reputation.

Ableton Live further suffers here as each version of Live is an individual purchase. Owners of one version get a discount on upgrading, but it will still cost you $229 for a Standard upgrade and $299 for the Suite. In comparison, whether you own the $99 Fruity version of FL Studio, or the full priced bundle, updates are free for life.

Ableton Live vs. FL Studio: The Best DAW for You

Which DAW is best for making music is an ongoing argument. While both pieces of software certainly excel at specific tasks, it is difficult to choose which is best.

It’s important to not that neither piece of software will make you a star musician overnight, and spending some time learning music theory is going to help more than any program you purchase.

Regardless of which DAW you choose, any piece of software requires time to learn. So, with that in mind, this Ableton Live tutorial for beginners could be essential reading.

Read the full article: Ableton vs. FL Studio: What’s the Best Music Maker?


from MakeUseOf https://ift.tt/2tGZv36
via IFTTT

How to Send Encrypted Email on Android Using OpenKeychain

The 5 Best Long Exposure Apps for Your iPhone

Safari Downloads Not Working? 7 Troubleshooting Tips and Fixes to Try

safari-download-issues

It’s not always easy downloading files in Safari for Mac. Sometimes files seem to disappear after you download them, while other times they don’t download at all. Confusingly, this can happen for a variety of reasons. However, the fixes are all easy enough, regardless of whether you have to click two buttons or 10.

In some cases, the solution to Safari download issues involves checking your Downloads folder. In other cases, it involves disabling any plugin that might cause you problems. These are all simple actions, so it shouldn’t take you much time to get downloading again. We’ll walk you through it

1. Check Your Default Downloads Folder

Using Safari's Preferences to check your file download location

Safari sends every file you download to a folder on your Mac. Unsurprisingly, it uses Downloads as the default location. However, you can change this, perhaps without even realizing it.

You should thus check where Safari sends your downloads, and change it accordingly if desired. To do this:

  1. Click Safari (in your Mac’s top menu bar) and choose Preferences.
  2. Select the General tab.
  3. Expand the File download location dropdown box.
  4. Select Downloads (or whatever folder you’d like to use).

You can set the default download location to a folder other than Downloads, of course. But make sure you remember what this alternative folder is. Otherwise, you could lose time searching for files that aren’t in an obvious location.

2. Check the “Open Safe Files” Box

Clicking the "Open "safe" files" box in Safari's Preferences

Sometimes, it might seem like Safari downloads aren’t working normally because of a certain setting. This is the Open “safe” files after downloading box, which you’ll find in Safari’s General Preferences pane.

This option is turned on by default. It instructs Safari to automatically open all “safe” files once they’ve finished downloading. By turning it off, you might mistakenly think that Safari has stopped downloading properly, since it stops automatically opening your files.

However, you can easily turn it back on. You simply have to do the following:

  1. Click Safari (in the top menu bar) and select Preferences.
  2. Make sure you’re on the General tab.
  3. Check the small box next to Open “safe” files after downloading.

Safari will now open all “safe” files for you after it downloads them. And in case you were wondering, Apple defines certain file types, such as pictures and PDFs, as “safe.”

3. Check Your Network

It’s worth bearing in mind that, if you can’t download in Safari, it might not be Safari that’s the problem. In fact, it could be that your Wi-Fi connection is too slow, or isn’t working normally. In that case, there are a number of steps you can take.

First, make sure that you’re actually connected to a Wi-Fi network and that your Mac is close to the router. You’ll typically suffer from slow downloads when you’re far away from the router, so moving closer can solve some problems.

Also, you can often speed up your Wi-Fi speeds by changing your router’s channel. You can do this by typing your router’s IP address into Safari’s address bar and hitting Return. You’ll then come to your router’s settings page, which is where you can change the channel it uses.

One other trick you can try is checking whether another device is eating up your Wi-Fi’s bandwidth. This can slow down the speed of downloads, particularly if lots of devices are doing intensive work at the same time. Try pausing video streaming, online gaming, and similar activities if you can.

Similarly, if you’re downloading a large file, you might simply have to wait a while before it finishes downloading.

4. Check for Paused Downloads

Pressing the Resume button to restart a stopped download in Safari

Starting a download and then closing your Mac while it’s still in progress can pause it. This is an obvious reason why you can’t find the download in your Downloads folder: it hasn’t actually finished downloading.

In such cases, you have to restart the download. You can do this by clicking the Show Downloads button in the top-right corner of Safari’s screen, which looks like an arrow pointing down. Then hit the Resume button, which resembles the refresh button in most web browsers.

5. Try Downloading Again

Sometimes, files get corrupted or damaged when you download them. This can stop the download from finishing, or it can stop you from opening the file once it’s downloaded.

Either way, you can try simply downloading the file again. This is a basic step, but it can work because such interruptions and errors will prevent downloads from completing.

6. Check Your Mac’s Security and Privacy Settings

Using Security & Privacy to change which downloaded apps you can open

Sometimes, Safari download problems occur because your Mac doesn’t let you open apps from unidentified developers. You’ll find this setting in the Security & Privacy pane of System Preferences, which restricts you to opening apps downloaded from the App Store.

Fortunately, you can open apps from unidentified developers, assuming that you trust them. This is what you should do:

  1. Launch Finder.
  2. Type the name of the app you want to open into Finder’s search bar.
  3. Click This Mac to search your entire system.
  4. Right-click the app in question and click Open.

You can also change your settings to let you always open apps downloaded from outside the App Store. This involves doing the following:

  1. Launch System Preferences and open Security & Privacy.
  2. Click the lock icon and enter your administrator password to authorize changes.
  3. Under Allow apps downloaded from, click App Store and identified developers.

Note that this option only permits apps from known developers, so if you download an app from an unidentified developer, you’ll have to go through the process above. When your Mac blocks an unidentified app, you’ll also see a prompt to open it in the Security & Privacy pane here. See our ultimate guide to Mac security for more on this and similar measures.

7. Disable Safari Plugins

Using Safari's Preferences to disable plugins

Plugins can sometimes interfere with how web browsers operate. This includes downloading, so if you’re having download problems on Safari you should try disabling any recently added plugins. This can restore the browser to a state that’s closer to normal.

This is what you should do:

  1. Click Safari (in the top menu bar) and choose Preferences.
  2. Select the Websites tab.
  3. Under the Plug-ins column, de-select any plugin you’d like to disable.

Once you’ve disabled any suspect plugins, you should try completing your download again. If it works, you know that the disabled plugin was most likely the cause of the problem. You should keep it disabled whenever downloading.

But if you need it for other tasks, remember to enable it when you do them.

An Easier Time on Safari

Apple offers Safari as a simpler alternative to Google Chrome, and one that consumes less of your Mac’s battery power. As the above shows, sometimes it can run into issues, but there are thankfully ways to solve your download problems.

And if you aren’t having particular problems with Safari, check out essential Safari tips and tricks to make it better.

Read the full article: Safari Downloads Not Working? 7 Troubleshooting Tips and Fixes to Try


from MakeUseOf https://ift.tt/2H7tklt
via IFTTT

8 Mock Interview Websites to Help You Nail Your Job Search

mock-interview-websites

Interviews can be nerve-wracking affairs. The simplest questions that you did not prepare for can catch you off guard and ruin the flow of the conversation. Start giving interviews to prepare better. Or use mock interviews to face interviewers with confidence.

There are many resources online to help you get in the right frame of mind for a conversation with prospective employers. Here are several mock interview sites that can help you get ready for the big day.

1. Pramp

pramp website

The site name takes its inspiration from the phrase PRActice Makes Perfect. The idea behind the program is to teach a candidate how to prepare for a programming interview. You need to sign up for a free account to receive feedback on your interview from your peers.

Key Features:

  • You are matched with interviewers based on your choice for a programming language.
  • Interviews are live, one-on-one video sessions with the person you are matched with.
  • A user alternates as both the interviewee and the interviewer, putting you on both sides of the interview desk to gain a deeper understanding of the process.
  • You can take as many interviews as you want. The site stores your answers and creates a customized session based on the information.
  • You can customize a session to focus more on specific areas you want to improve on.

Price: Free

2. InterviewBuddy

homepage of interviewbuddy

Create a profile with the details of your professional qualifications. Choose a time slot for the interview and receive a curated list of material to study for the session. After giving the mock-interview, you will receive comprehensive feedback on your performance and a link to the recording of the interview.

Key Features:

  • No need to download any software to use the site.
  • A detailed scorecard specifies your areas of strengths and weaknesses.
  • Use the recorded interview to evaluate your performance.
  • Curated resources help you prepare for interviews.

Price: $15 per user

3. Gainlo

homepage of gainlo

Gainlo is an interview preparation resource for engineering students. Professional interviewers conduct mock interviews and provide feedback on your performance.

Key Features:

  • Interviews are on Skype and also use code-sharing tools.
  • You get feedback immediately at the end of the interview and can ask any questions on your end that you might have.
  • The site also has a blogging section that carries many useful tips regarding job hunting. Like ways to research a company before you sit down for a job interview.

Price: Price per interview varies depending on the interviewer

4. InterviewBit

homepage of interviewbit

On InterviewBit, you get a series of interview questions for practice. Pay attention to the advice on how to give the right answers to these questions.

Key Features:

  • You can get referrals to actual tech companies if your profile matches the needs of a company.
  • You receive an organized plan to study interview questions in order of difficulty.
  • Access to questions asked to previous candidates by the top tech companies.
  • Get help with debugging your code from the community of members of the site.

Price: Free

5. Interviewing

homepage of interviewing

The program offers anonymous technical interview practice with actual engineers from across a host of top tech companies, from Google to Facebook, Microsoft, and more. You receive help with preparing for interviews and also have the opportunity to make valuable connections with professionals in the field.

Key Features:

  • If the anonymous interview session goes well, there is the possibility of getting in touch with your interviewer using your real name and credentials and getting a job offer.
  • Interviews have voice communication but the option of no video, so you can control the level of anonymity.
  • You receive feedback on your performance and suggestions on how to improve.

Price: Free

6. Technical Mock Interview

homepage of techmockinterview

You get to practice your interview skills in front of a panel of professional engineers. Many of them have worked for the largest tech companies and conducted many actual interviews.

Key Feature:

  • After the interview, you get a detailed hiring result that consists of verbal and written feedback on your performance.

Price: Price per session: $109 for Coding, $129 for System Design, and $159 for Data Science

7. Prepbunk

homepage for prepbunk

You create an account on the Prepbunk website and fill in a form regarding your professional details. The form gets submitted to the team behind the site. You then arrange to appear for a mock interview, either over the phone or Skype. A site team evaluates your performance in the interview and provide a detailed performance analysis.

Key Features:

  • You’re interviewed by industry professionals instead of a simulator.
  • You can also opt for a mock interview without any feedback if you prefer self-assessment.
  • A three weeks course is offered by the site to provide you with a step-by-step guide to improving your interview performance.

Price: Free

8. My Interview Practice

mock interview practice online website

You interact with an interview simulator. An interview script appears before you in the form of one question at a time. You must answer in a set amount of time. The time limit is meant to replicate the pressure experienced during an actual interview.

Key Features:

  • No software download required.
  • Interviews are reviewed by your peers.
  • Answer a series of handpicked questions that don’t repeat but challenge you differently each time.
  • Study a recording of your interview performance afterward.
  • You can add your own interview questions to the simulator.
  • Interviews relating to more than twelve different industries are available to practice with.

Price: $14.99/mo Premium membership with free trial

More Tools to Help Prepare for the Big Interview

The biggest hurdle to clear an interview you are qualified for is lack of preparation and nervousness. Mock interviews can be a great way to bolster both.

There are other ways to get ready for a job opening without spending a dime. So get supercharged for your next hunt with these free tools.

Image Credit: nd3000/Depositphotos

Read the full article: 8 Mock Interview Websites to Help You Nail Your Job Search


from MakeUseOf https://ift.tt/2tLyD1P
via IFTTT

How to Set Up a Linux Media Server in Under One Hour

linux-media-server

Designing the ultimate media server for your TV and movie collection can be a challenge. What hardware should you use, what operating system should you install, and what kind of software should you be running?

Rather than waste your time trying to decide, here’s the answer. A Linux server, running all the media software you need, can be set up in less than an hour thanks to Docker. Let’s run through how.

What Is Docker?

Rather than installing software in the traditional manner on your PC, Docker lets you run them in secure containers.

They share the same physical environment as your operating system, but they run independently and separate from your main system, meaning you can test out and install different kinds of software without worrying about conflicts.

It’s the perfect platform for testing new applications, especially on a server, where one bad update or one script change can cause everything to fail. Docker also helps to speed up installing new applications, especially combined with DockSTARTer, a script for installing and updating media software containers using Docker.

Requirements for Installation

To use DockSTARTer (and Docker), you’ll need to prepare a server. DockSTARTer can run on any kind of machine that runs Linux, including a Raspberry Pi, but you should be aware that some software won’t run on ARM-based architecture like the Pi, which might limit your potential here.

While it doesn’t matter which Linux distro you choose as Docker will run on most distributions, the DockSTARTer script doesn’t work with Arch, so you wouldn’t be able to use this guide for that distro.

If you want to keep resource usage down, install server or headless versions of any distro you choose. These will come without a desktop environment and have a smaller resource footprint.

This is a media server installation, so you’ll need a capable CPU for transcoding media, which converts media from one format into others that media players can then play. If you’re planning some heavy usage, a CPU that can cope with multiple transcoded streams will be useful here.

This guide from Plex, the media streaming software, should help you figure out the kind of processor you’ll need.

You’ll also need enough storage space so that your server can also act as DIY network storage for your content if you don’t have a NAS already.

Step 1: Installing Git and Curl

To install Docker with DockSTARTer, you’ll need to open up a terminal window on your server or connect via SSH. You’ll need to install two bits of software first—Git and Curl. Git is version control software that allows developers to share their software, while Curl allows for data transfers from the internet.

To install on a Debian-based OS (Debian, Ubuntu, Raspbian, etc):

sudo apt install curl git

To install on Fedora:

sudo dnf install curl git

To install using Yum:

sudo yum install curl git

Step 2: Installing DockSTARTer

Once you’ve installed Curl and Git, you can proceed with installing DockSTARTer.

You have two options for installing Docker with DockSTARTer—you can install using the script provided by DockSTARTer, or perform a manual installation. Either is fine, but it depends on how paranoid you prefer to be when installing software using a script from the internet.

Installation With Script

To run the installation script for DockSTARTer, run the following at your terminal:

bash -c "$(curl -fsSL https://get.dockstarter.com)"

Once completed, type the following to reboot:

sudo reboot

Manual Installation

If you’d prefer not to use the provided installation script, the following commands will clone the git repository containing DockSTARTer and set it up before rebooting:

git clone https://github.com/GhostWriters/DockSTARTer "/home/${USER}/.docker"
sudo bash /home/${USER}/.docker/main.sh -i
sudo reboot

Step 3: Run DockSTARTer and Select Your Apps

With DockSTARTer installed, you can now begin setting Docker up with your containers. Start by typing sudo ds in your terminal to begin.

DockSTARTer Installation Terminal Screen Setup

To begin installing your Docker applications, select Configuration and hit enter, then Full Setup. Wait for the script to perform any actions before you’re presented with a list of apps to install.

Each app has a useful description next to it to help you choose. This is where you’ll need to consider what kind of apps you’ll need and want on your server. Do you intend on using it just for media streaming, or are you looking for software that can organize your media?

Dockstarter Apps Installation Configuration Menu

To help you choose, here are some possibilities:

  • Plex, an all-round media server
  • Emby, an alternative to Plex
  • Airsonic, a media server for music
  • CouchPotato, for automatic movie downloads
  • Deluge, a BitTorrent client
  • Sonarr, for automatic TV media downloads
  • HTPC Manager, to manage certain media apps in one dashboard

This list isn’t exhaustive, so look carefully through the apps you have available. Use your keyboard up and down keys to scroll, and hit space to select each of the apps you want to install.

You should also ensure that you select two other apps—Ouroboros and Portainer. These are useful for Docker maintenance once you’ve finished using DockSTARTer. Ouroboros keeps your container apps up-to-date, while Portainer helps you monitor and configure Docker through a web UI.

Once you’re ready to proceed, hit enter.

Step 4: Configure Server Settings

There’ll be pre-configuration questions at this next stage, depending on the app you choose. For example, if you select to install the Deluge BitTorrent client, you’ll have to confirm which port settings you want to use.

Hit enter to confirm the configuration for each app (or select No, if you’d prefer to edit these).

After a few initial app configuration stages, you’ll be able to alter the timezone and hostname of your machine, as well as some default locations for media content. Select No, unless you’re happy with the default settings, and then hit enter.

Dockstarter Global Server Hostname Configuration Menu

The first option allows for the configuration of your server’s timezone. Assuming your system timezone is correct, choose Use System at this stage, or select another with Enter New. Edit the hostname in the following menu, either by using the current server hostname (if you’d prefer this, choose Use System again) or selecting Enter New.

The next menu asks you to choose various user ID and group IDs; it’s recommended you select the Use System option here.

You’ll then have to select the correct folder for Docker’s configuration file. Unless you’re planning to alter this, choose Use System. The next menu will ask if you want to set permissions on your Docker config file, select Yes and hit enter.

You can now start to edit folders for various media. You can select your own, but if you want your files to appear in your Linux user home directory, select Use System for each of these, or select Enter New for entirely new locations. If the folders don’t exist, DockSTARTer will ask for permission to create them, so hit Yes and enter.

Dockstarter Final Configuration Log

Once completed, DockSTARTer will confirm changes to your Docker configuration file. At its final stage, it’ll ask whether you want to create the final containers for your apps; select Yes and hit enter and wait for the process to complete.

The apps will download and install in container “sandboxes” created to your specifications. This may take a bit of time, depending on the apps you’ve chosen, the resources of your server, and your internet connection.

Once it’s complete, your apps will install and be ready and running in Docker containers! Some may need further configuration, such as Emby, and may run with web UI’s for configuration. You can configure Emby, for instance, by visiting YourServerIpAddress:8096 with your web browser.

You can also configure and monitor your Docker installation with Portainer. Use your web browser to visit YourServerIpAddress:9000 where you’ll first create an administration account. Choose a username and password, then hit Create User.

A Linux Media Server, Ready in Under One Hour

Docker takes the pain away from installing a media server on Linux. Rather than installing each application separately, using DockSTARTer, you can install Docker and all the container apps you need in an hour or less, depending on how quick your server is (and assuming it’s already pre-built).

There’s no point having a media server, of course, without the right media player (or players!) to match. Build a media player using these Linux media center distros and turn your home into the ultimate media playback powerhouse.

Read the full article: How to Set Up a Linux Media Server in Under One Hour


from MakeUseOf https://ift.tt/2H8XWTp
via IFTTT

Why Do Phones Have Such Short Battery Life? 5 Reasons Why

Typesy Typing Trainer Helps You Reach 100 WPM — 93% off

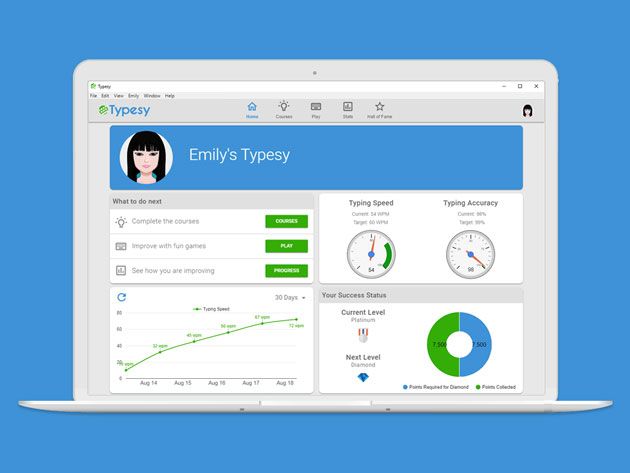
It might seem like a small thing, but your typing speed has a massive influence on your productivity. Imagine if you could write every report and every email in half the time — how much time would you save? Typesy Typing Trainer can make this dream a reality with a program of exercises created by touch typing experts. Right now, you can get lifetime access to the platform for $19.99 via MakeUseOf Deals.

Double Your Typing Speed

The average person can type about 40 words per minute. For context, that’s about the length of this paragraph. Improving your typing speed might seem like an impossible task — but Typesy is here to prove otherwise.

This online platform combines video tutorials and fun exercises to help you master the skill of touch typing. Anyone can benefit from the program, and Typesy provides a personalized experience for every learner.

You start by watching a video tutorial, delivered by a touch typing expert. Then, Typesy gets you to practice on a specific set of letters. This helps you master the best techniques for fast typing.

There are 16 activities in total, and Typesy monitors your progress to provide personal coaching. When you complete the course, you can even claim an advanced typing certificate.

Lifetime Access for $19.99

Order now for $19.99 to get lifetime access to Typesy, worth $290.

Read the full article: Typesy Typing Trainer Helps You Reach 100 WPM — 93% off


from MakeUseOf https://ift.tt/2H81UvU
via IFTTT

You Can Now Use Google Duo on the Web

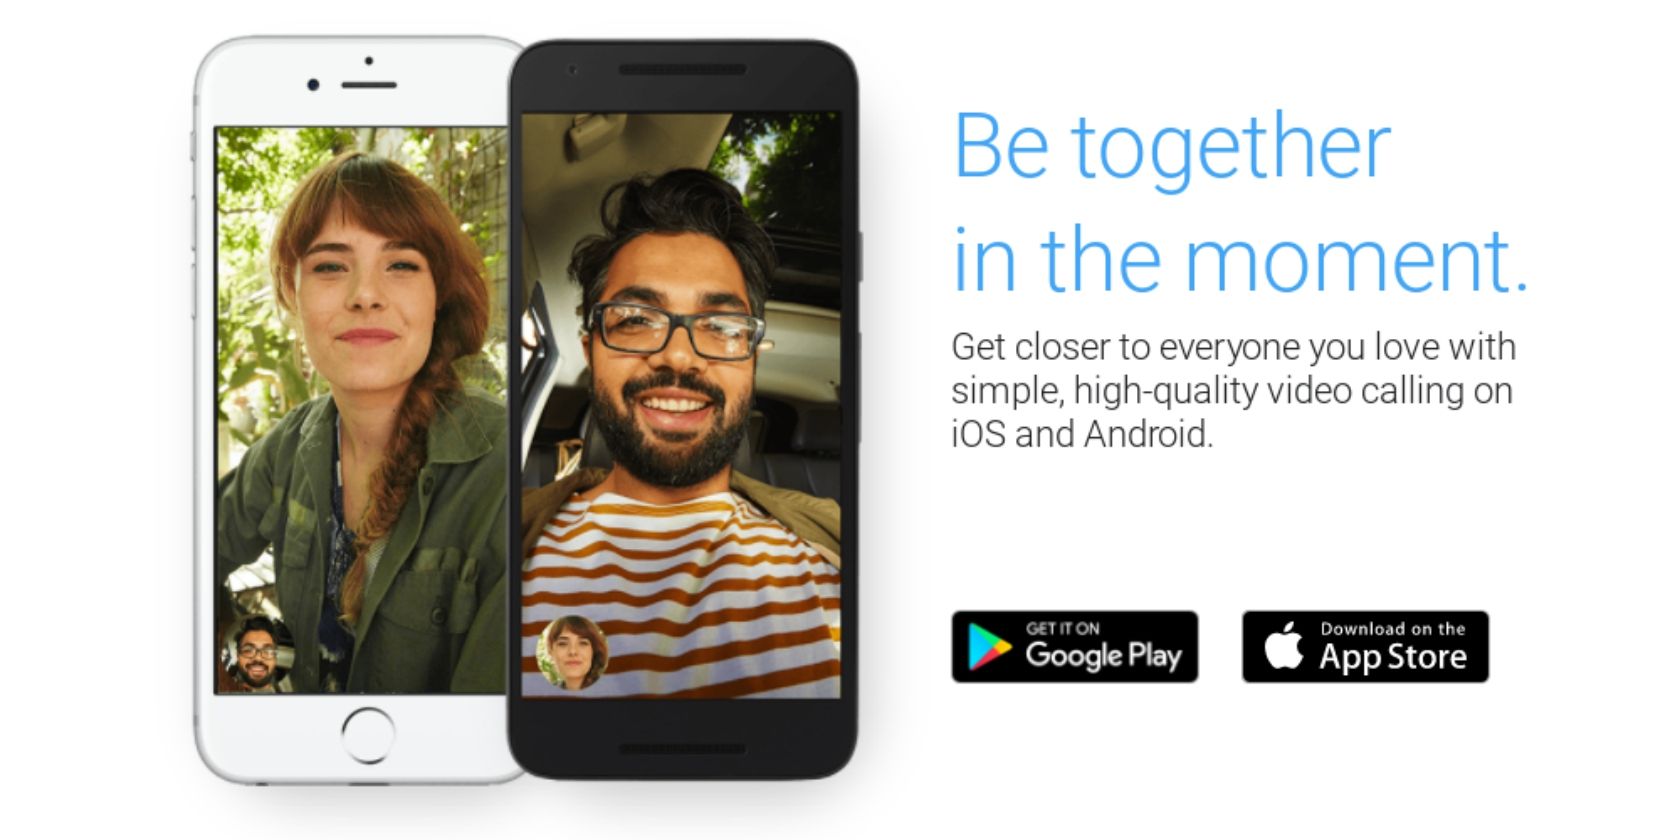
Google Duo is now available on the web as well as on Android and iOS. This means you can make voice and video calls from your web browser without needing to download the Google Duo app. This isn’t going to change your life, but it might make it slightly easier.

Google Duo debuted at Google I/O 2016. It was released later that same year alongside Google Allo. While Allo is dedicated to instant messaging, Duo is dedicated to voice and video calls. If you want to know more, here’s our beginner’s guide to Allo and Duo.

Google Duo Is Now Available on the Web

As first spotted by Android Police, Google Duo now has a dedicated website located at duo.google.com. To use Google Duo on the web, you just need to visit that site and follow the steps to get started. Which means signing into your Google account.

If you have previously used the Google app you’ll see a list of your contacts who are already using Duo. If not, you can sign up to use Duo on the web by inputting your mobile phone number and verifying that it’s you by inputting a code sent via SMS.

Google Duo’s interface on the web will be familiar to anyone who has previously used the app. And both voice and video calls are available on Chrome, Firefox, and Safari. There are reports that Duo doesn’t work on Microsoft Edge, but that should be a temporary blip.

Google’s Messy Melange of Messaging Apps

It made little sense for Google to keep Duo confined to being a mobile app. Bringing Duo to the web means anyone and everyone can use the voice and video chat app, regardless of what device they’re using. So we expect Google Duo to grow in popularity.

It should be noted that you can already use Google Allo on the web. However, Google has since announced it’s killing Allo in favor of Messages. And now Google Assistant is coming to Messages. Anyone would think Google doesn’t know what it’s doing at times.

Read the full article: You Can Now Use Google Duo on the Web


from MakeUseOf https://ift.tt/2T2E2AI
via IFTTT
Spotify Is Now Available in India

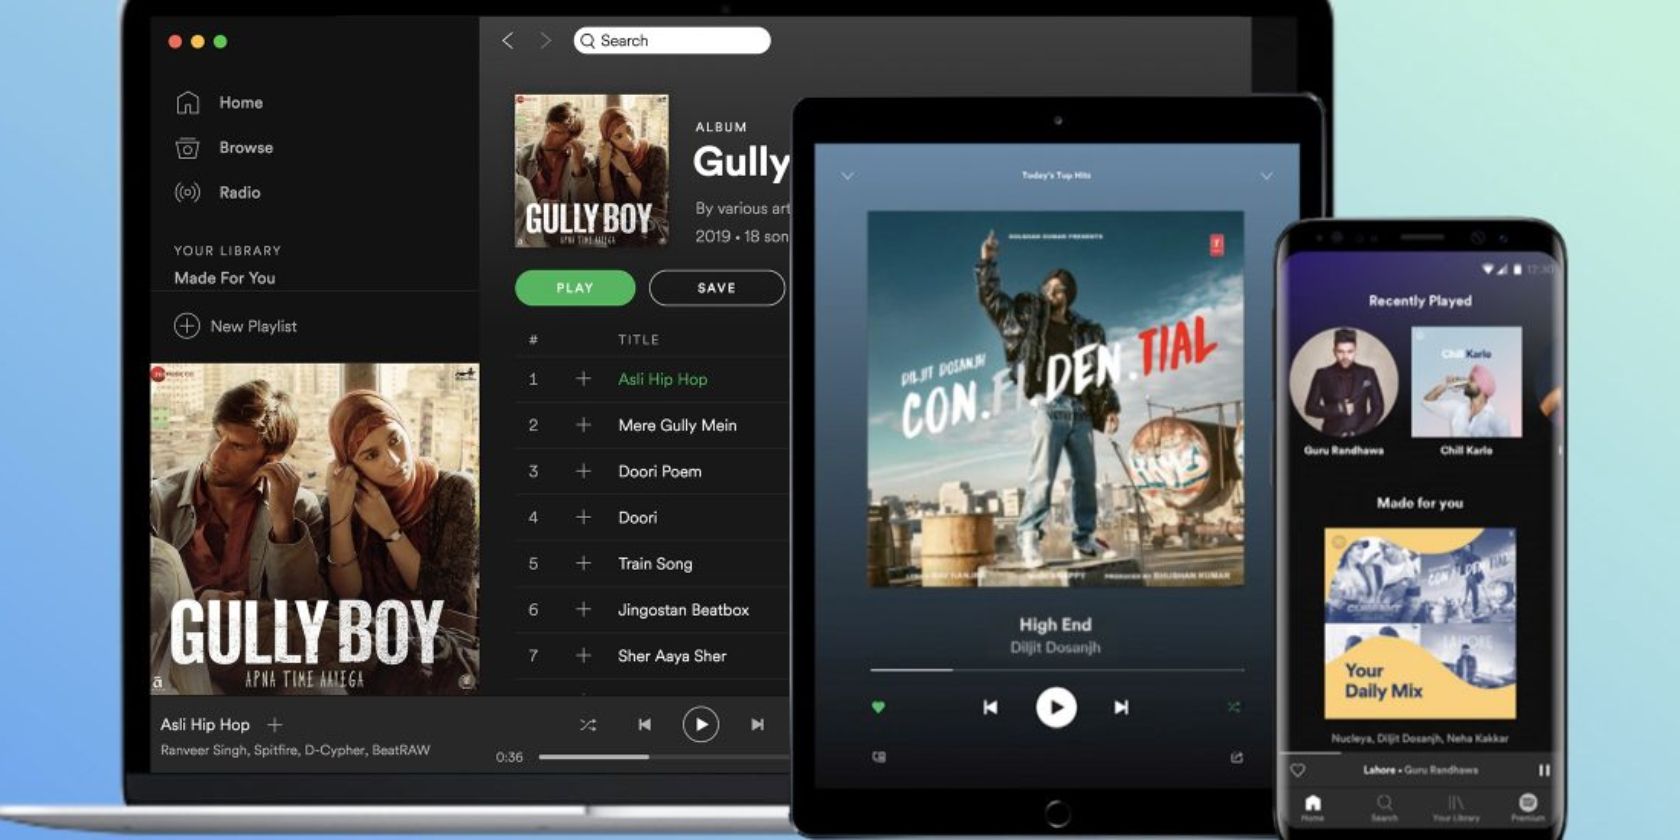
Spotify has officially launched in India. With a population of 1.3 billion people, this represents a huge opportunity for Spotify. And the music streaming service is seizing that opportunity by offering Indian residents a better deal than the rest of the world.

Spotify has wanted to launch in India for some time, with the first rumors sprouting in 2016. However, Spotify faced licensing issues which delayed its launch. And Spotify is launching in India despite an ongoing legal battle with Warner Music Group.

None of which will concern Indian music lovers, who can now use Spotify for the first time.

Spotify Officially Launches in India

Spotify’s offering in India is markedly different from the rest of the world. For starters, Spotify Free users will be able to play every song on demand on their smartphone. Whereas users in the U.S. and beyond are stuck listening to songs on shuffle.

Then there’s the pricing for those who decide to pay for Spotify. Indian users can make use of a 30-day free trial, and then pay just Rs 119 ($1.67) per month for Spotify Premium. They can also choose to pay for access for one day, one week, one month, and more.

In the Spotify press release, Daniel Ek, the Spotify founder and CEO, said:

“As Spotify grows, our goal is to bring millions of artists and billions of fans together from every country and background. India has an incredibly rich music culture, and to best serve this market, we’re launching a custom-built experience.”

This custom-built experience means Spotify is making the app available in multiple local languages. There’s also playlists made especially for India and specific Indian cities. And then there are the playlists featuring the best songs from Indian movies.

Download: Spotify for Android | iOS (Free, with paid subscription available)

Spotify Faces Stiff Local Competition

Spotify has launched in India at a critical time. The streaming music service has 200 million users, 96 million of whom pay for the privilege. However, Spotify is facing stiff competition, particularly from Apple Music, which is growing at an incredible rate.

Given the incredibly competitive pricing, plus the localized content, Spotify stands a good chance of successfully penetrating the Indian market. However, it will have to go some to overtake the local competition such as Gaana, JioSaavn, and Wynk.

If you’re an Indian resident trying Spotify for the first time, be sure to check out our unofficial guide to Spotify.

Read the full article: Spotify Is Now Available in India


from MakeUseOf https://ift.tt/2EgxCUy
via IFTTT

The 10 Best Astronomy Apps for Enjoying the Night Sky

Astronomy used to be a somewhat expensive hobby once upon a time, requiring telescopes and other equipment. However, that’s not quite the case anymore.

With smartphones being as smart as they are now, all you need are apps that will transform your phone into a mobile observatory. Here is our rundown of the 10 best astronomy apps for Android.

1. Sky Safari

Screenshot from Sky Safari app

Sky Safari will not just help you become a better-equipped astronomy fan, but also just lay down, relax, and look at the stars, with features like the soothing background music, for example.

It is equipped with a powerful search, which can help you instantly find any celestial object you’re looking for. There’s also a dedicated events section, as well as a live view of the sky that moves as you move your phone, according to your location and compass.

In-app purchases are available to unlock more features, like additional objects and perspectives.

Download: Sky Safari for Android | iOS (Free, in-app purchases available)

2. Star Walk 2

Star Walk 2 is one of the most aesthetically pleasing astronomy apps out there. The app opens with a beautiful live view of the sky, reflecting your current location. The live view also has nice calming background music.

You can tap objects you see in the live sky to get a concise description, as well as a detailed image of the object. The search feature is also great, and the voice search works perfectly. The best feature of Star Walk 2 however, is the time slider that lets you slide through time and see how the objects move.

In-app purchases will let you unlock more celestial objects as well as remove the ads from the free version. Alternatively, you can just purchase the paid version of Star Walk 2.

Download: Star Walk 2 Free for Android | iOS (Free, in-app purchases available)
Download: Star Walk 2 for Android | iOS ($2.99)

3. Star Chart

Screenshots from Star Chart app

Star Chart gives you three different modes. The first is the default sky view. Secondly, you get an explore mode that lets you wander across the solar system. The third mode is called “Moments in time”, which lets you take a virtual look at important past events in astronomy.

The standard app has all the basic features you’ll need, including a settings panel that lets you customize the sky view. Star Chart also packs in some serious expandability, giving you numerous in-app purchase options to add more to your stargazing experience.

Download: Star Chart for Android | iOS (Free, in-app purchases available)

If you want to expand the horizons of your astronomy hobby by doing a little more background research, check out these amazing astronomy websites.

4. Sky Map

Screenshots from Sky Map app

Sky Map is exactly what it sounds like. It’s a no-frills map of the sky. Sky Map is simple, and reliable, and is meant for astronomy enthusiasts that just need a simple guide to the night sky.

You can select and deselect the categories of objects you want to be displayed on the map. The live view can be set to automatic, which moves as you move your device, or manual, which requires the user to navigate it.

There’s also a nifty time travel feature that will see what the sky looked like on any given date and time. Sky Map was originally developed by Google, but is now donated and open sourced.

Download: Sky Map for Android (Free)

5. Stellarium Mobile

Screenshots from Stellarium Mobile app

If you’ve had an interest in astronomy for a while, you must have definitely heard about Stellarium. Stellarium Mobile brings the essence of Stellarium’s very popular desktop version to your phone.

Stellarium Mobile gives you a sky view with options to choose what appears in the sky. You can also choose to emulate different landscapes, which adds some virtual reality flavor to the app.

Download: Stellarium Mobile for Android ($2.49)
Download: Stellarium Mobile for iOS ($2.99)

6. Solar Walk 2

Screenshot from Solar Walk 2 app

Solar Walk 2 is an astronomy app that revolves around the sun and the solar system. Made by the developers of Sky Walk 2, this app shows you the night sky through from the perspective of our place in it.

Perhaps the best feature of Solar Walk 2 is the time bar, which you can use to time travel to see how celestial objects move over time. The paid version of the app also comes with a horde of other celestial objects to look at.

Download: Solar Walk 2 Free for Android | iOS (Free, in-app purchases available)
Download: Solar Walk 2 for Android | iOS ($2.99)

If you want a deeper look into the outer space, check out these free online space telescopes.

7. Mobile Observatory 2

Screenshots from Mobile Observatory 2 app

Mobile Observatory is not the fanciest looking app on this list, but it is something every serious astronomy enthusiast needs to have. This astronomy app comes with loads of features, which makes up for the not-so-fancy user interface.

Mobile Observatory comes with different sky views, a dedicated solar system view, and different sections dedicated to objects, including the sun and moon. Not only that, there are sections for eclipses and events, as well. The app is paid but updated fairly regularly.

Download: Mobile Observatory 2 for Android ($4.49)

8. Sky View Free

Sky View Free is a unique astronomy app. Its primary feature of the sky view seems similar to other apps on this list at first glance. However, Sky View has an augmented reality (AR) mode for this view, which lets you point your camera to the sky and identify celestial objects in the app.

Sky View Free also has options to let you see trajectories of objects, take snaps of your current view, and check sky view by date and time.

Download: Sky View Free for Android | iOS (Free)

9. Star Tracker

Screenshots from Star Tracker app

If you want a basic sky view that navigates through the sky well, Star Tracker is the way to go. Star Tracker is pretty basic, but for some astronomy enthusiasts, it might be all they need.

The key highlight of this app is the zoom feature, which will automatically zoom onto the celestial object that your screen is pointed at, giving you an immersive experience.

Download: Star Tracker for Android | iOS (Free, premium version available)

10. SkyWiki

Screenshots from Sky Wiki app

SkyWiki is an astronomy app that acts like a mini-encyclopedia of astronomy. You get a sky map with the option to change the speed of time, pause it, and print out the current version of the sky map.

However, that’s not all. SkyWiki is also equipped with a periscope section, which gives detailed insight into current celestial positioning. In addition, there are sections for celestial events and news, making SkyWiki a must-have guide to have for any astronomy enthusiast.

Download: SkyWiki for Android (Free)

More Ways to Explore Space

Astronomy apps don’t demand much in terms of smartphone specifications, other than compass, accelerometer, gyroscope, and such. Although it wasn’t the case a few years ago, these features are standard now, even in budget smartphones. So, a smartphone is all you need!

If you want to see the cosmos in further detail, check out these websites to view and download space images.

Read the full article: The 10 Best Astronomy Apps for Enjoying the Night Sky


from MakeUseOf https://ift.tt/2T3SA2Z
via IFTTT

How to Stream Steam Games to Raspberry Pi Without Moonlight

It’s small, it’s powerful, and it can do almost anything. But the Raspberry Pi hasn’t been great for gaming… until now.

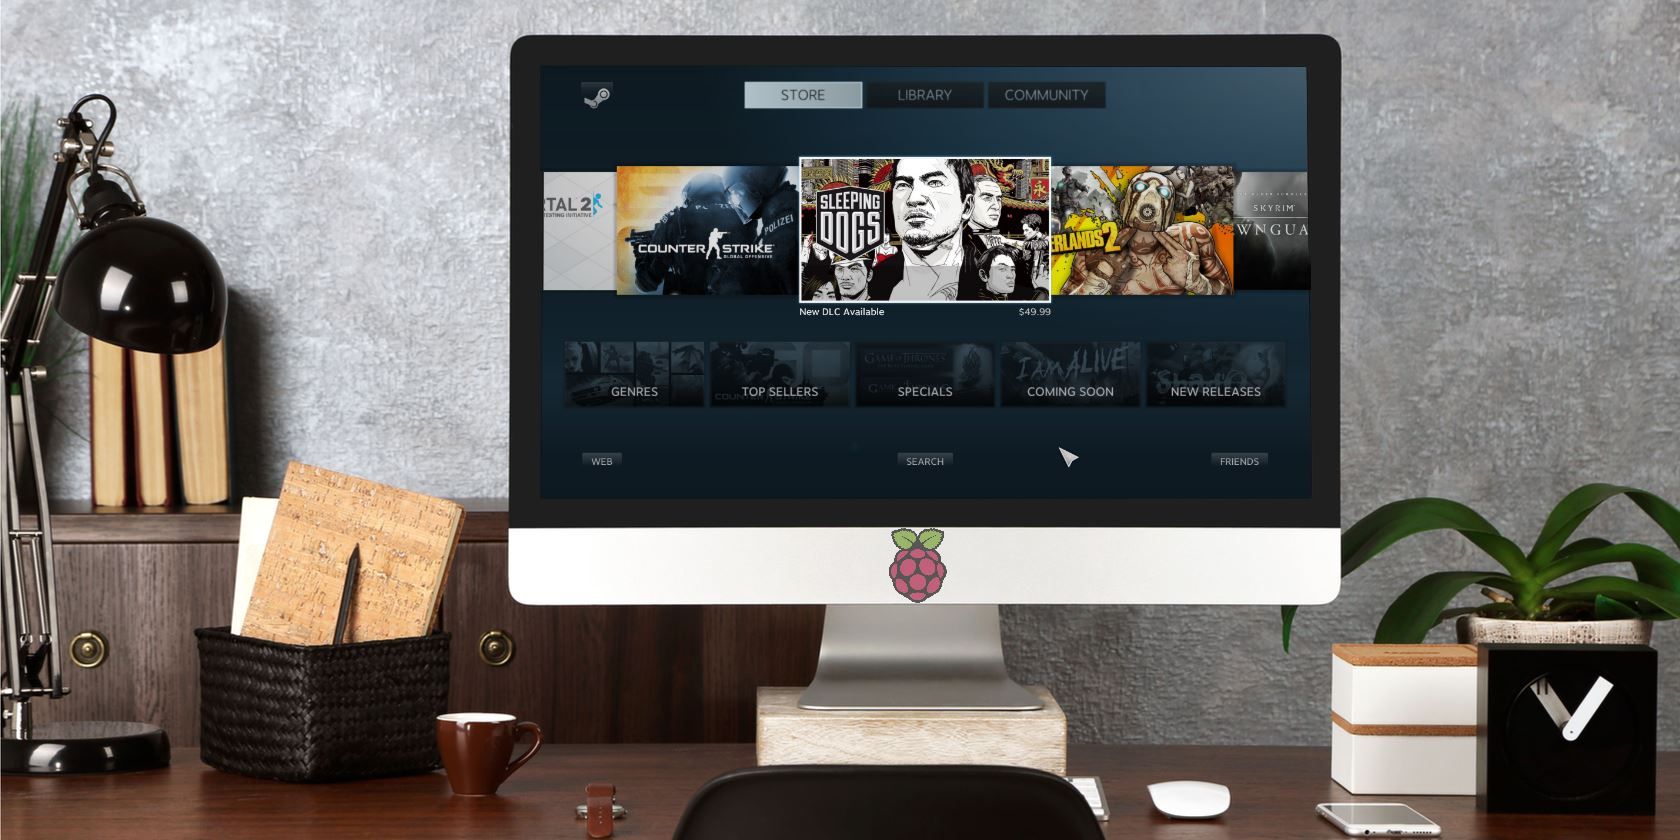
After retiring the Steam Link hardware, Valve has released Steam Link software for Raspberry Pi. Streaming games from PC to Raspberry Pi is now official, using a dedicated app and without relying on Moonlight.

What is great about this is that you can set it up in just a few minutes. Now you can install Steam Link software on your Raspberry Pi to play games running on your PC. Here’s everything you need to know.

What You Need to Play Steam Games on Raspberry Pi

Previously you could install Nvidia GeForce on your PC (if compatible) and use the open source implementation of Nvidia’s GameStream software (Moonlight) to stream games via your Raspberry Pi.

Now all you need to stream games from Steam to your Raspberry Pi is:

  • A Raspberry Pi 3B or 3B+
  • 8GB or great microSD card with Raspbian Stretch installed
  • Keyboard and mouse
  • A suitable game controller (see below)
  • A router with Ethernet ports (5GHz wireless is not recommended for the Raspberry Pi)
  • Two Ethernet cables.
  • HDMI cable
  • A suitable TV for gaming
  • Steam software on your computer, a Steam account and library of games

You will also need a computer running Steam on Windows 7 or later, Mac OS X 10.10 Yosemite or later, or Linux Ubuntu 12.04 or newer. You should have an account with Steam and at least one game installed.

If you’re new to the Raspberry Pi, you’ll need a copy of the Debian-based Raspbian Stretch operating system. Get started with our guide to installing an operating system on the Raspberry Pi.

Configure Your PC for Steam In-Home Streaming

Boot your PC and connect it to your home network via Ethernet. This is necessary as forcing the Raspberry Pi to rely on its wireless radio adds to its processing load.

By comparison, the Steam Link hardware from Valve gave better results when connected via Ethernet. As Ethernet is faster than Wi-Fi, it makes sense to use it for the best performance. (You can use the Pi-powered Steam Link over Wi-Fi, but it should be as close as possible to the router.)

Steam should be installed on your PC, running, and up-to-date.

Updates usually occur automatically when you launch Steam, but if this doesn’t happen, open the Steam menu and select Check for Steam Client Updates.

Enable In-Home Streaming in Steam

Once updated, go to View > Settings and select In-Home Streaming. Here, check Enable streaming and ensure the Client options button is set to Balanced. (You might change this later to improve performance.)

Click OK to confirm.

How to Install Steam Link on the Raspberry Pi

Like your computer, the Raspberry Pi should be connected to your network via Ethernet. Once booted up, open the Terminal window (use the Ctrl + Alt + T shortcut) and enter:

sudo apt update
sudo apt install steamlink

The first of these commands updates the Raspberry Pi’s packages list. Meanwhile the second finds the Steam Link software in the packages and installs it.

Install Steam Link on Raspberry Pi 3

Wait while the process completes, hitting Y to confirm if prompted.

A few moments later the Steam Link software will be installed on your Raspberry Pi. Assuming you have games in your Steam library, you’re ready to start playing on your TV, via the Raspberry Pi.

Run Steam Link and Play Games on Your TV

To launch the Steam Link software, open Menu > Games > Steam Link on your Raspberry Pi.

Launch Steam Link on the Raspberry Pi

A full screen Steam interface will appear, displaying the name of your computer and the attached controller. Select your computer to start the network test. You’ll be prompted by Steam Link on the Raspberry Pi to enter a PIN code on your computer, so do this and click OK.

Main Steam Link configuration menu

If all goes well, you should see a message informing you that the network will work with Steam Link. Use OK and Back to return to the main menu.

You may, however, be notified of the need to update your drivers. Steam will handle this for you, simply click Install when prompted.

Install drivers on Steam Link

Once this is updated, you’ll be able to access your Steam library. Note that the software will be running in the foreground on your PC (as opposed to a background process) so be sure no one plans to use the computer while you’re gaming.

When you’re all done, hit the power button in Steam and click Stop Streaming.

Stop Steam Link on the Raspberry Pi

How to Connect a Game Controller to Raspberry Pi Steam Link

Use the following game controllers with Steam Link:

  • Steam Controller
  • Xbox One wired
  • Xbox 360 wireless or wired
  • Sony Dualshock 4 wireless or wired
  • Nintendo Switch Pro

For USB controllers, all you need to do is plug and play. For Bluetooth, however, you’ll need to enable it via the Raspbian desktop.

Click on the Bluetooth icon in the menu bar and Turn on Bluetooth. Next, click Bluetooth again and Add Device.

Put the game controller in pairing mode (check the device’s documentation for details), then wait as the device is detected. Select it, click Pair, and follow any instructions to complete the pairing.

Note that you may need to repeat the process a few times to get it to work.

Boot Your Raspberry Pi Directly Into Steam Link

Want to use your Raspberry Pi 3 or later as a dedicated Steam Link? Easy!

In the Terminal window, enter

sudo nano .bash_aliases

In the blank file, input:

steamlink

Hit Ctrl + X then Y to save and exit nano, and restart the Raspberry Pi:

sudo shutdown -r now

or

sudo reboot

When the Pi restarts, it will now boot straight into the Steam Link software.

Steam library viewed on Raspberry Pi

You’re ready to play!

Troubleshooting the Raspberry Pi Steam Link

Getting the Steam Link software set up with the Raspberry Pi is straightforward. But it might not quite work right for you. Fortunately, some simple troubleshooting can fix most issues.

Unresponsive or choppy gameplay? Switch to a wired Ethernet connection instead of wireless networking.

Entered PIN but no connection? Try upgrading your graphics device drivers. If your system uses Nvidia drivers, update GeForce Experience, then try again.

Can’t connect your Bluetooth controller? Shut down any console the controller is usually paired with.

General poor performance? Check our tips to optimize your Raspberry Pi, focusing specifically on the power supply and a new microSD card.

How to Stream Steam on Raspberry Pi Using Moonlight

If for some reason the official Steam Link software doesn’t work but you still want to stream games to your Raspberry Pi, some alternatives are available.

Most notable is Moonlight, as mentioned above. This requires your PC to have a GTX 650 or higher Nvidia GPU and the GeForce Experience software. Before proceeding, you should update both Steam and GeForce Experience.

When you’re ready, install these dependencies in Raspbian Stretch:

sudo apt install libopus0 libasound2 libudev0 libavahi-client3 libcurl3 libevdev2

Next, edit the sources list:

sudo nano /etc/apt/sources.list

In the text editor, add:

deb http://archive.itimmer.nl/raspbian/moonlight stretch main

Press Ctrl + X to save (confirm with Y) then download and add the GPG key.

wget http://archive.itimmer.nl/itimmer.gpg

sudo apt-key add itimmer.gpg

Update your sources:

sudo apt update

Then install Moonlight:

sudo apt install moonlight-embedded

You can then pair the Pi with the PC. Check the PC’s IP address (ipconfig in the Windows command line, ifconfig on Linux) then enter

moonlight pair [ip address]

Look for the Nvidia GeForce Experience popup on your PC and enter the PIN number when prompted.

Ready to play a game? Enter the following:

moonlight stream [options] -app [app name]

Where [options] is something like the resolution and FPS (-1080 -30fps for example) and the [app name] the name of the game.

Note: It’s worth noting that Moonlight is likely to fall out of favor with the arrival of the Steam Link software. If it doesn’t work for you right now, updates from Valve might well resolve any issues you’re facing.

Want to stream other games from your PC to your TV? Our guide to Parsec will help you stream any game from PC to Raspberry Pi.

More Ways to Play Games on Raspberry Pi

If you’ve followed the steps and used the right hardware, you should now be able to stream PC games across your network via your Raspberry Pi.

Steam Link isn’t limited to streaming games to your TV, either. The software is available on mobile devices, enabling you to play PC games on Android.

Enjoyed playing your favorite PC games on your Raspberry Pi? It’s just the beginning. Thanks to streaming and emulation, a huge number of games can be played on the Raspberry Pi.

Read the full article: How to Stream Steam Games to Raspberry Pi Without Moonlight


from MakeUseOf https://ift.tt/2EjcuNv
via IFTTT

Wednesday, 27 February 2019

How to Write a Cover Letter

cover-letter-tips

When you submit a resume, do you always include a cover letter? In almost all cases, it is appropriate and wise. The letter allows you to introduce yourself, personalize your interest in the company, address points that do not belong on a resume and make yourself stand out.

If you need a little assistance, here’s how to write a cover letter, along with tips and templates to help get you started.

Customize Your Cover Letter

One of the first things to remember about writing a cover letter is that you should tailor it to the specific position. While using a template does help, you should always customize it for the job and company.

The template should be your starting point, not the end result with only minor tweaks.

From Glassdoor online:

“When starting to write any cover letter, it is always best to plan the content of your letter based on the requirements of the job you’re applying for.”

If you plan to use a template, you also want to choose the correct one for the letter. For example, some include salary requirements while others work better for the creative field.

Have a Solid Opening

Some sources say that if you start a cover letter by saying that you are applying for X job that you saw in X advertisement, it is a waste of text. Of course, you must state the position you are applying for.

The opening should cover why you are writing and provide a brief idea of who you are. But be sure to stand out when you say why you want the job and why you are the right fit for it.

As Time.com writes:

“To grab a recruiter’s attention, a good narrative — with a killer opening line — is everything.”

You should think through your opening carefully and show your personality, but avoid corny humor. Be clear, concise, and confident.

Know the Company

Take the time to research the company you are applying at so that you can express how your experience can help. Plus, having knowledge of the company is ideal for when you land an interview.

As Harvard Business Review puts it:

“Hiring managers are looking for people who can help them solve problems… show that you know what the company does and some of the challenges it faces.”

When you have information about the company and their needs, you can then highlight your relevant skills and achievements to show why you are the person for the job.

End With Enthusiasm

In your final paragraph, include your contact information, express your enthusiasm, and state if you plan to follow up. Monster.com offers this advice for the closing:

“If you will wait for their reply, tell them that. If you will be following up, tell them when they can expect to hear from you. Don’t drop the ball on your first promise to a potential employer, though.”

If you are including additional material with your cover letter and resume, such as a portfolio or sample of your work, be sure to mention this as well. And of course, thank your reader for their consideration

While your opening should grab their attention, your closing should also be strong and clear.

Other Tips

Here are additional tips to keep in mind when crafting your cover letter:

  • Always address the letter to a person, not Sir or Madam. If necessary, do your research for the proper contact.
  • Try to limit the letter to one page. Be succinct and get to the point.
  • Do not repeat your resume. Your cover letter should enhance it, not duplicate it.
  • Do not point out the skills that you lack. Emphasize and highlight those you have that apply to the position.
  • Check and double-check your spelling and grammar.

How Not to Write a Cover Letter

Knowing how to write a cover letter for a job is essential. But just as important is how not to write a cover letter. Here are just a handful of those things you should leave out when composing your letter.

  • Overused phrases like self-starter, detail-oriented, and team player
  • Unnecessary details such as activities you enjoy, personal history, and information unrelated to the job
  • Negative comments about current or previous employers and companies
  • Untruths about your skills, qualifications, and experience
  • Salary requirements or expectations unless specifically requested

How to Write a Cover Letter With a Template

Along with knowing how to write a cover letter that targets the job you want, is the appearance of it. This is another important part of creating your letter so that it has a clean and professional appearance.

Keep It Simple

Microsoft Office online has one of the nicest selections of cover letter templates beginning with this simple design. Just swap out the text on the template with your own.

cover letter template simple office

Add Some Color

If you want a little splash of color on your cover letter, this next one from Microsoft Office is a good choice. Remember, a small amount of color is fine as long as you do not overdo it. If you prefer another color, Office also has green and blue options.

cover letter template violet office

Include Salary Requirements

For a cover letter in response to an advertisement asking that you include salary requirements, this template from Microsoft Office is ideal. The template includes language that addresses the salary, along with employment history, but you can adjust it, of course.

Cover Letter with Salary Requirements

Be Creative

If you are applying for a position that involves design or another creative field, you may prefer a cover letter to match, especially if you believe the hiring manager expects it. This one lets you express your creativity while still maintaining a professional appearance.

cover letter template creative office

Use a Style

Maybe you are looking for a particular style of cover letter. For instance, the Dublin design is often used for those lacking experience while the Chicago design is suitable for those with management experience. Each has different formatting to accompany the highlights of the style.

For eight free downloadable templates that include Dublin, Chicago, Milano, and Harvard, check out the selection from ResumeGenuis. You can download an entire pack from each design with various color options that include helpful prompts.

cover letter template chicago resume genius

Find Your Industry

When what you really need is a template plus a sample with helpful text for that specific position, review these options on Template.net. You can download cover letter templates for jobs in nursing, education, retail, technology, business development, and other fields.

The sample text is provided to help you, but remember that you can change it easily to suit your skills and experience.

cover letter template sample

Ready, Set, Write

Now that you know how to write a cover letter, hopefully, the additional tips and templates will help you on your way to a great letter that leads to an interview. Just remember to use the cover letter to tell your story, briefly but with confidence.

And for some help creating your resume, take a look at these resume templates for Word or other resume templates for Photoshop Illustrator.

Read the full article: How to Write a Cover Letter


from MakeUseOf https://ift.tt/2XtDbrl
via IFTTT