
On macOS, Finder is the hub from which you launch all your apps, manage and share your files, and do all kinds of other operations. If you’re looking to boost your Mac productivity, mastering Finder is thus a great way to do so.
Apple has added more tricks to Finder with every macOS update, including Mojave. We’ll walk you through a slew of these Finder tips that will make you more productive than ever.
1. Set Default Finder Folder
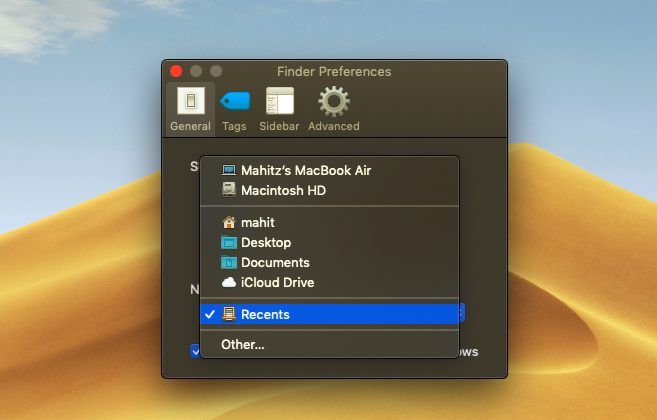
If you often work out of a particular folder, it’s frustrating that Finder opens Recents by default. You then have to navigate to another folder every time. Thankfully, you can tell Finder to open whatever folder you like:
- Click on the Finder menu at the top-left of your screen, in the menu bar.
- Select Preferences.
- On the General tab, find the New Finder windows show header.
- Use the dropdown menu to select the default folder.
2. Choose a Search Type
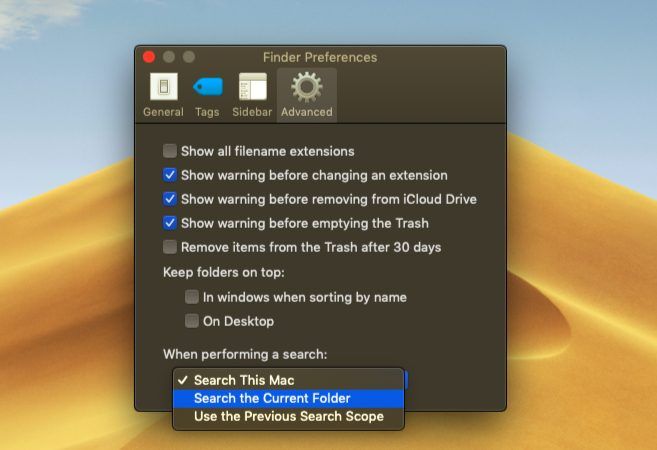
You’ve probably had to sift through multiple folders searching for a certain file at times. The default search option is helpful in some cases, but is not fine-tuned and thus inefficient to a certain extent.
If you like, you can change Finder’s default search parameters: This way the macOS will exactly know which folders to search and will cut down the efforts needed to search for a file.
- Select Finder > Preferences.
- Go to the Advanced tab.
- Click on the dropdown menu that reads When performing a search.
- Change the scope of the search:
Search This Mac will search your entire computer no matter what folder you’re in.
Search the Current Folder will only search your current directory.
Use the Previous Search Scope will remember what you did last time and use that.
3. Rename Multiple Files at Once
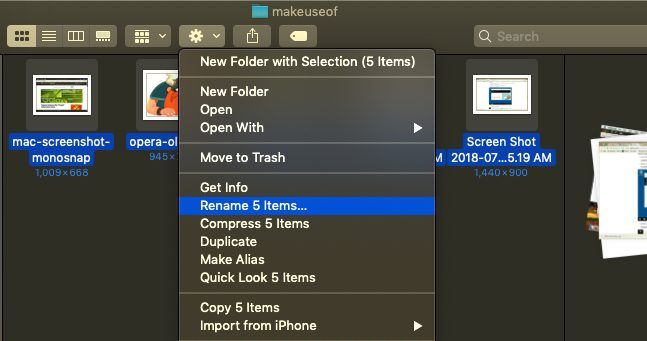
The process for renaming multiple files in Finder isn’t immediately clear, especially if you’re coming from Windows. However, it’s not too difficult when you get used to it:
- Open Finder and select the files you want to rename. You can hold Shift to select files in a row, or hold Cmd and click to select multiple files.
- Click the Action (gear) button located at the top of the window.
- Choose Rename X Items.
- Select a Name format, which allows you to choose the naming convention. The options include Name and Index, Name and Counter, and Name and Date.
- Start Number lets you choose the beginning of the number naming sequence.
4. Reverse Batch-Rename Files
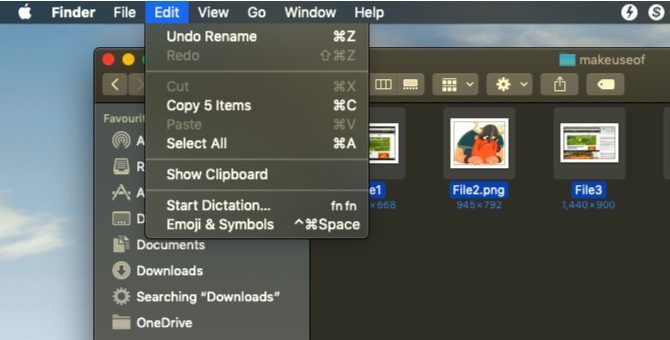
If you mess up batch-naming of files, fret not—macOS has you covered. Finder offers an option to undo the batch renaming of files:
- Open Finder and click on Edit in the app menu at the top-left corner.
- Select Undo Rename.
- Alternatively, try using the Cmd + Z keyboard shortcut to undo the operation.
5. Force-Close and Relaunch Finder
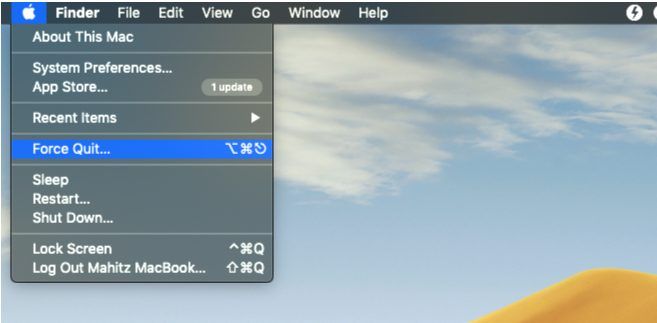
The best way to handle a sluggish Finder is to force close and relaunch it. This method is also useful when you make changes to Finder’s configuration, or if macOS displays a Finder Quit Unexpectedly message.
- Switch to the Finder window.
- At the top-left, click the Apple logo while holding the Shift key.
- Select Force Quit Finder and choose Finder. Finder will close.
- Shortly after, the Finder window will reappear automatically.
6. Gallery View
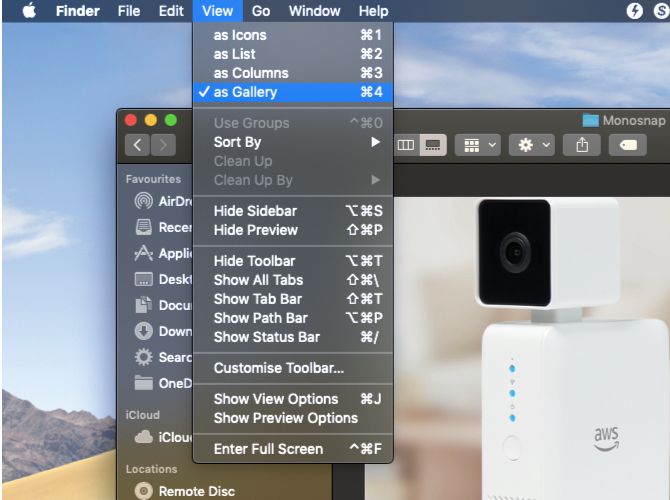
Gallery view is one of the Finder improvements that debuted with macOS Mojave. This new feature is aimed at helping you view files in a more useful way; it also lets you take a look photo metadata. It’s just one of the several Finder view options.
Gallery view is more or less a sorting option that displays your files in the form of a slider. In order to enable the Gallery view, follow the steps detailed below.
- Open Finder and browse to the desired folder.
- Click on the View menu at the top-left corner.
- Select as Gallery.
7. Utilize the Sidebar
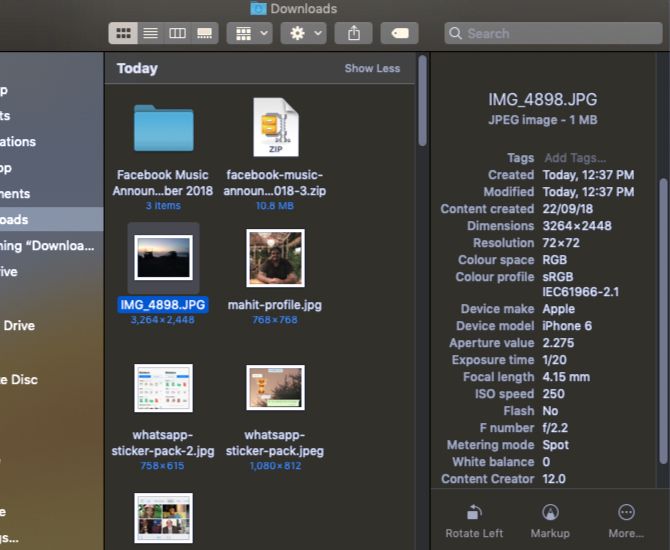
The sidebar is another useful element that displays image metadata without using third-party apps. Make sure you’ve switched to Gallery view as mentioned above. Once that’s done, the metadata will automatically display on the sidebar.
You can show the sidebar in other views by selecting View > Show Preview, or using the Shift + Cmd + P shortcut.
You’ll see that the sidebar displays all image-related information. This includes location, dimensions, resolution, camera device, Focal length, and more. It also lets you add Finder tags.
8. Quick Actions
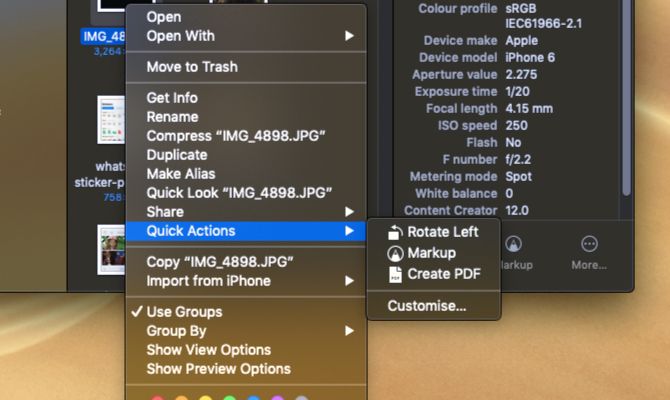
Quick Actions works in tandem with the Finder sidebar; its menu allows you to make snappy edits to your files.
Even neater, Quick Actions can handle multiple file types and the contextual menu will change accordingly. For instance, Quick Look offers a rotate tool, markup tool, and a PDF creation option for an image. To use it:
- Open Finder in Gallery view, or show the sidebar using Shift + Cmd + P.
- Right-click a file and select Quick Actions, or find the actions at the bottom of the sidebar.
- Select Customization and choose an option, or customize the contextual menu to your taste.
9. Quick Look
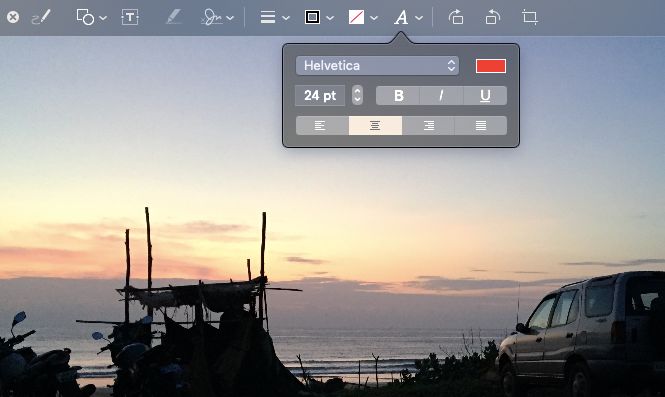
Previewing files is one area where I thought that Windows’ file explorer had macOS beat. However, the Quick Look feature (a macOS fundamental) proved that I had underestimated Finder.
This feature will let you make minor changes and quick edits without having to open the file directly. The next time you want to insert a signature, trim an audio clip, or resize an image, Quick Look will come in handy. Just press Space with any file selected to open it in Quick Look.
When Quick Look pops up for an image, you’ll see options to add text, doodle, crop, and more. Plus, Quick Look offers a customized menu for different file types. So you’ll see shortcuts designed for whatever file you’ve opened.
Now Finder Is Better Than Ever
In the past, Finder has taken flak for being inefficient and unintuitive. However, it’s changed for the better recently, thanks to macOS Mojave bringing useful features that help you better manage your content.
Furthermore, features like Quick Actions help reduce your dependency on third-party apps. Mastering these new Finder features and sticking with old favorites will help you get work done more efficiently than ever. And if Finder doesn’t work for you, check out the best Finder alternatives.
Read the full article: 9 Top Tips for Using Finder on Your Mac More Efficiently
from MakeUseOf https://ift.tt/2yUwzri
via IFTTT
No comments:
Post a Comment