Windows 10 updates are a contentious issue. Some users love the automation; others detest the overbearing approach. Whatever your take, there is always a potential for an error. Namely, Windows 10 error code 80072EE2.
Windows 10 errors are always frustrating, that’s for sure. But they don’t have to keep your system offline for long. Check out the following six fixes for a Windows 10 80072EE2 error.
What Is a Windows 10 80072EE2 Error?
The Windows 10 80072EE2 error means “ERROR_INTERNET_TIMEOUT” and usually accompanies an issue with Windows Update. Within Windows Update, you might see an error message along the lines of “Windows Update encountered an unknown error,” or “Windows could not search for new updates.”
There are a few different quick fixes you can try to eradicate the 80072EE2 internet timeout error.
1. Restart Your System
First thing: restart your system. If you haven’t rebooted in a while, a quick restart can sometimes fix the 80072EE2 error. Reboots fix all sorts of Windows issues and is always a basic troubleshooting step.
2. Run Windows 10 Update Troubleshooter
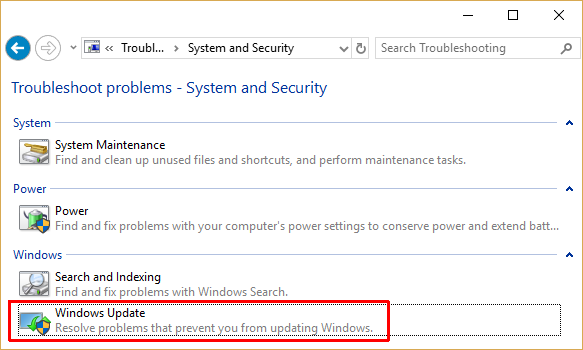
Windows 10 has loads of integrated troubleshooters. There’s one for Windows Update; you just need to know where to find it.
Head to Control Panel > Troubleshooting > System and Security. Then, select Windows Update from the list.

When the troubleshooting panel appears, select Next. If there are any fixes available, hit Apply this fix. Otherwise, move to the next section.
3. Manually Edit Windows Update Registry Entry
The Windows Registry is a database of system setting. Most of the time, you should steer clear of registry items because you can make unintended catastrophic changes. However, at times, it is the easiest way to fix certain problems. Making random changes to the registry is never a good idea, but specific guided changes can make the difference.
Before continuing, check out how to back up your Windows Registry. It is worth doing, just in case.
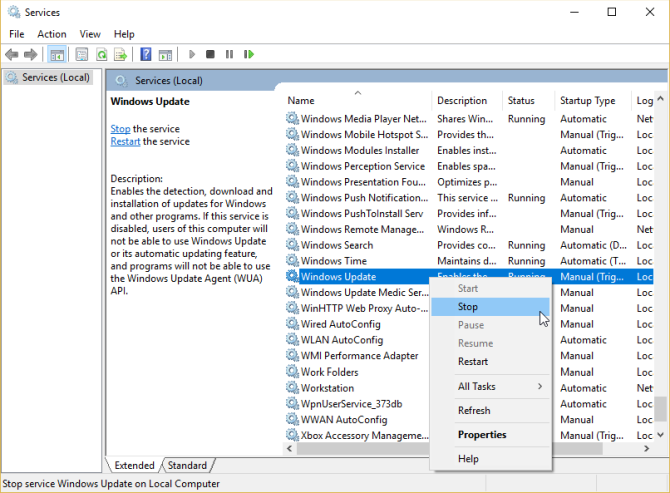
Windows Services
Hit Windows Key + R to open the Run dialog. Type services.msc and select OK. Scroll down to Windows Update, right-click, and select Stop.

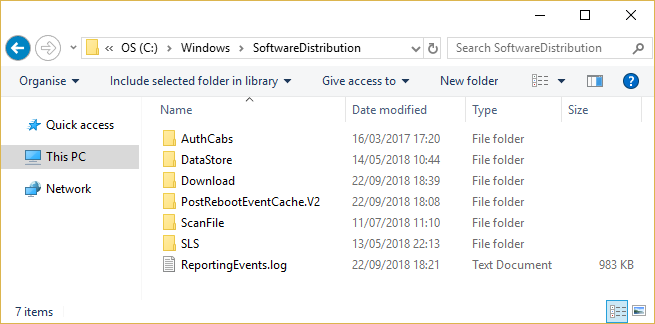
Next up, open Windows Explorer, then copy and paste C:\Windows\SoftwareDistribution into the address bar:

Delete all the contents of this folder.
Head back to the Services panel and restart the Windows Update service. (Find the service, right-click, and select Start.)
Windows Registry
Now, hit Windows Key + R, type regedit, and press OK. When the Registry Editor opens, press CTRL + F, then search for HKEY_LOCAL_MACHINE\SOFTWARE\Policies\Microsoft\Windows\WindowsUpdate. If it doesn’t find the registry entry, try and locate it manually. Sometimes the Registry Editor search loses its way, but the entry is there.
In the right-hand panel, check for the WUServer and WUStatusServer registry keys. If they are there, delete them.
Head back to Windows Services and check that Windows Update is running. If not, start the service manually.
4. Run SFC
If your Windows Update is still throwing up an 80072EE2 error code, you need to move onto other fixes. System File Check is another Windows system tool that checks for missing and corrupt Windows system files. Sounds like CHKDSK, right? Well, SFC checks for Windows system files specifically, while CHKDSK scans your entire drive for errors.
But before running the SFC command, it is best to double-check that it is completely functional.
DISM stands for Deployment Image Servicing and Management. DISM is an integrated Windows utility with a vast range of functions. In this case, the DISM Restorehealth command ensures that our next fix will work properly. Work through the following steps.
- Type Command Prompt (Admin) in the Start menu search bar, then right-click and select Run as administrator to open an elevated Command Prompt.
- Type the following command and press Enter: DISM /online /cleanup-image /restorehealth
- Wait for the command to complete. The process can take up to 20 minutes depending on your system health. The process seems stuck at certain times, but wait for it to complete.
- When the process completes, type sfc /scannow and press Enter.
5. Run CHKDSK
Next up, try running Windows Check Disk from the Command Prompt. CHKDSK is a Windows system tool that verifies the file system and with certain settings, fixes issues as it runs.
Type command prompt in your Start menu search bar, then right-click the best match and select Run as administrator. (Alternatively, press Windows key + X, then select Command Prompt (Admin) from the menu.)
Next, type chkdsk /r and press Enter. The command will scan your system for errors and fix any issues along the way.
6. The Final Straw: Reset Windows 10
If nothing else works, you can use Windows 10’s Reset function to refresh your system files. Windows 10 Reset replaces your system files with a completely fresh set of files and theoretically clears lingering issues relating to your SYSTEM_SERVICE_EXCEPTION error while keeping the majority of your important files intact.
Head to Settings > Update and Security > Recovery, then under Reset this PC select Get started. Your system restarts as soon as you hit the button, so make sure you to back up any important files beforehand. Your system will restart, then you may select Keep my files or Remove everything.
Windows 10 Error 80072EE2 Fixed
One of these fixes will resolve Windows Update 80072EE2 error code. Windows Update error codes are among the most frustrating because Microsoft has grabbed control over updates. You cannot always choose when they land and if Windows Update fails, it leaves you with some extra work to take of before it works.
Another handy bluescreen error code tool is Nirsoft’s BlueScreenView. It helps you better understand the error codes so you can isolate issues much faster!
Read the full article: How to Fix Windows Update Error 80072EE2
from MakeUseOf https://ift.tt/2RjxAkr
via IFTTT
No comments:
Post a Comment