Chromebooks have deservedly earned a reputation for being easy-to-use, even for people who aren’t technologically savvy. Chromebooks aren’t just perfect for students, they’re also solid options for seniors.
But just because the operating system is straightforward, it doesn’t mean there aren’t some parts of it that require further explanation. Without further ado, here’s an ultimate how-to guide for your Chromebook.
How to Take a Screenshot on a Chromebook
Chromebooks offer two ways to take screenshots natively. You can either capture the full screen or a part of a screen.
To capture the entire screen on your Chromebook, hold down Control and press the Switch Window key. It’s on the top row of your keyboard in what would be the F5 position on a non-Chromebook device.
Note: If you own a Chromebook with a 360-degree hinge, you can also press Power + Volume Down, just like an Android device.
To capture part of your screen, press Control + Shift + Switch Window. The mouse cursor will change into a crosshair. Just click and drag the crosshair over the part of the screen you want to save.
If your screengrab was successful, you will see a notification pop up in the lower right-hand corner.
You can find all your screenshots in the Download folder. They are not automatically saved into Google Drive.
How to Right-Click on a Chromebook
As with screenshots, there are two ways to perform the right-click action on your Chromebook.
The most common method is to use the trackpad. Move the mouse to whatever item you want to right-click on, then tap the trackpad with two fingers at the same time.
The lesser-known method uses the keyboard. Press and hold the Alt key then tap one finger on the trackpad instead of two.
Of course, technically, there’s a third way—use a USB mouse!
How to Rotate the Screen on a Chromebook
Depending on the model of Chromebook you own, there might be times when it’s more practical to use your machine in portrait rather than landscape view.
It’s also a useful trick to know in case you ever need to flip your screen 180-degrees, for example, if you are trying to show something to someone sat on the opposite side of the table.

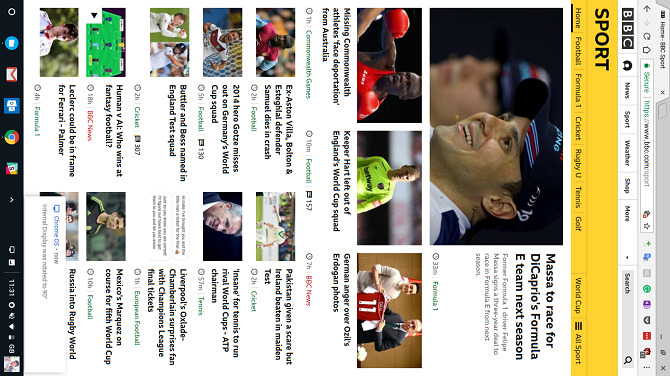
Rotating the screen is easy. You can move through four 90-degree turns by pressing Control + Shift + Refresh.
You can only rotate in a clockwise motion.
How to Copy and Paste on a Chromebook
We won’t dwell on this one for too long. Most users will already know how to copy and paste, but it still perplexes new Chromebook users who expect the process to be widely different to what they are used to.
In practice, the process is exactly the same as the method you’d use on Windows. Use Control + C to copy, Control + V to paste, and Control + X to cut. You can also use the right-click context menu.
How to Print on a Chromebook
Printing has always been the Chromebook’s Achilles heel. It’s never been a straightforward process.
Before beginning, you need to know if your printer is “Cloud Ready.” Check Google’s list of compatible printers if you’re not sure.
If it is Cloud Ready, follow the instructions below:
- Open Chrome and type chrome://devices in the address bar.
- Locate your printer in the New Device section of the page.
- Click on Register.
If it’s not Cloud Ready but has Wi-Fi capabilities, follow these instructions instead:
- Open Chrome on a Windows or Mac operating system.
- Type chrome://devices in the address bar.
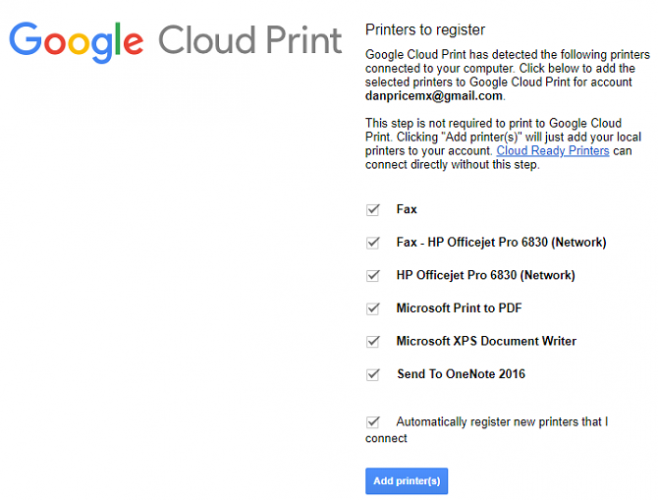
- Click Add Printer in the Classic Printers section of the page.
- Mark the checkbox next to the printer you want to add.
- Select Add Printer.

After completing either of the above processes, you can go to your Cloud Print portal to ensure setup was successful.
Lastly, if you want to add a local printer without using the Cloud Print app, use these guidelines:
- Open the Chromebook’s Settings menu (accessible through the system tray).
- Scroll down and click on Advanced.
- Go to Printers > Add Printer.
- Give the printer a name and enter its IP address.
- Click on Add.
Note: You cannot add a non-Wi-Fi-enabled printer to your Chromebook.
How to Zoom Out on a Chromebook
Chromebooks offer two ways to zoom in and out. It depends whether you want to increase the size of a single page/app, or of your whole screen.
To zoom in and out on a single app, press Control + Plus or Control + Minus accordingly. You can reset your screen’s zoom by pressing Control + 0.
If you’d rather change the zoom level across the entire operating system, press Control + Shift + Plus or Control + Shift + Minus. This shortcut will also change the size of your app dock, thus letting you fit more apps on it if you’re running out of space.
How to Change a Chromebook’s Owner
If you’re planning to sell your Chromebook, or even just give it to another family member, you will need to change the device’s owner.
The only safe and secure way to accomplish this is to do a factory reset AKA Powerwash. Performing a Powerwash will delete all data from the computer, including the users and any data in the download folder. Therefore, ensure you make a backup before proceeding.
To Powerwash your machine, open the Chromebook’s Settings menu and navigate to Advanced > Powerwash > Powerwash.
When it becomes available, click on the Restart button. You will be taken through the device setup screens. The Google Account you enter when prompted will automatically become the Chromebook owner.
How to Invert Colors on a Chromebook
Like almost all operating systems, Chromebooks come with a broad range of accessibility tools. One of them allows you to invert the colors on your screen. In Chromebook-speak, the feature is called “High Contrast Mode,” but the end product is the same.

There are two ways to invert the colors. The simplest method is to use the keyboard shortcut; press Search + Shift + H. However, this shortcut will only work if the Search key is still mapped to the search function; if you’ve assigned it to caps lock, it won’t work.
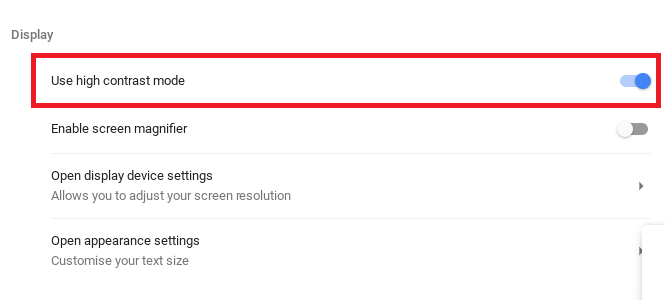
The alternative approach requires you to dive into the Settings menu. Open the menu and go to Advanced > Manage Accessibility Features. In the display section, slide the toggle next to Use high contrast mode into the On position.
How to Connect to Wi-Fi on a Chromebook
How you connect to Wi-Fi depends on the type of network you want to connect to. Firstly, make sure Wi-Fi is turned on. Click on your profile photo and select No network. Make sure the toggle at the top of the popup window is in the On position.

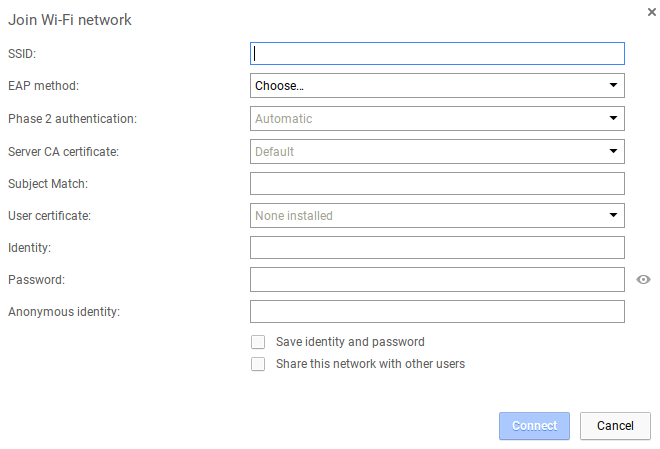
To connect to a visible network that’s within range, click on the network’s name and enter the password if needed. Meanwhile, to connect to a hidden, unlisted network, repeat the above steps but instead choose Join other network. Enter the network information and hit Connect.
What Else Do You Need to Know About Chromebooks?
The nine queries we’ve covered in this article are some of the web’s most searched Chromebook questions.
However, it’s not an exhaustive guide, so if you still have questions, feel free to reach out in the comments below.
Alternatively, you can keep reading more Chromebook content elsewhere on the site. We’ve covered everything from the most useful Chromebook shortcuts to fixing common Chromebook errors.
from MakeUseOf https://ift.tt/2IxzfSN
via IFTTT
No comments:
Post a Comment