Wednesday, 1 May 2019

Portal Cord is a Charger Cable With a Power Bank Hiding Inside

Power banks are an incredible invention. They make it so we can keep our devices running for substantially longer than their built-in batteries.

They’re not without flaws, though. Part of the reason a device like a smartphone is so useful is that it’s easy to carry around. It fits right into your pocket. Most power banks, however, aren’t so portable.

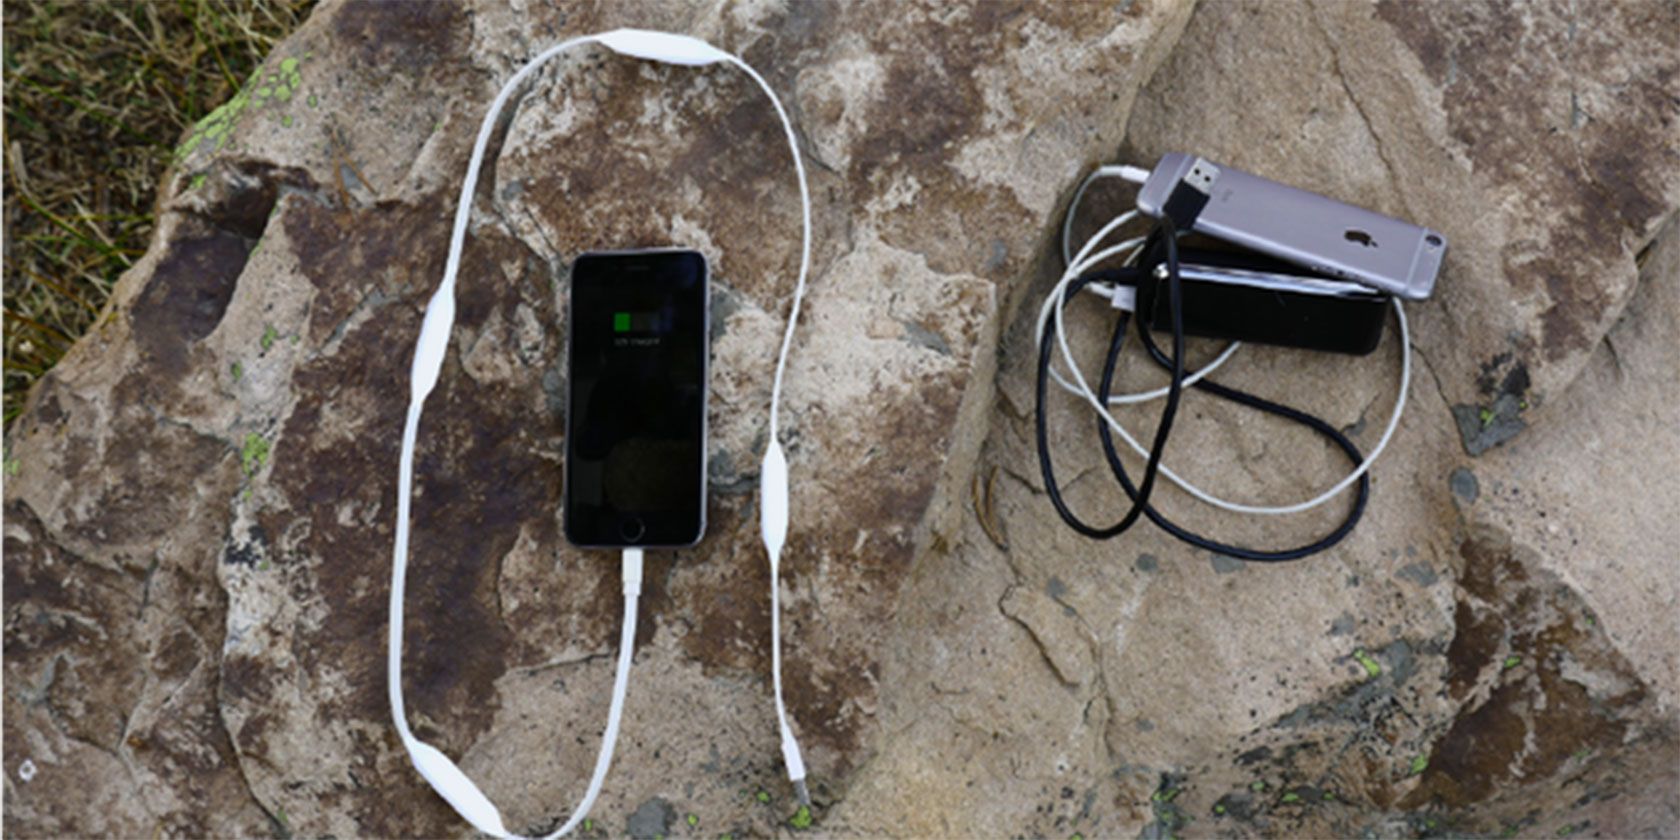
Portal Cord is setting out to solve that problem by tucking the power bank right inside of the cord.

Portal Cord Features

The way the Portal Cord is able to contain the power within the cord is by having multiple batteries lining the length of the device. While a traditional power bank features one large battery, this one uses a bunch of smaller ones.

Obviously, even by having multiple batteries along the cable, there’s just no way to fit a huge amount of juice. As such, the Portal Cord features 1,800 mAh of charging power. To put that into perspective, an iPhone XS Max features a 3,174 mAh battery, while a Pixel 3 features a 2900 mAh battery. Basically, you won’t get a full charge for your devices out of this power bank, but thanks to Quick Charge technology, you’ll get a decent amount of juice rather quickly.

The Portal Cord is available in USB-C, Lightning, and micro USB, so it’ll work with a wide range of devices including newer iPhones and most Android devices.

For length, the Portal Cord measures three feet, which is pretty standard for power cables. Not going with an incredibly long cable allows the device to remain portable. The cable and attached batteries are pretty light, coming with a weight of only 4.24 ounces.

Portal Cord Availability

Portal Power is seeking funding for Portal Cord on Kickstarter right now. The project is tracking to meet is $20,000 funding goal with around $15K as of this writing. Backers who would like to order a device can do so for $55 while the early special lasts. After that, the price goes up by $10. The company plans to ship the power banks to backers in October 2019.

Make sure you understand the risks of backing a crowdfunding project before you jump in though. Read our guide featuring things you need to know before backing a Kickstarter.

Read the full article: Portal Cord is a Charger Cable With a Power Bank Hiding Inside


from MakeUseOf http://bit.ly/2V7ixzV
via IFTTT

Facebook Is Getting a New Redesign for 2019

Facebook is currently hosting F8, its annual conference for developers. The first day of F8 was filled with announcements covering Facebook, Messenger, Instagram, WhatsApp, and Oculus. And the headline has to be Facebook’s new redesign for 2019.

Facebook Changes Things Up for 2019

Facebook has redesigned the Facebook website and app. Visually, Facebook is being bleached, with the blue almost all gone, and a simpler, cleaner, and very white palette used instead. This makeover makes Facebook look more like Instagram.

Content-wise, the new Facebook is being built around two core components: Groups and Events. Groups is at the heart of the new Facebook, and represents Facebook trying to move away from the News Feed and make Facebook more about communities.

Facebook Wants You to Join New Groups

On the Facebook Newsroom, Facebook explains that while people use “Facebook to connect with friends and family […] it’s also a place to connect with people who share your interests and passions.” Which is why it’s putting Groups first.

There’s also a privacy element involved. While many people make their Facebook posts viewable to all and sundry, groups are more private. And with Mark Zuckerberg claiming Facebook is becoming a “more privacy-focused social platform” this is a crucial move.

facebook redesign 2019

Facebook is launching a redesigned Groups tab to help you find new groups. It will also plant group recommendations across other parts of the app. And introduce new features for specific types of group such as Job groups and Health Support groups.

Events is getting a new tab too. This will let you “see what’s happening around you, get recommendations, discover local businesses, and coordinate with friends to make plans to get together.” Which Facebook sees as another way of fostering communities.

Facebook Wants You to Meet New Friends

Facebook is also testing a new feature called Meet New Friends. This will “help people start friendships with new people from their shared communities like a school, workplace or city.” Meet New Friends is opt-in only and still a work in progress.

Facebook is rolling out the redesigned app for Android and iOS right now. The new desktop site will follow “in the next few months”. Which gives you time to check out the top social media apps you could (and probably should) be using instead of Facebook.

Image Credit: Marco Verch/Flickr

Read the full article: Facebook Is Getting a New Redesign for 2019


from MakeUseOf http://bit.ly/2GMAZE4
via IFTTT

Valve Index Price, Release Date, and Preorder Information Revealed

Anyone eagerly anticipating the final details of Valve’s Index virtual reality headset can relax, as the company has revealed all of the details, including how much it’ll cost, when it’ll ship, and when you can throw down your hard-earned cash on a preorder.

Valve Index Details and Specs

We’ve seen quite a few companies moving in the direction of computer-free virtual reality, including HTC with the Vive Focus Plus. This isn’t one of those, as Valve is pushing the limits with a very high-end headset that’ll keep hardcore virtual reality fans quite happy.

The screens on the new Index are 1440×1600 RGB LCDs, which Valve says allows for sharper visuals than OLEDs with the same amount of rendering power. The screens are also faster than others on the VR market, coming with a 120Hz refresh rate with full back-compatibility to 90Hz. There’s also an experimental 144Hz mode. According to Valve, “higher framerates improve realism and optical comfort, allowing longer and more comfortable play sessions,” which sounds like exactly what VR fans are looking for.

Another key aspect of the Index is the low persistence of 0.330ms to 0.530ms. This allows images to remain sharp when you move your head around, which is key to creating an immersive VR experience.

The headset will also feature off-ear sound built-in, which makes it easy to hear the VR experiences with as much comfort as possible.

Outside of the headset, there’s a full VR kit which includes new controllers and base stations. Thankfully, the Valve Index Base stations are compatible with 2.0 tracking-capable hardware, which is the same that comes with the Vive Pro, so buyers will be able to keep the base stations they already have.

Speaking of those controllers, Valve says they were “designed from the ground up to enable natural interactions, high-fidelity hand presence, and long-term comfort.” They promise natural, direct inputs that’ll help keep immersion during gameplay. There’s a total of 87 sensors in each controller that’ll track everything including hand position, finger position, motion, and pressure. Valve specifically called out the amount of time it spent developing controllers that allow natural and accurate open-handed throwing, which these will.

Valve Index Preorder, Release Date, and Price

Obviously, the key information about the Valve Index is the cost. For the full kit, which includes the headset, controllers, and base stations, the price is $999. The headset and controllers together sell for $749. On their own, the headset is $499, the controllers are $279, and the base stations are $149.

Obviously, those prices don’t include the computer required to run virtual reality experiences. Valve suggests at least 8GB RAM, an NVIDIA GeForce GTX 970+ or AMD RX480+ GPU, a dual-core processor with hyperthreading, and USB 3.0.

Preorders on all of the parts of the Valve Index open tomorrow, May 1. Valve says the hardware will ship by June 28, 2019, so anyone who drops the money on a preorder won’t have to wait too long to get their hands (and eyes) on a kit.

Once you snag one of these, make sure to check out some of our favorite virtual reality experiences to play on it.

Read the full article: Valve Index Price, Release Date, and Preorder Information Revealed


from MakeUseOf http://bit.ly/2V4nGZv
via IFTTT

Tuesday, 30 April 2019

What Is Airplane Mode and What Does It Do?

How to Replace a Damaged Phone Screen Display

As mobile phone displays are much tougher than they used to be, it seems like they’re indestructible. Sadly, they’re not. Dropping your phone can often break the display. Your phone can no longer be considered useful.

Want to replace a damaged smartphone display? It’s a relatively cheap and straightforward process. Here’s how to do it.

The Costs of Replacing Your Phone Screen

Replace a cracked phone display

Cracked your mobile phone display? Dropped it in the street, or crushed it playing football? Sat on it, even? You know by now that you’ve given yourself a headache. Can the phone be repaired, and if so, what are the costs?

Many services available online and locally will repair your mobile phone, for a price. But if you have access to the parts and they’re inexpensive, why not perform the procedure yourself?

You should also consider the non-monetary costs: time spent without a phone, data that needs archiving from the device. Hopefully your mobile platform’s cloud service can help here, or perhaps a desktop utility can check the phone’s contents.

Fitting a new display that costs the same as a replacement phone is pointless. However, if replacing the mobile phone screen is closer to $15, it makes sense to have a go yourself.

Where to Find a Replacement Phone Screen

Replacement smartphone display and tools

The most obvious location for a replacement display is eBay. Simply searching for the mobile phone model and the word display will turn up the required parts. Just remember to shop safely when using eBay.

In my case, “nexus 5 display” returned a wealth of accurate (and, sadly, slightly inaccurate) results. Take the time to check that the component you choose is genuinely for your device. Often, components may appear in the results thanks to a poorly written listing.

Amazon is also a resource for replacement screens, but you should also consider a general Google search as this will turn up specialist suppliers who might be able to provide a lower price.

Note that you may find listings that offer just the display, versus listings with half the phone’s chassis. Which one you buy depends on how complicated you want things to get. For example, just the display means melting the adhesive using a heatgun or hairdryer.

Alternatively, a replacement display kit that includes half the phone’s body will require components being transferred from the old body into the replacement.

The Tools for Replacing Your Phone Screen

Often, replacement displays ship with the tools included. Typically, you’ll receive:

  • Mini screwdrivers
  • Mini Torx drivers
  • Plastic tweezers
  • Plastic wedges
  • A guitar pick/plectrum

You should also have:

  • Curved tweezers
  • Precision knife or craft scalpel
  • Hairdryer or heat gun

These tools are included to remove the case and unscrew any components that obstruct replacing the display. For example, a mobile phone will have Torx screws under the battery cover that will need removing before you gently prize the case apart.

Note that spending money on these tools isn’t totally necessary. Sanding off the ends of a couple of plastic bicycle wheel levers will produce usable alternatives—otherwise, they can be sourced relatively cheaply.

The Basics of Replacing a Phone Screen

There are so many different mobile phone models on the market (either new or used) that providing a standardized guide is next to impossible. Additionally, some models cannot be repaired without sending them back to the manufacturer.

Head to YouTube to check how your particular phone’s display can be replaced. You’ll find many detailed device-specific guides on the procedure.

Most smartphones are essentially made up of several layers of components. Each layer must be carefully detached for the glass display to be replaced.

These guides typically follow this procedure for replacing your smartphone display:

  1. Open the phone
  2. Remove the display
  3. Replace the adhesive
  4. Fit the new display
  5. Ensure correct cable connection

Read on to learn how to fit a replacement smartphone display.

Step 1: Open the Phone

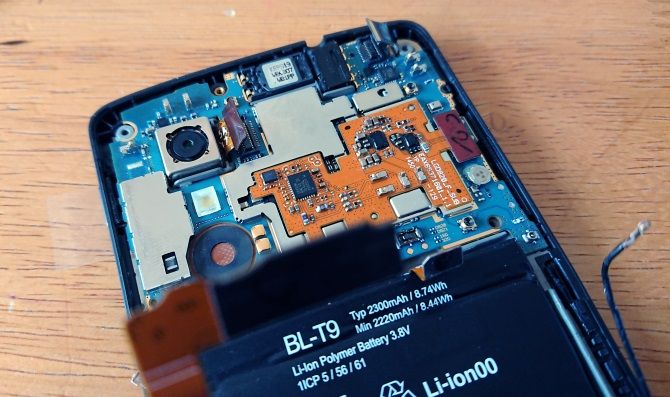
To begin, remove (where possible) the rear cover, battery and identify where the Torx (or standard) screws might be hidden. Look under labels and beside USB ports. You might find screws in the battery cavity if you have a device with a removable cell.

Prize the phone apart using the levers and plectrum; additional screws will need removing, too.

Use the provided tools to open your phone

Watch out for ribbon cables, which require careful unlatching from their connectors. Use a flat plastic blade or plectrum for this.

Use the provided tools to open your phone

These are often threaded through the different layers of hardware within the phone. Ribbon cables are delicate; easily broken, take care as damage to these could change the dynamic of the repair considerably.

Step 2: Remove the Screen

By now you should have the front of the phone in your hand, empty, with the glass display ready to remove. Soften the adhesive with the heat gun.

Alternatively, you can leave the phone in a warm place (such as on a radiator) for a while.

Persuading your phone’s display to part with the body isn’t usually difficult. Pushing through the camera hole against the glass to begin with, slowly prize the glass display away from the body.

As noted, some replacements are basically half a phone.

In this case, you won’t need to remove the display, but you will need to remove components (and even the motherboard) from the damaged device into the new body.

Step 3: Replace the Adhesive

Narrow rolls of replacement adhesive can be bought online. Have some double-sided sticky tape laying around? Cut this into narrow 1 mm slivers, then apply the adhesive to the phone’s frame, rather than the glass.

Step 4: Install the New Screen

Once the adhesive is in place remove the protective strips on the adhesive and push the glass into place.

Apply light pressure where the display meets the adhesive. Take care not to put pressure on the middle of the glass display. Excessive force can break even the strongest Gorilla glass.

Step 5: Ensure Correct Cable Connections

It’s now time to put the phone back together.

Reconnect the relevant cables, locking them down where necessary. Place the components back in the case with care, checking that there are no cables or screws left over. Test the phone to check that it works.

Reconnect the cables to the phone during reassembly

You should be able to switch the phone on without securing the final screws in order to check functionality.

Planning to use a video guide? Review it before you start to familiarize yourself with the steps.

Does the New Phone Screen Work?

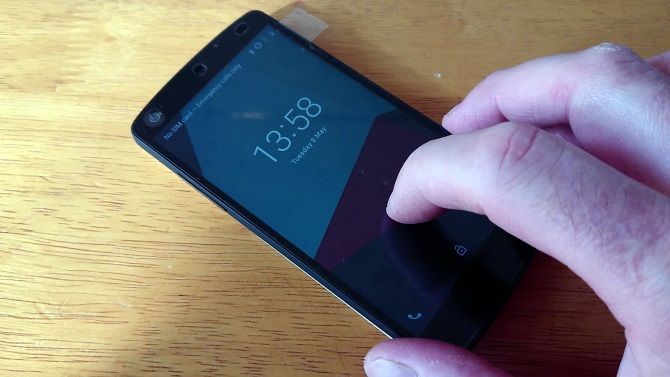
A repaired smartphone display

The moment of truth: does the new screen work? Remember, a touchscreen display has two purposes: touch interaction, and displaying the phone’s operating system.

A successful replacement will give your phone a fresh “almost new” look, and if the touchscreen works, well done.

However, it isn’t always plain sailing. I’ve fitted a replacement display that caused the phone to overheat. Therefore, it is important to buy components from reputable sellers, and ensure you’re buying the right parts for your phone.

DIY Smartphone Repair, Success!

Confident? Replacing a mobile phone screen isn’t simple, but it is something that you should certainly consider if the price is right.

While there are no hard-and-fast rules—devices differ from manufacturer to manufacturer—the steps provided should illustrate what is entailed.

Most importantly, don’t walk into performing such a repair without some device-specific research first. Video guides are particularly useful; once you’re ready, get hold of the right tools and surprise yourself!

Here’s another tech problem you can solve yourself with a bit of time and effort: phone display flickering.

Read the full article: How to Replace a Damaged Phone Screen Display


from MakeUseOf http://bit.ly/2XSgHQg
via IFTTT